Microsoft just released a new Windows Insider version featuring a plethora of new features, including app folders in the Start menu, new touch gestures, and more. One useful element that went unnoticed among the newly added features is live captions. That’s right, you read that correctly. Live captions, a popular feature on Android smartphones, are now accessible in Windows 11.
The feature is available offline only on Windows 11 Insider build 22557, and speech data is handled locally on your computer without the use of the cloud. The feature is expected to make its way to the stable version sometime in the future. With that in mind, here’s how to utilize and set up live captioning on Windows 11.
What are Live Captions in Windows 11?
“Live captions will help everyone, including people who are deaf or hard of hearing, understand audio better by viewing captions of spoken content,” said Microsoft in a post.
Live Captions is an accessibility feature that translates audio you play on your PC to text. Without an active internet connection, the capability operates, and audio data processing is done on your Windows 11 PC. The live captioning feature is now only accessible in English (United States), but more languages are planned to be added soon.
How To Enable Live Captions For Windows 11
Step 1: Switch to the “Accessibility” tab from the left sidebar of the Settings app. Select “Captions” from the “Hearing” column.

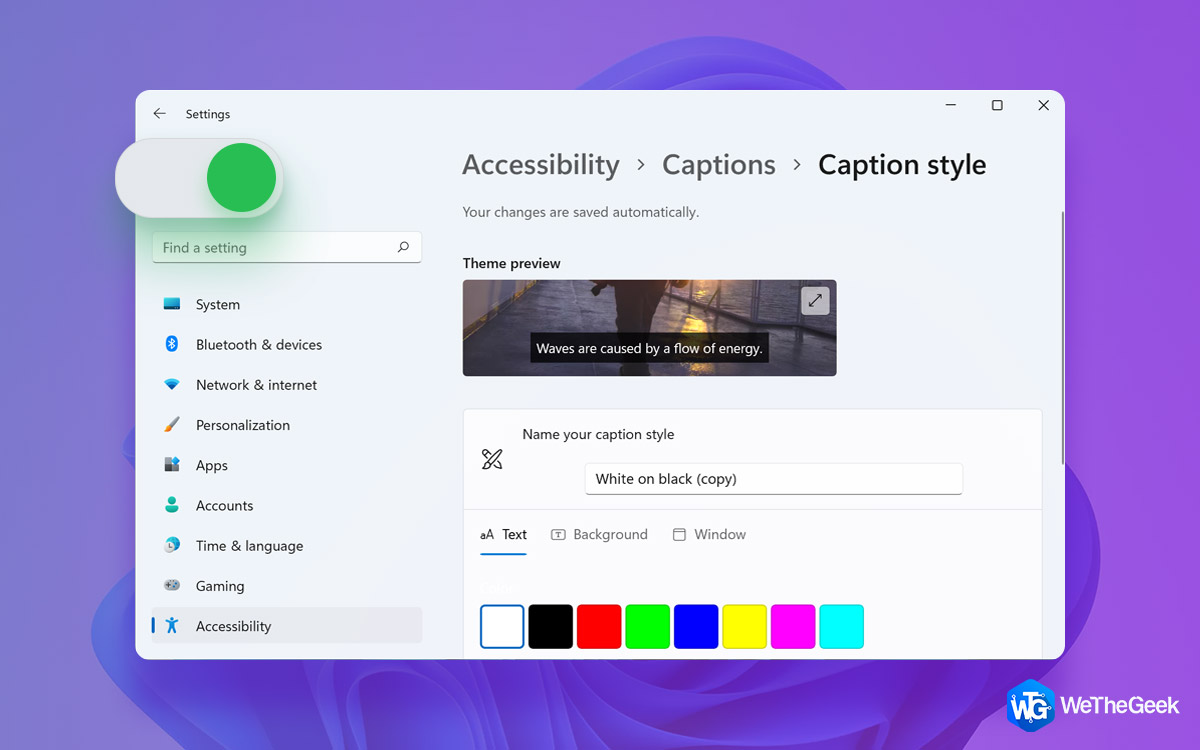
Step 2: To obtain live captions on your PC, turn on the new “Live captions” toggle. You can also use the Win+Ctrl+L keyboard shortcut in Windows 11 to enable live captions.

Step 3: To acknowledge the local processing of your speech data, click “I agree” from the pop-up at the top of the screen. Your data isn’t shared with the cloud, according to Microsoft.

Steps On How To Customize Windows 11’s Live Captions?
You can now adjust a few parts of the interface, like caption box position, profanity filtering, microphone audio, and caption style, after you’ve set up live captions. Here’s how you can change them:
Step 1: Select “Position” from the Settings icon in the top-right corner of the captions box. You can now select to have the captions box appear at the top, bottom, or wherever on the screen.
Step 2: You may also filter profanity and incorporate the audio from your microphone in the captions. To adjust these settings, click the Settings icon again and select “Caption choices.”
Following that, we can adjust the caption style. White on black, small caps, large letters, and yellow on blue are among the alternatives. The text, background, and captions window can all be customized in terms of color and opacity. In the theme preview window, you can see how the caption style would look.
How To Add a Shortcut to Quick Settings for Live Captions On Windows 11?
After you’ve set up live captions, you can use Windows Quick Settings tiles to enable or disable the feature. Here’s how to use Quick Settings to get live captions:
Step 1: To use Live Captions, you’ll need to use the “Accessibility” Quick Settings tile by pressing Windows key + A. Click the pencil icon to add it to the Quick Settings tray if it isn’t already there.
![]()
Step 2: To get a list of available tiles, click “Add.”

Step 3: From the list of possible tiles, select “Accessibility.” You can even choose to add more tiles if you find them beneficial while you’re at it.

Step 4: After you’ve chosen your tiles, click “Done” to save your modifications.

Step 5: Now, select the Accessibility tile you just created.

Step 6: To activate the function, enable the “Live captions” toggle from the list of options that appears. Later, you can deactivate live captioning using the same techniques.

The Final Word On What Are Live Captions And How To Enable Them On Windows 11?
On Windows 11, the live captions function works surprisingly nicely. Except for the occasional hiccups that most speech-to-text systems experience, the feature appears to be dependable enough to use daily.
Follow us on social media – Facebook, Instagram, and YouTube. For any queries or suggestions, please let us know in the comments section below. We would love to get back to you with a solution. We regularly post tips and tricks, along with answers to common issues related to technology.