Since the human brain processes video 60,000 times faster than the text, videos are becoming popular, and are changing the way we communicate. With that said, to share knowledge and to become popular, people are creating vlogs and videos. But in doing so, they miss out on the most essential part, that is video editing.
So, if you don’t want to lose an audience and are looking for a way to edit videos for Free, we’ve put together this guide to help with that.
How to edit videos on Windows for Free
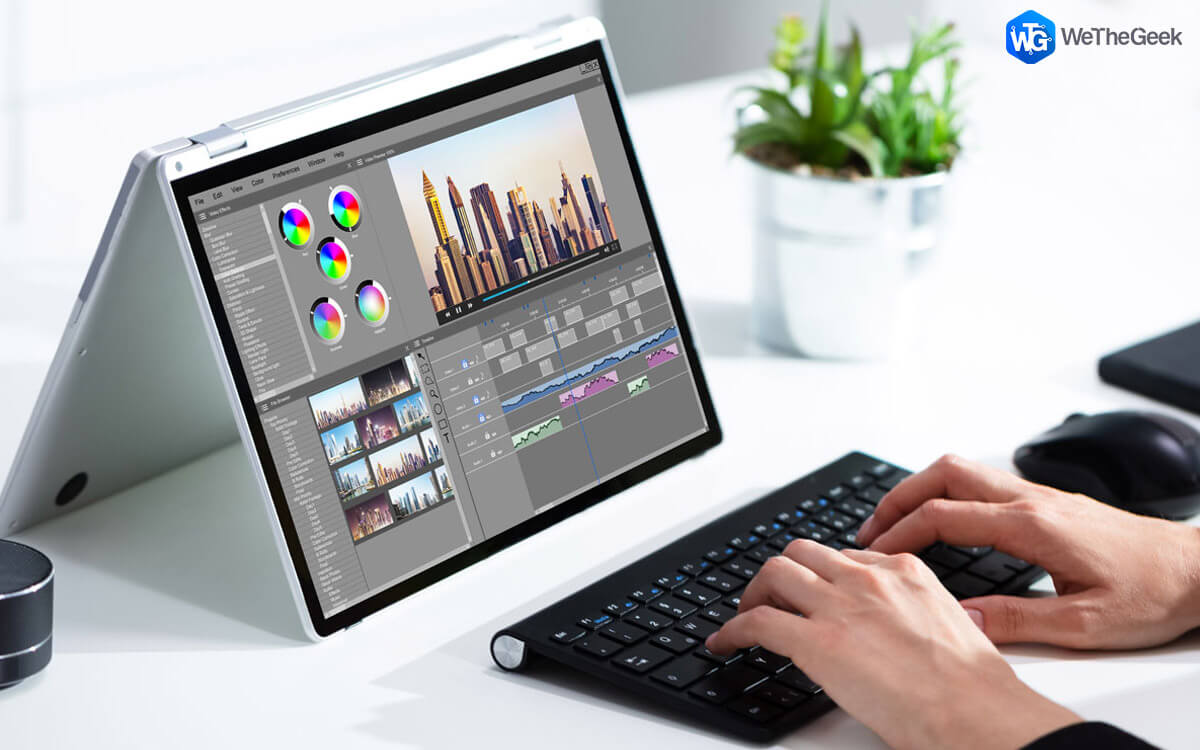
There’s no shortage of professional video editing software and Windows also offers a hidden video editor, yet people always look for alternatives. So, if you too are looking for a video editor that can help refine videos, here we explain how to do that using OpenShot.- an open-source and free editing software.
Alongside this, if you are looking for a way to capture a screenshot, edit it and add it to the videos or presentations we suggest using TweakShot. This amazing Windows compatible screen capture tool helps take screenshots of active windows, selected areas, scrolling window,s and more. Furthermore, you can even capture and edit video using this professional tool.

To learn more about it, read the comprehensive review on TweakShot.
Features – TweakShot
- A professional screen capture and video recorder software for Windows
- Powerful features to capture active windows, selected region, scrolling window
- Edit captured screenshot and video
- Rotate, flip, annotate and more
- Add image caption
- Crop image, fill colours, pixelate and more
- Easy video recording
- Simple User Interface
- Color Picker, hot keys for ease of use
Now that we know what TweakShot and OpenShot have to offer. Let’s learn how to edit videos using OpenShot.
Modify Playback Speed of a Video
Using OpenShot, you can slow down or speed up the playback speed of the video.
Here’s how to do that:
1. Launch OpenShot
2. Drag and drop video to timeline that you wish to edit.
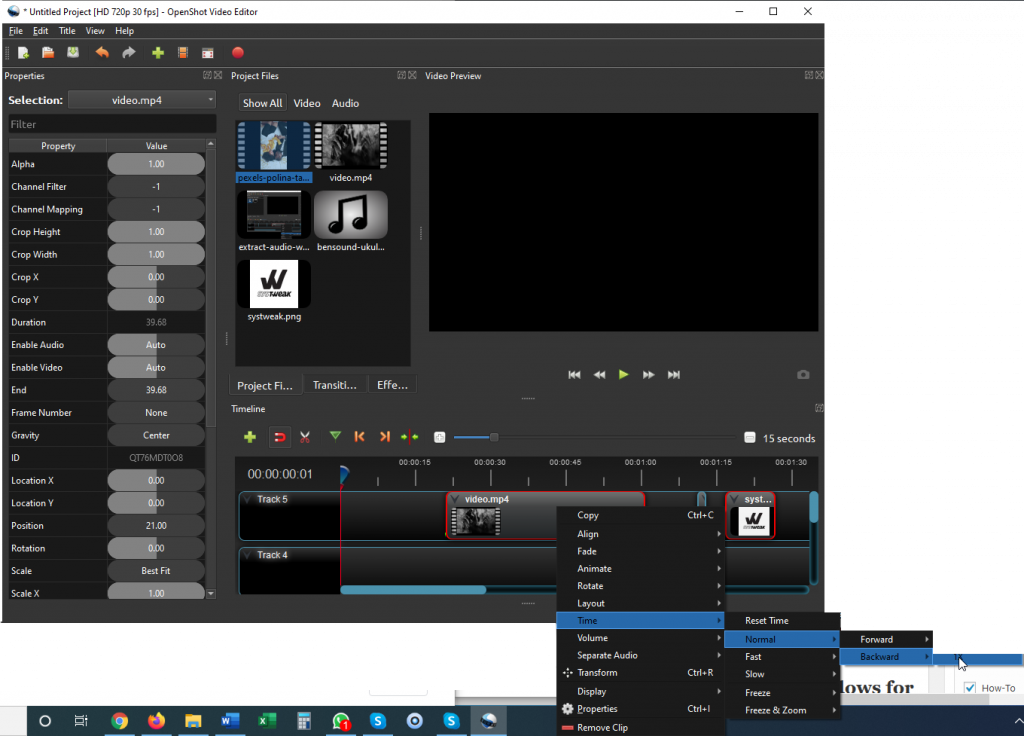
3. To change the playback speed right-click the video > Time > select from the option. To make it fast forward select Fast > Forward > rate at which it should be played.
Note: To alter backward speed select Backward > choose the rate
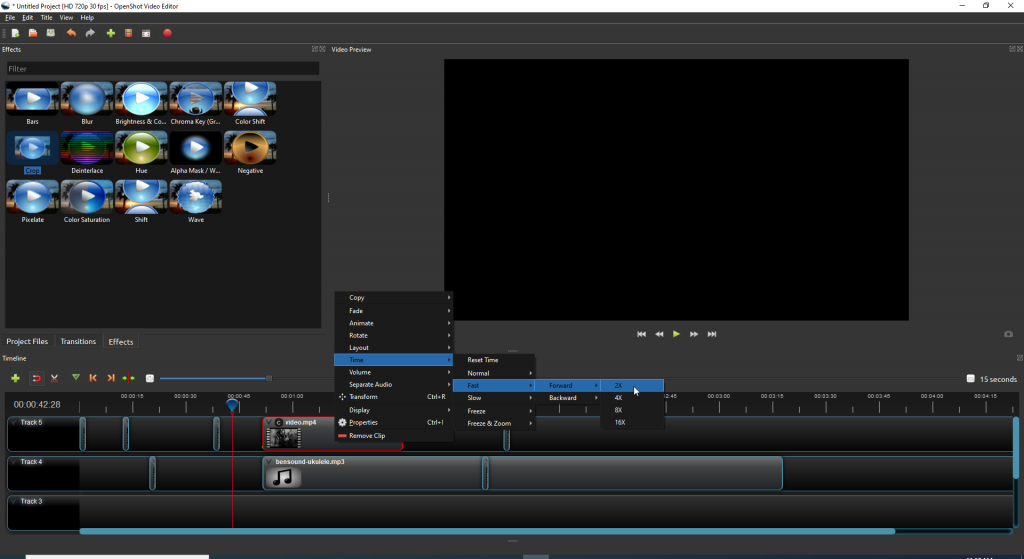
5. To decrease the speed, right-click video > Time > Slow, and select the speed.
6. Once this is done, save the project so that you can have the video saved with desired output
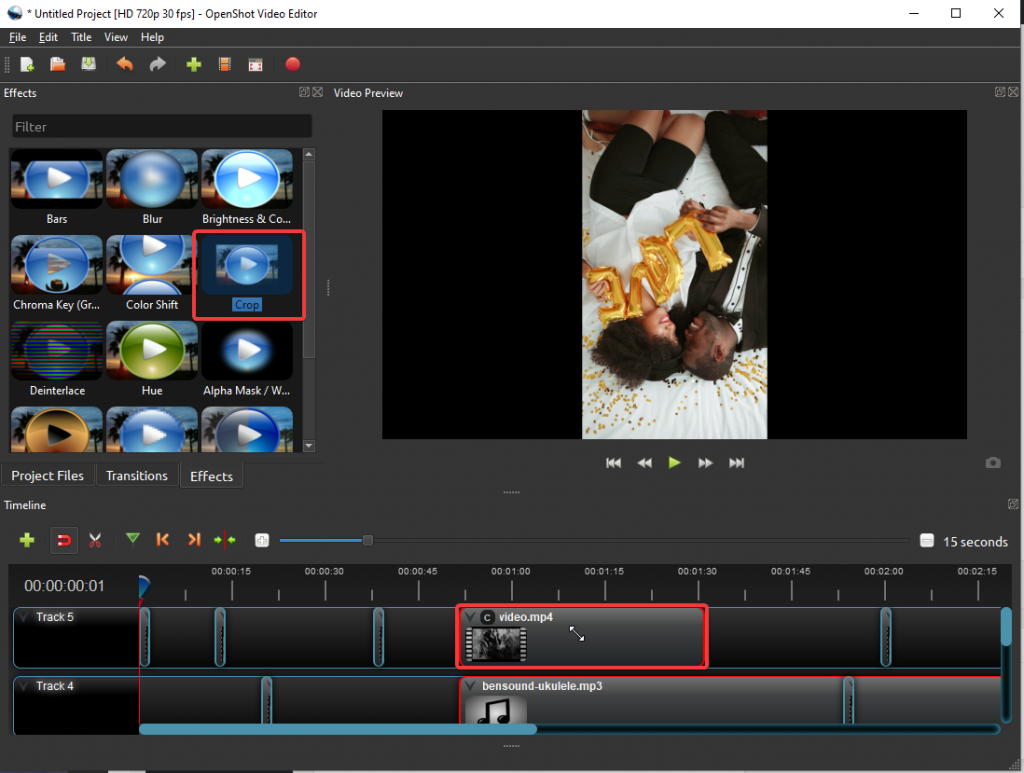
Using OpenShot Add Music to the Video
Want edit video and add your favorite music track? It’s easy just follow the step by step guide below:
1. Open the OpenShot app
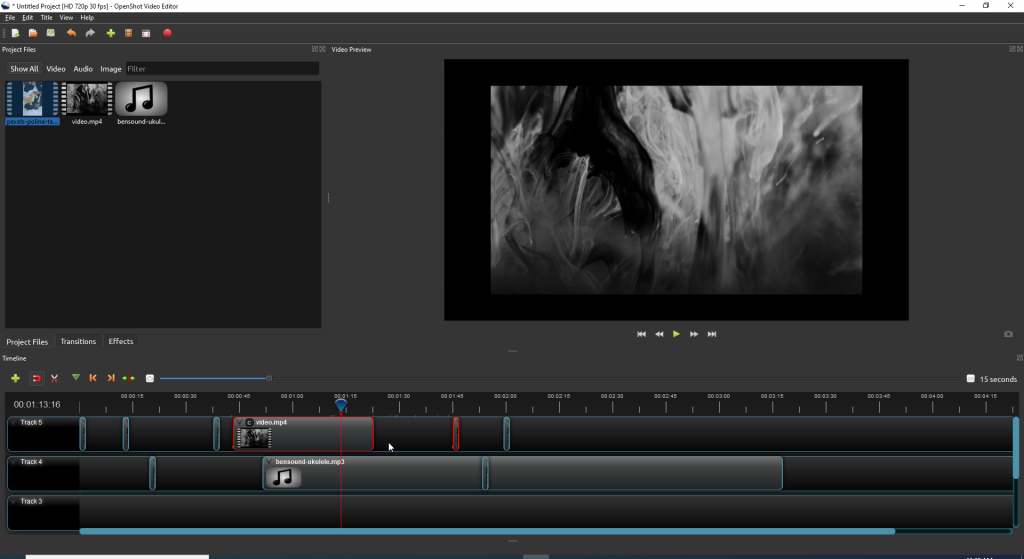
2. Add both voice and video files to the Timeline. Audio file will be added to Track 4 and video to Track 5
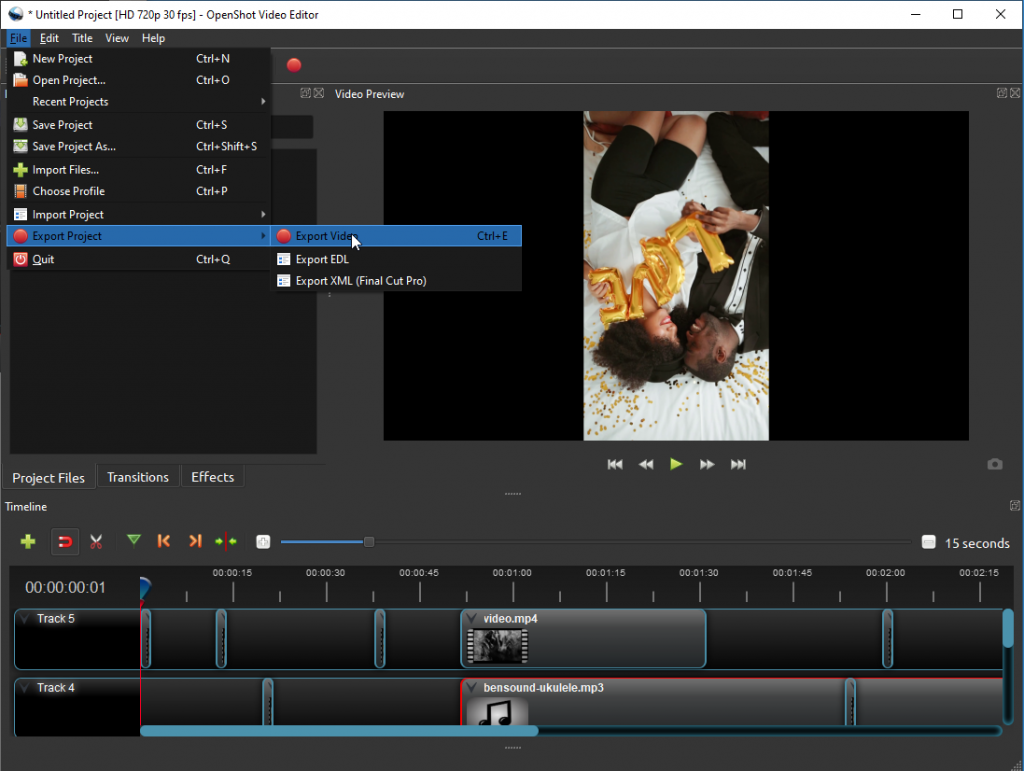
3. Export the video File > Export Project > Export Video.
This way, you will have your favorite music added to your video track.
How to Detach Audio From a Video
Sometimes, a video without an audio output is enough while on the other hand you might just want to use the same audio in another video. If that is the case, here’s how you can mute to video or can remove audio from video.
1. Run OpenShot.
2. Import the video, to remove audio and add it to Timeline
3. Next, right-click the video on the timeline and select Separate Audio > Single Clip (all channels).
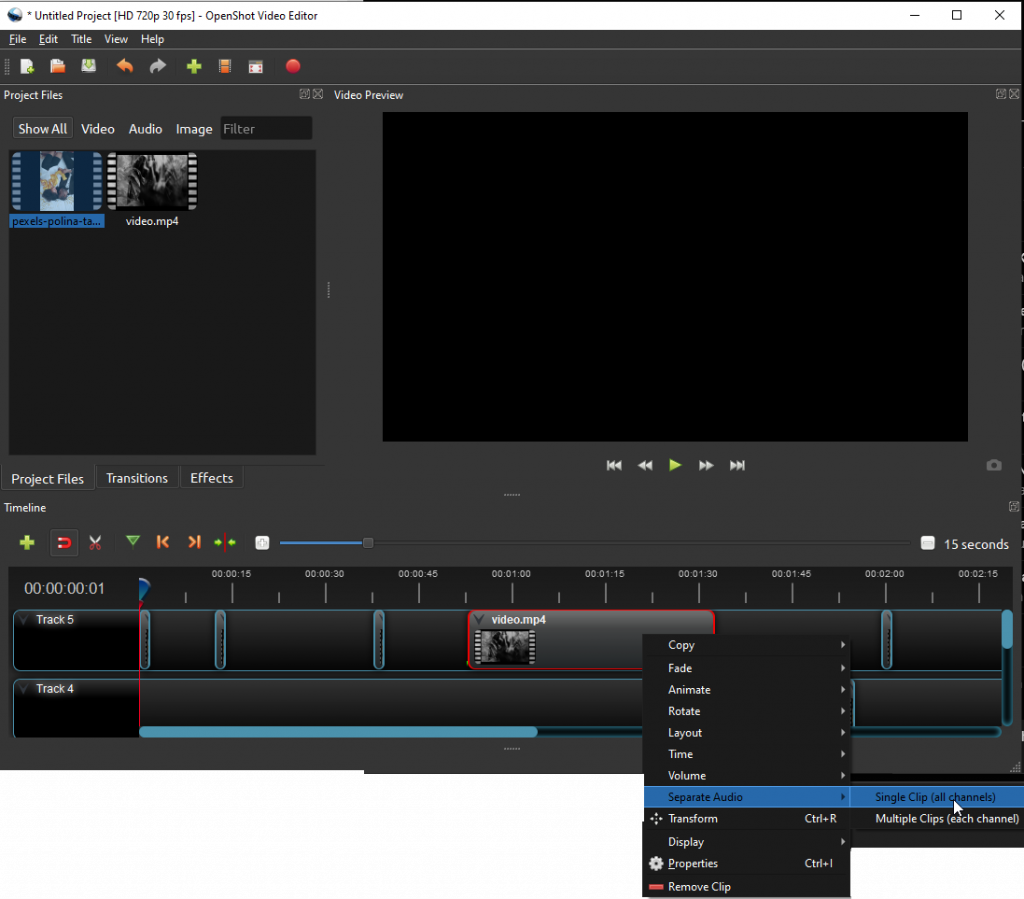
Tip: To mute a video click the audio file added to the timeline > hit Delete key.
5. Save the edited video.
Steps to Trim or Cut Video Using OpenShot
If you think you have recorded something incorrectly or is unwanted, you can crop it from the video frame. To learn how to do that, follow the steps below:
1. Launch OpenShot
2. Add video to the timeline
3. Hit Effects tab > select Crop > drag it on the video that you want to crop.
Note: The video should be added to the timeline
4. You will now see, a c in small letter. This means the effect is added.
5. Right-click small C > Properties.
6. Move the playhead to crop, and preview changes in the Video Preview window.
7. When done, save the cropped video.
Splitting Video Into Multiple Parts
Want to divide the video into several parts? Follow the steps and do that on your Windows 10 using OpenShot:
1. Run OpenShot > import video and add to the timeline.
2. Drag the playhead on the part of the video that is to be divided.
3. Right-click the video > Slice > Keep Both Sides.
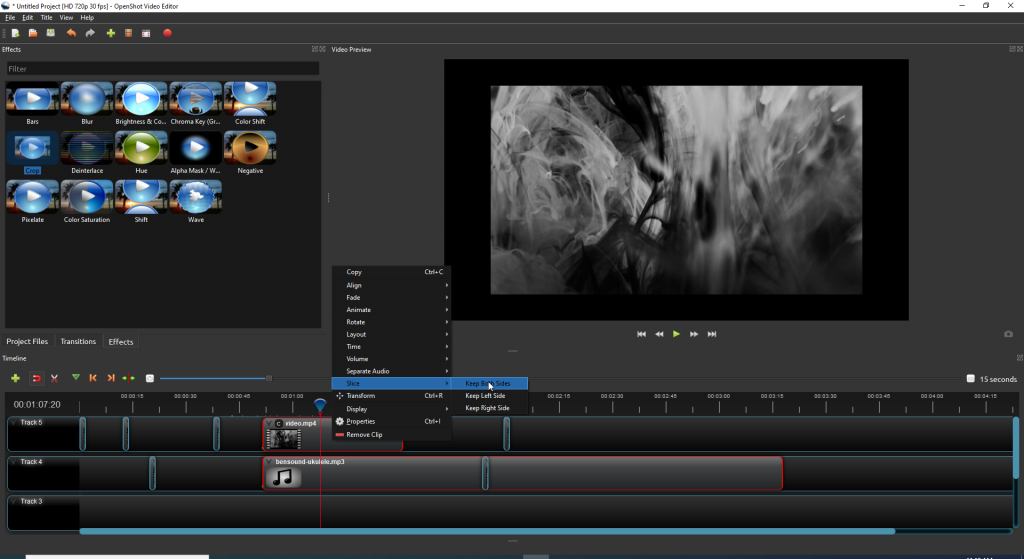
4. Your video will sliced. Save it.
Rotating and Reversing a Video
Using OpenShot, you can both rotate and reverse a video. To do so, follow the steps below:
- Run OpenShot > import vides > right- click > Add to Timelime > right-click the video added to timeline> Rotate > pick the option.

- Rotate the video clockwise or anti-clockwise whichever way you want > save the output and you are done.
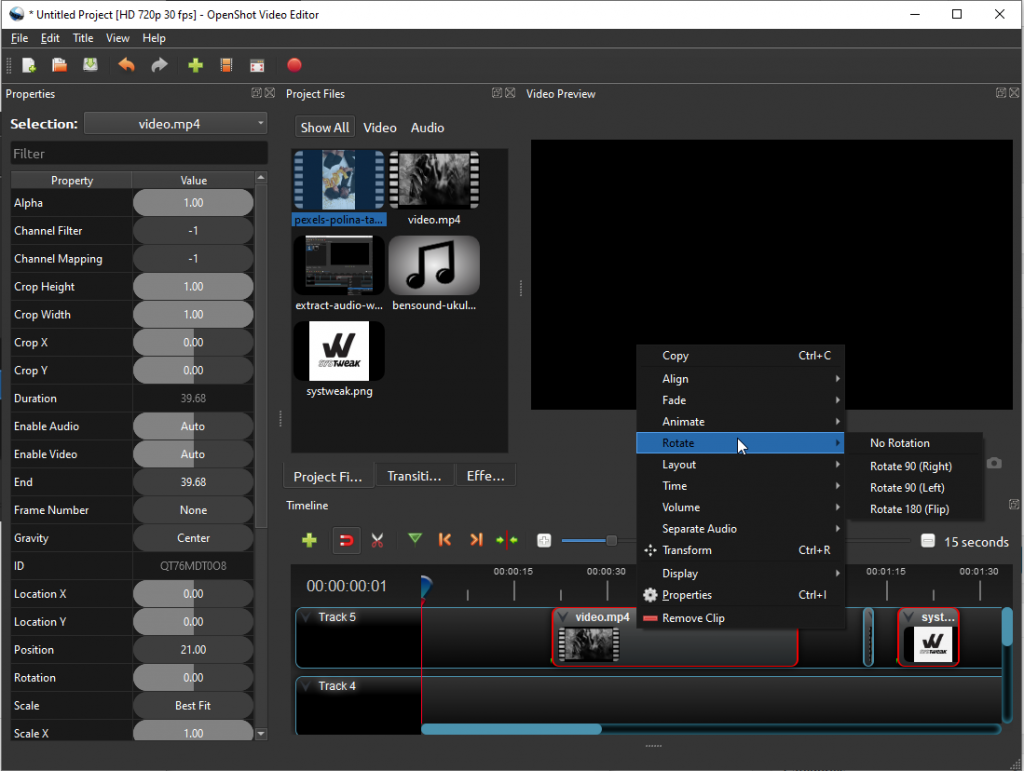
To reverse a video, add it to the timeline > right-click > pick the Time > Normal > Backward > 1X.
The video will now be reversed.
Merging Video Files
If you have recorded several short videos and want to combine them, here’s how to do that:
- Launch OpenShot
- Import video clips to join.
3. Add to timeline in a sequence.
4. Once done, click File > Export Project > Export Video.
Adding Title to a Video
Now that the music is added, video files are merged, you must be wondering how to add text or a title, right? Well, here you go.
1. Add video to timeline on Track 4
2. Hit the Title menu > Title.
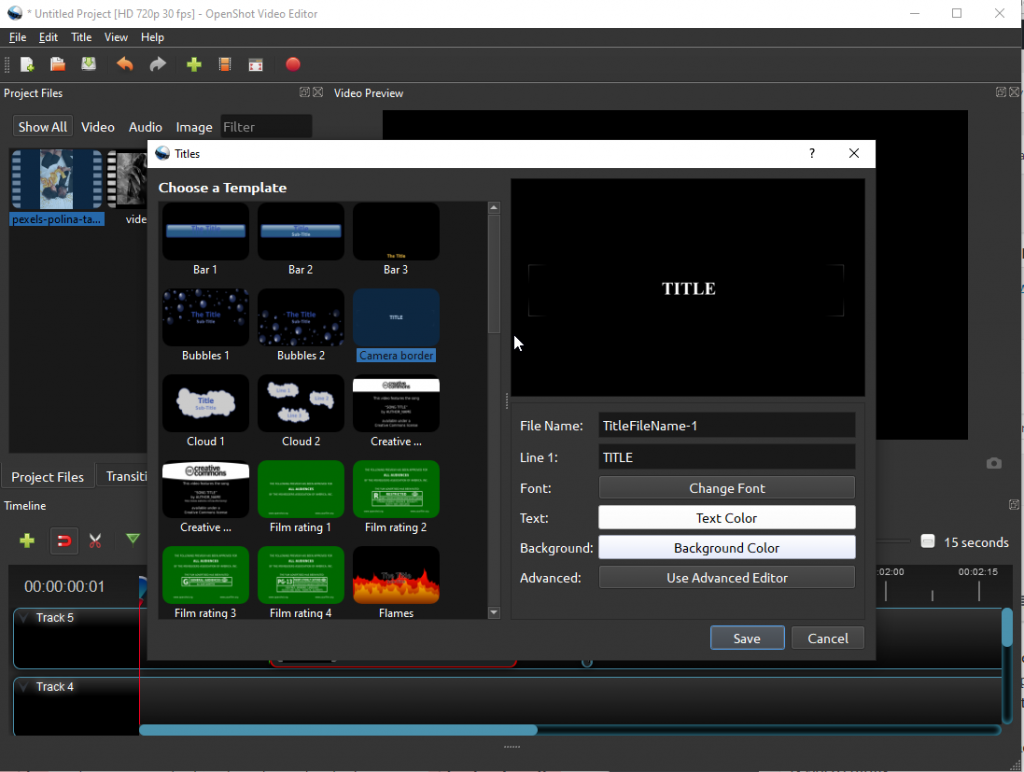
4. Hit Project Files tab > right-click the text style you just saved > Add to Timeline > Track 5 > OK.
Note: If placed above the video track , title will now be visible on the video.
Adding Transition Effects Between Clips
Want to join multiple videos, but don’t want them to look messy? Use transition effects and avoid clutter or mess video output.
1. Launch OpenShot > add video to the timeline
2. Click Transitions tab > select the filter > drag and drop it to the end.
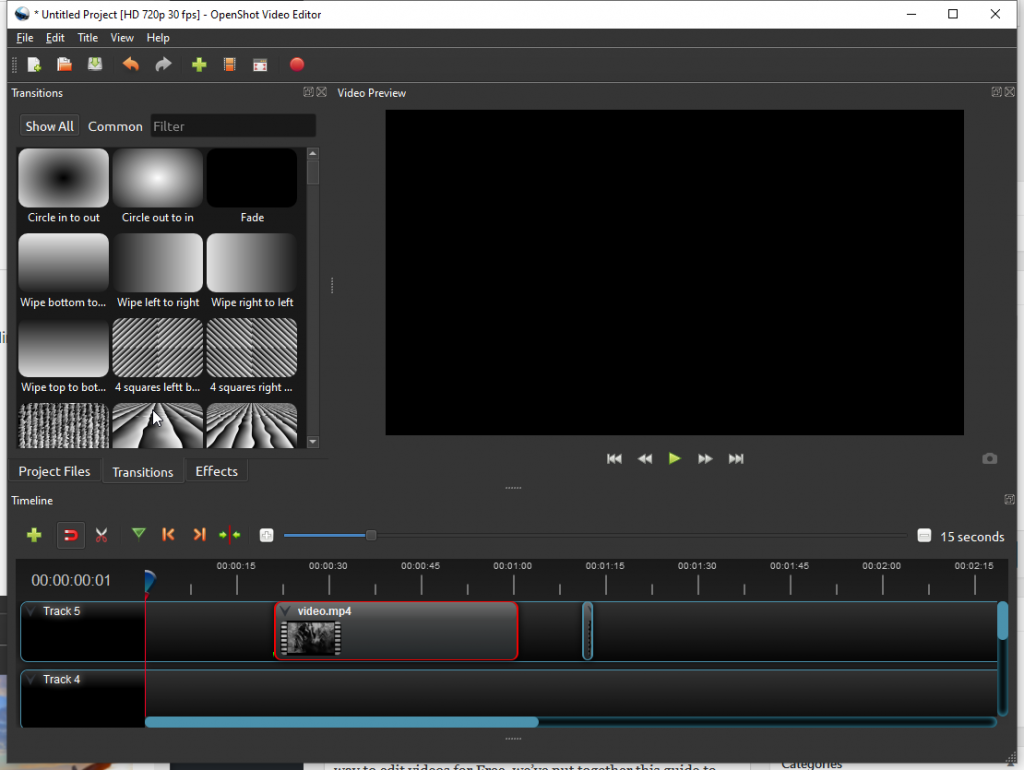
4. Make changes, if required.
That’s it, this way you can add multiple clips and add transitions. In addition to this, you can record a voiceover and add it to the video. To learn more about them, read about the best audio recording apps.
Swiftly, editing Videos on Windows and Adding Watermark
Watermarking the Video
Using OpenShot and other video editing tools, these days anyone can edit videos and make them look professional. Even if you are a beginner, there’s nothing to worry about, you can easily edit videos by following above-mentioned steps.
Moreover, you can also add Watermark and prevent others from using your copyrighted video. To add a watermark, go through the below-mentioned steps:
1. Launch OpenShot
2. Import video and image > add to timeline > select Track 4 > OK.

4. Similarly, add the image and this time pick Track 5.
5. Right-click image > Properties.
6. Next, use Scale option to resize watermark image. To set the location use Gravity option.
7. Once the process is done, export the video.
That’s it, using these simple steps you can edit a video on Windows for Free and can add a watermark too. We hope you will give it a try. Furthermore, to capture screenshots and add them to the video you can use TweakShot – the best screen grabbing and video recording software.
Do share your thoughts about the post in the comments section.