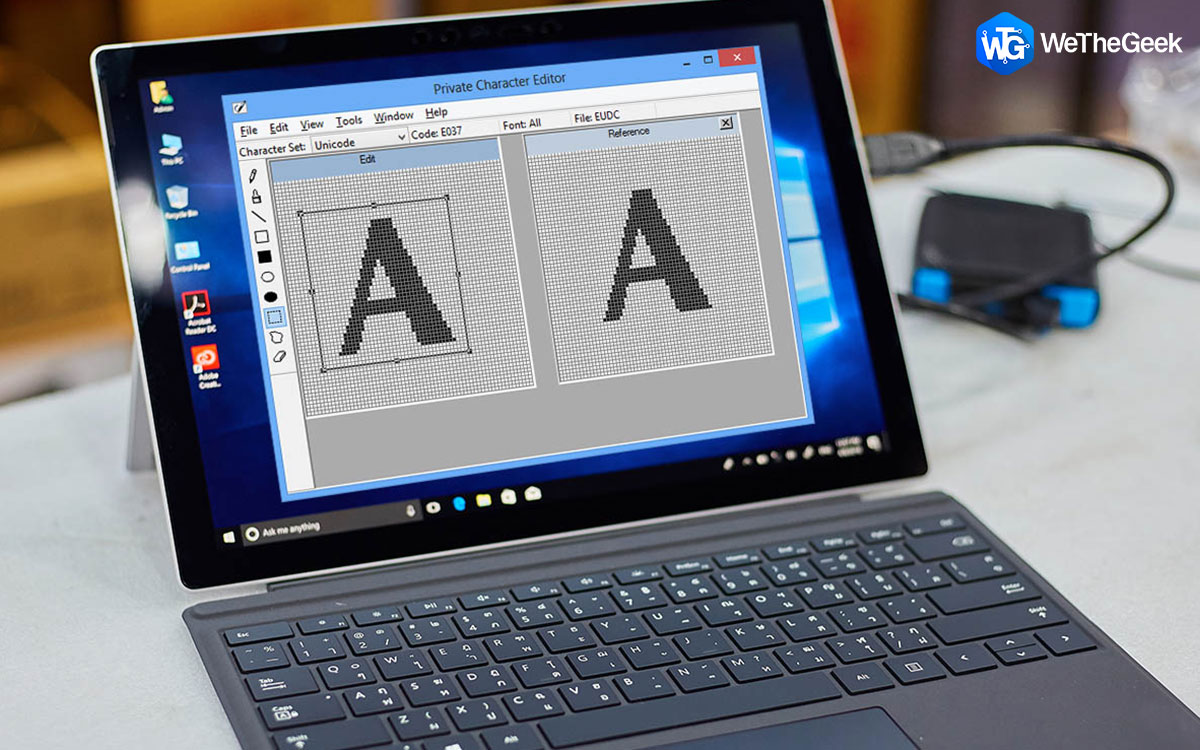
Want to create your Fonts without installing a third-party app and that too, for free? If yes, then I believe you are looking for Windows Private Character Editor, which is an in-built application in Windows designed to create custom fonts. This application was inculcated by Microsoft since Windows 7 and has continued till Windows 10.
The Windows Private Character Editor comes preinstalled in Windows operating system and is one of the easiest font and character makers among others. It is free of cost and uses minimum system resources. However, there are a few limitations as well, especially the application not being as advanced as other third party programs. Also, the newly font created will only reflect in your computer as others will not have this customized font. To share your new font with others, you can print a document or take a screenshot with text embedded in the new custom font.
Also Read: How To Install Fonts In Windows 10
How To Create Your Font With Windows Private Character Editor
Today, I will explain all you need to know to create your fonts using Private Character Editor, from accessing the application to creating the font and using it as well.
Step 1: Launch The Private Character Editor Application
Private Character Editor has never been publicised by Microsoft and has remained hidden within system files. You will not even find a shortcut of this application in the start menu. To access this tool, you can use any of the following three methods:
Method 1: Type Private Character Editor in the search box on the taskbar.
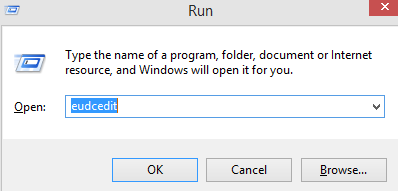
Method 2: Press Windows + R key to open Run Box and type eudcedit and click on OK.
Method 3: Navigate to C:\Windows\System 32\eudcedit.exe on your computer and double click on eudcedit.exe to initiate the application.
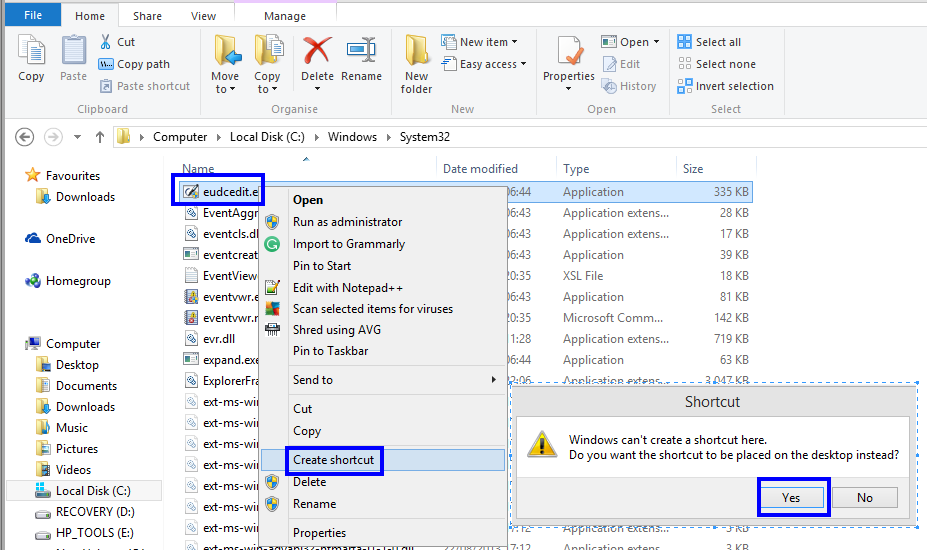
Note: You can also create a shortcut from the executable file by making a right-click and selecting Create Shortcut from the contextual menu. It will be placed on your desktop.
Also Read: How To Change The Default Font Type In Windows 10
Step 2: Select Code To Assign The Character
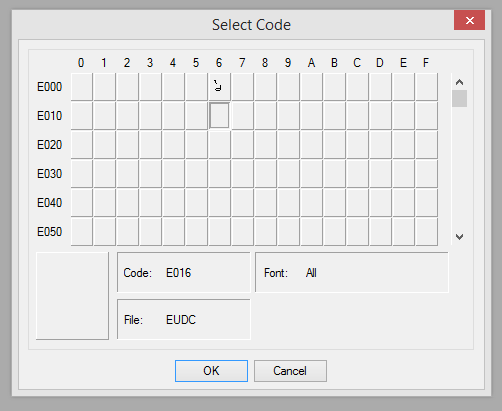
The first step you will have to do when the Private Character Editors launches, is to select a code. As the app window opens, you will find a secondary window open with the app where you have to select code first. The code you select will be automatically assigned to the new character you create. You can only use the new character created if you know the right code.
The total number of characters that one can create is 6400, which is a pretty large number. There are 16 values on the top row and 400 values mentioned on the left side, which are combined to make all the 6400 codes.
For example, if you select the sixth code in the second row, the code will combine out to be E016.
Also Read: How to Use New Windows 10 Font Settings
Step 3: Create A Character
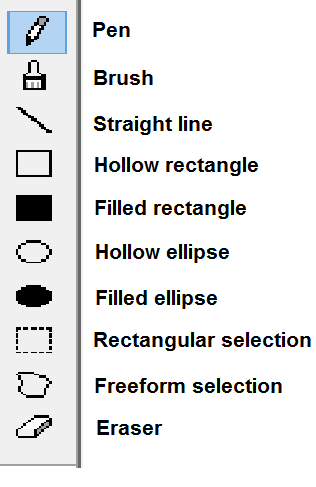
Now that you have selected code and clicked on OK, the code box will be replaced by a drawing grid of 64 x 64 blocks. You can use your mouse cursor and clicks to design any character you want within the drawing board. Although it is mostly freehand drawing, there are a few tools that can help you design the character. The colour used for the drawing will always be black, which will start filling the blocks with left click. And on the other hand, a right-click on a block would remove the black colour and make it empty again. This is the best way of drawing as you can rectify any error at any point in time. The basic tools available are shown below:
Also Read: Steps to Change the Windows Login Screen Message & Font
Step 4: Edit A Character
If you like doing things the easier way, then you can import a character that is already in your system and modify it, the original character will not be altered as the changes you make will be saved as code number that you have chosen in the beginning. The process to import a character is:
- Click on Edit tab from the top and then click on Copy Character from the drop-down menu.
- Select the character from the new dialog box that opens. You can change the font from the bottom right corner and scroll down to get a character that is almost similar to what you want.
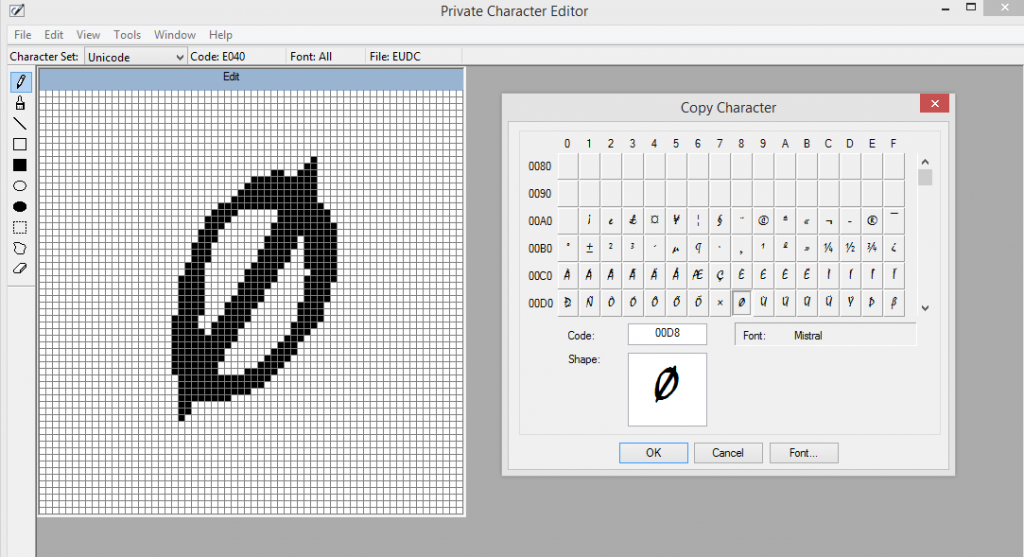
- Click on OK and the character will be copied in your work area, where you can further changes and save it.
Also Read: Embed Fonts in a Microsoft Word Document
Step 5. Save The Character
The final step in how to create fonts with Windows Private Character Editor is to save your hard work spent in creating a new character. Follow these steps to save your newly created character:
- Click on the File Tab and then on Font Links.
- A dialog box will appear asking you to save the character. Click on Yes to save the effort.
- Next, another prompt will appear asking you to make the character. Available for all fonts or specific fonts only. Choose “Link with All Fonts” and click on OK.

Also Read: How to Change the Google Chrome Default Font?
Step 6: Use The Character
So the application was launched, Character was created and saved. What Next? Why, we must know how to use it, of course? Here are the steps to use the newly created characters:
- Open the Windows Character Map by pressing the Windows + R keys to open the Run box and then type charmap in the text box.
- In the Windows Character Map window, click on the drop-down menu on the top and select “All Fonts (Private Characters)”. All the characters created will be displayed here.
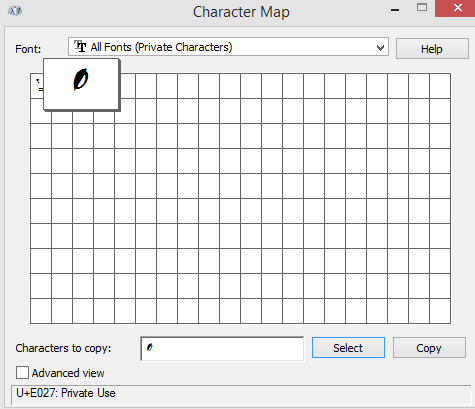
- Select any character you want to copy and then click on Select and Copy, and this will be copied to the clipboard.
Note: For Microsoft Word file, enter the code of the character selected and then press Alt + X.
Also Read: 10 Best Typography Apps for Android to make Effective Fonts
The Final Word On How To Create Your Font With Windows Private Character Editor
Although there are limitations, Private Character Editor is the only free tool and built-in Windows operating system. It may look time-consuming to create every alphabet, but once you start, you will complete it in no time. You can also create special characters as I have done here, and the possibilities are limitless.
Follow us on social media – Facebook, Instagram and YouTube. For any queries or suggestions, please let us know in the comments section below. We would love to get back to you with a solution. We post regularly on the tips and tricks along with solutions to common issues related to technology.
mariya jonsan
This is very new for me as i am not aware from this method or techniques but now i got it , surly try this to create font.Dheeraj Manghnani
Hi Mariya, Thank you for your feedback, it matters a lot. I am glad to hear that you liked the article. To stay updated and get more articles like this do subscribe to our notifications and follow us on social media.Pat Morel
Windows Private Character Editor is a great tool. It is a pity that anything drawn in the top 5 rows of the grid will not appear on the linked font.Mridula Nimawat
Thank you for your feedback.