
If you’re an avid Windows 11 user, you’ve probably noticed that the operating system generates thumbnail images to give you a quick preview of your files and folders. These thumbnails can be incredibly helpful when it comes to identifying files at a glance, especially when you’re dealing with a large collection of images or videos. However, over time, these thumbnail images can accumulate and take up valuable disk space on your computer.
Clearing the thumbnail cache on Windows 11 is a simple yet effective way to reclaim storage space and ensure optimal system performance. By removing these cached images, you can also resolve issues such as slow-loading thumbnails or missing previews for certain files. In this blog post, we will explore four different methods to clear the thumbnail cache on Windows 11, ranging from user-friendly built-in options to more advanced techniques.
Whether you’re a tech-savvy user or a Windows novice, this guide will provide you with step-by-step instructions on how to clear thumbnail cache, so you can keep your system running smoothly and efficiently.
Also Read: How To Fix Windows 11/10 Thumbnail Not Showing
What is Thumbnail Cache on Windows?
To give users a quick preview of files, folders, and media content, Windows creates a collection of small-sized images or thumbnails called a “thumbnail cache.”. Windows creates these thumbnails when you browse through folders containing images, videos, or documents, and it saves them in a special cache folder on your computer’s hard drive.
Thumbnail caching improves user experience by enabling you to visually recognize files without having to open each one one by one. Windows helps you find and identify the files you’re looking for faster by displaying a thumbnail of the file’s contents.
The need to repeatedly load and create new thumbnails each time you access a folder is decreased by the thumbnail cache, which enhances system performance. Instead, Windows can quickly retrieve the pre-generated thumbnails from the cache, resulting in faster browsing and navigation.
Also read: How to Clear DNS Cache on Windows 11? (3 Methods)
Is it Necessary to Delete Thumbnail Cache on Windows?
Over time, the thumbnail cache can grow in size and occupy a significant amount of disk space. If you are running low on storage or want to free up some space, deleting the thumbnail cache can help you regain valuable storage capacity.
In some cases, you may encounter problems with thumbnail generation or display, such as slow-loading thumbnails, missing previews, or incorrect thumbnail representations. Clearing the thumbnail cache can help resolve these issues by forcing Windows to regenerate new thumbnails, potentially fixing any glitches or inconsistencies.
Also Read: How To Prevent From Creating The Thumbs.db Cache Files?
How to Delete Thumbnail Cache on Windows
Here are some simple methods to clear the thumbnail cache on Windows 11:
Method 1: Use the Settings App
Follow these steps to clear the thumbnail cache on Windows using the Settings app:
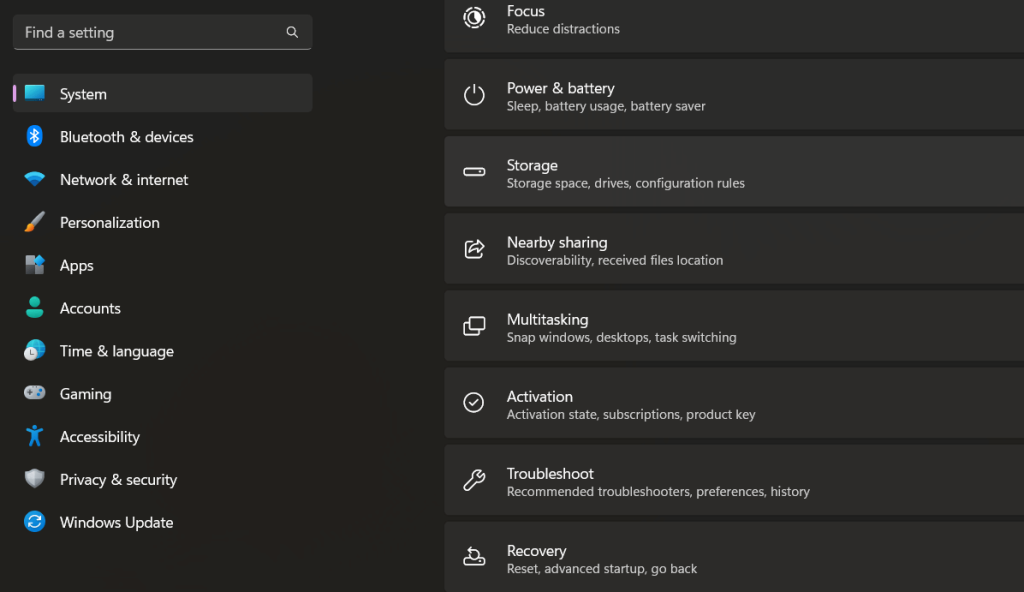
Step 1: Open the Settings app and switch to the “System” category from the left menu pane. Scroll down and select “Storage”.
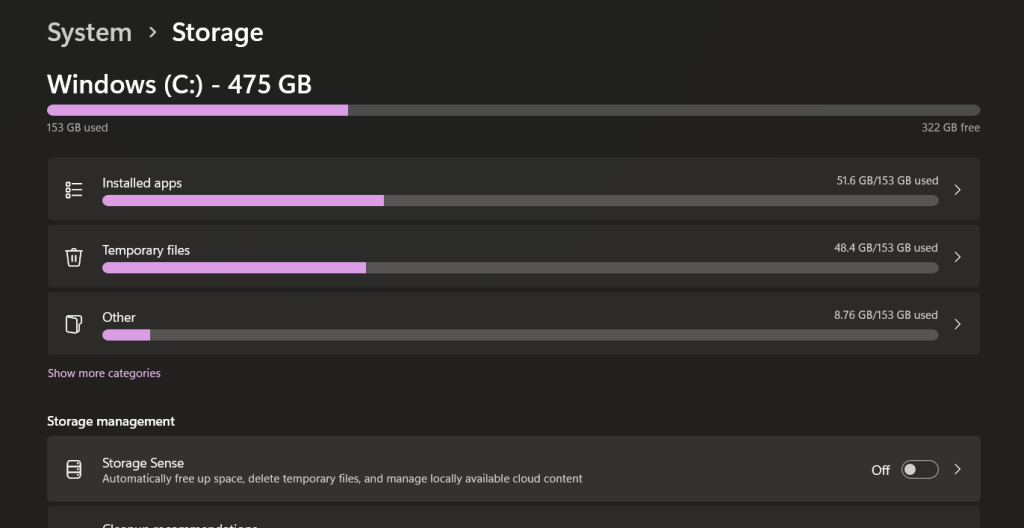
Step 2: In the Storage settings, you will see a list of storage categories. Scroll down and click on “Temporary files.”
Step 3: Windows will now analyze your system for temporary files that can be deleted. Wait for the analysis to complete.
Step 4: Once the analysis is finished, you will see a list of file categories that can be removed. Scroll down and locate the “Thumbnails” option.
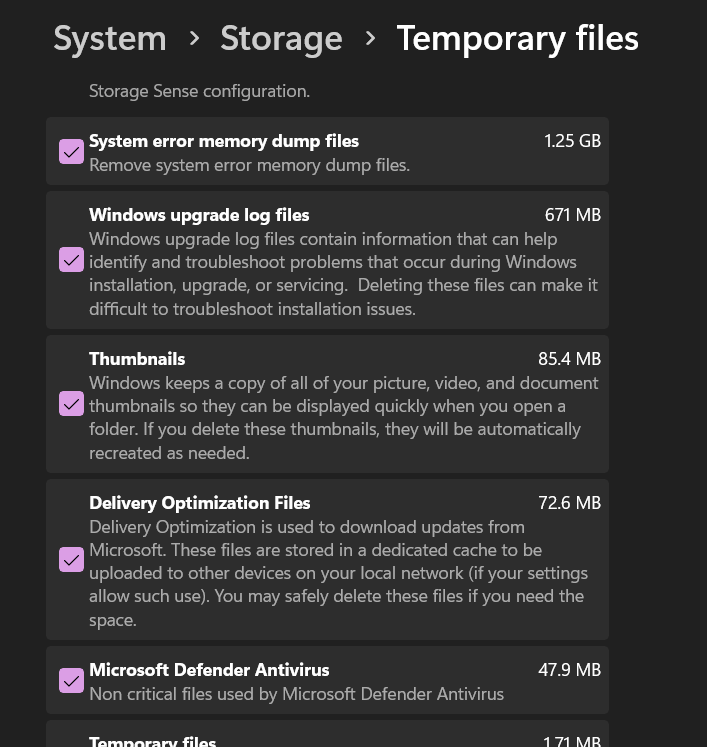
Step 5: Check the box next to “Thumbnails” to select it.
Step 6: Optionally, you can also select other file categories you want to delete, such as “Temporary files,” “Recycle Bin,” or “Downloads”.
Step 7: After selecting the desired categories, click on the “Remove files” button. Windows will start deleting the selected files, including the thumbnail cache.
Also Read: How to Clear Cache in Windows 11?
Method 2: Use the Disk Cleanup Tool
Here are the steps to clear the thumbnail cache on Windows 11 with the help of the Disk Cleanup tool:
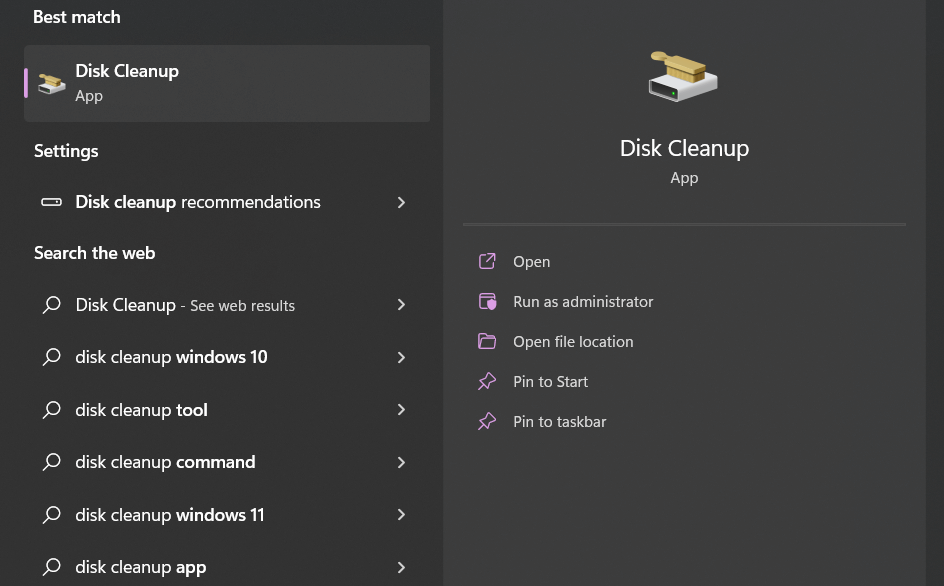
Step 1: Tap on the Search icon placed on the Taskbar and type “Disk Cleanup”. Hit Enter.
Step 2: Select Drive and tap on OK.
Step 3: In the Disk Cleanup windows, check on the “Thumbnails” box and hit OK.
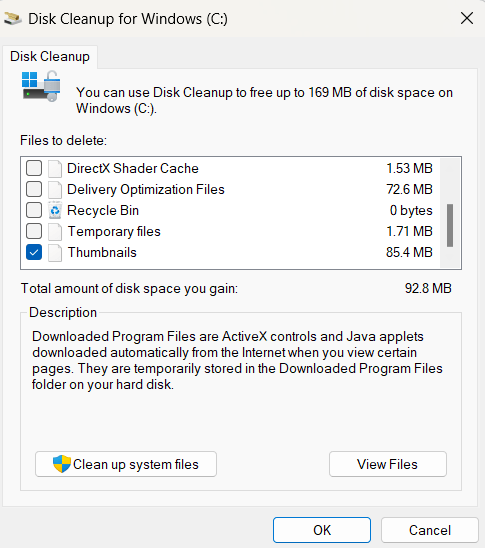
Step 4: A confirmation prompt will now appear on the screen. Hit on the “Delete Files” button to proceed.
Method 3: Use the File Explorer App
Follow the below-listed instructions to clear the thumbnail cache on Windows using the File Explorer app:
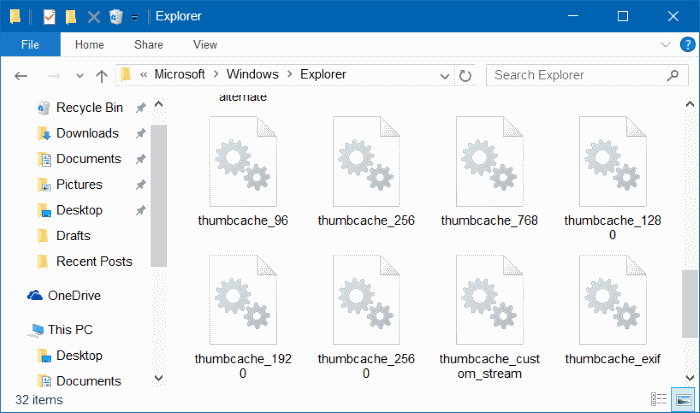
Step 1: Open the File Explorer app on your Windows PC. Navigate to the following folder path:
%homepath%\AppData\Local\Microsoft\Windows\Explorer
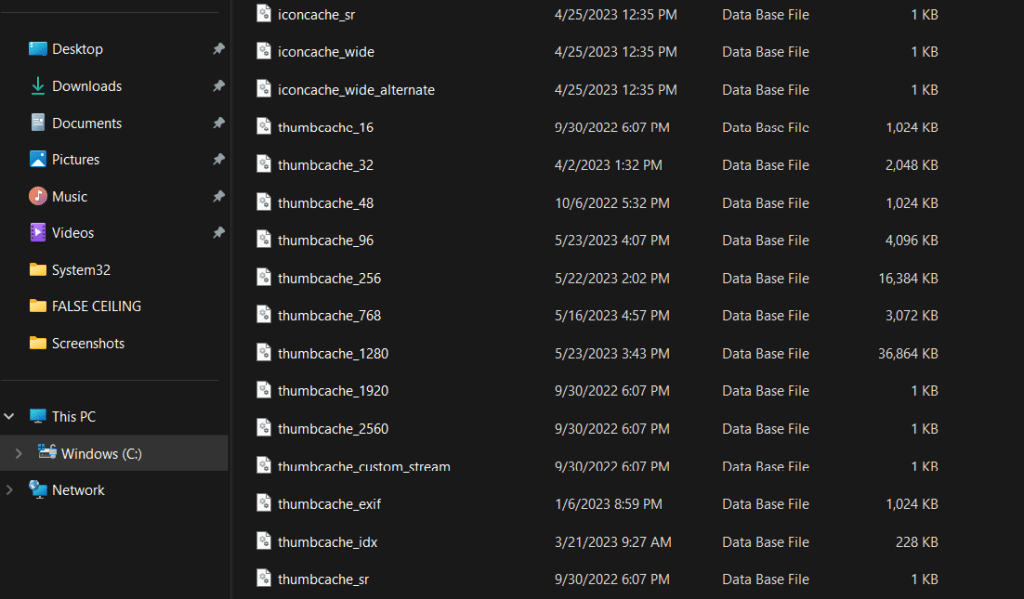
Step 2: Use the Ctrl + A key combination to select all the thumbnail cache files. Right-click on your selection and select “Delete”.
Method 4: Use the Command Prompt
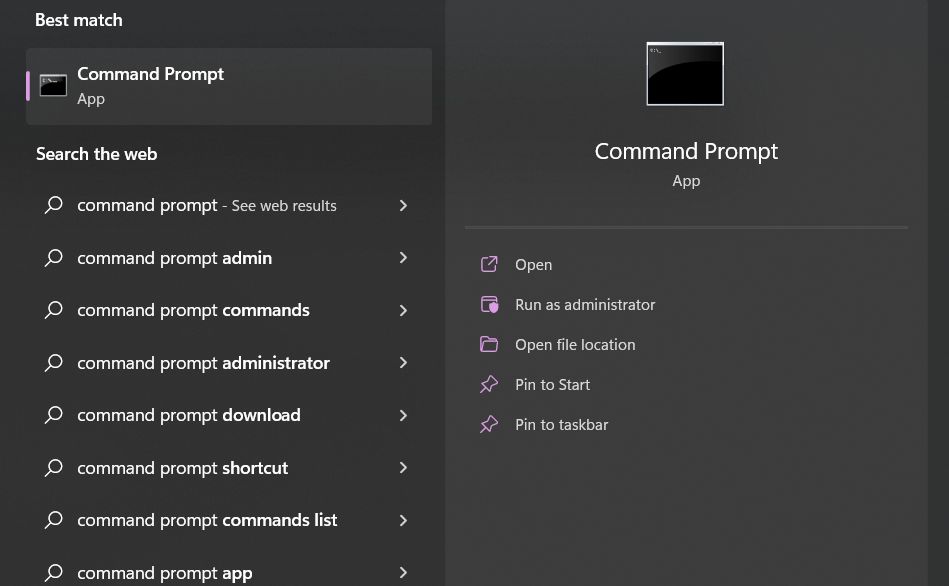
Step 1: Tap on the search icon placed on the Taskbar and type “Command Prompt”. Select the “Run as administrator” option to launch the app in admin mode.
Step 2: In the Command Prompt window, copy the following command and hit Enter to execute it:
del /f /s /q /a %LocalAppData%\Microsoft\Windows\Explorer\thumbcache_*.db
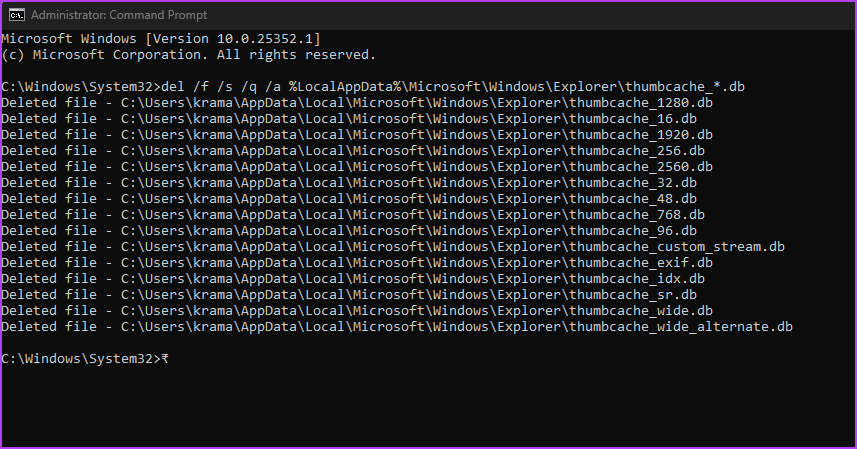
Step 3: And that’s it! Once you execute this command, you will see a list of all deleted thumbnail cache files on the screen.
Also Read: How To Optimize Memory and Manage System Cache
Conclusion
This wraps up our comprehensive guide on how to clear thumbnail cache on Windows 11 using different methods. Clearing the thumbnail cache on Windows 11 can help improve system performance, free up storage space, and resolve issues with incorrect or missing thumbnails.
Was this post helpful? Which method would you prefer to delete the thumbnail cache on Windows? Feel free to share what you think in the comments section. Follow us on social media – Facebook, Instagram and YouTube.