
The HEIC image format is one of Apple’s secrets to better quality images clicked on the iPhone. The secret is simple to decode when you realize that the HEIC image is captured in 16-bit color as compared to the 8-bit used by JPG. However, the JPG image format has the edge over HEIC images as it is supported by almost all image processing software across the globe. And this is the exact reason why many users are looking for ways to convert their HEIC images to JPG format. This blog introduces HEIC Converter, a fabulous app designed to batch convert HEIC to JPG within a short time.
Also Read: How to Convert HEIC to JPG on Windows PC
HEIC Converter: The Perfect Solution To HEIC Image Conversion.
The HEIC image format is undoubtedly one of the best image formats to work with. Unfortunately, it is limited within the Apple environment and requires special apps and encoders to work on Windows PC. Hence most people choose to convert their HEIC images to JPG or PNG. That is where the HEIC Converter app comes in.
The HEIC Converter app is a HEIC to JPG/PNG conversion tool that helps users convert all their HEIC images into JPG or PNG format without losing image quality. This lightweight app is easy to use and does not consume much of your PC’s resources. Here are the features of this app:
- Convert HEIC images to JPG.
- Convert HEIC images to PNG.
- Batch converts multiple images to JPG/PNG.
- Maintain the original EXIF data.
- Select the conversion speed of images.
Also Read: How To Convert HEIC To JPG On iPhone?
How To Batch Convert HEIC To JPG Using HEIC Converter?
HEIC Converter is an all-new application that can convert HEIC images to more common image formats like JPG & PNG. The most important feature of this application is that it allows users to batch-convert HEIC to JPG. This means you can select multiple HEIC images and convert them to JPG with a few mouse clicks. Here are the steps to batch convert HEIC to JPG using the HEIC converter app.
Step 1: Download HEIC Converter from the Microsoft Store or use the download button below.

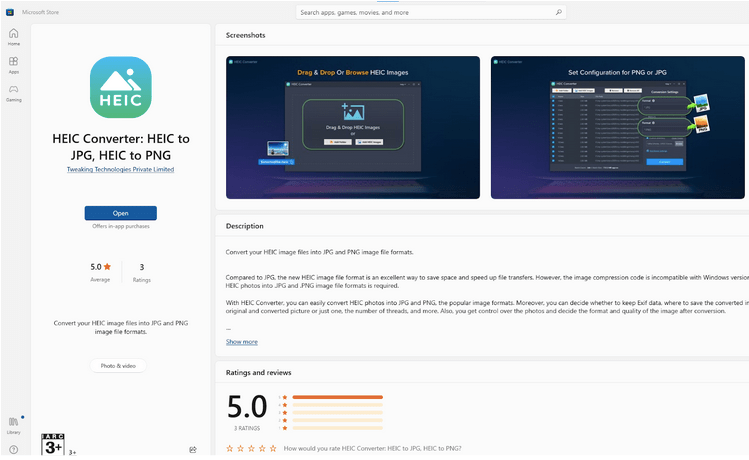
Step 2: Click on the Install button on the HEIC Converter’s Microsoft Store page and wait for some time until the app downloads and installs automatically.
Step 3: Next, click on The Open button and the HEIC Converter will launch on your PC.
Step 4: Before you can use the app, you need to Activate the app by clicking on the Activate Now button on the top menu bar.
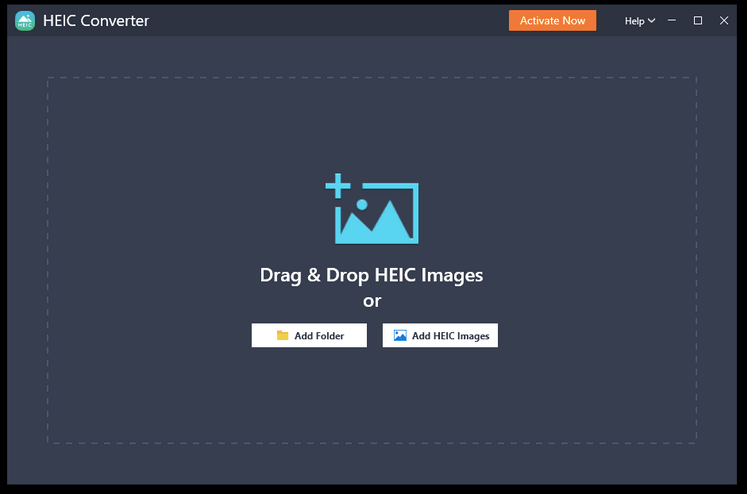
Step 5: Once the app is activated, you can start batch convert HEIC to JPG using any of the three methods listed below:
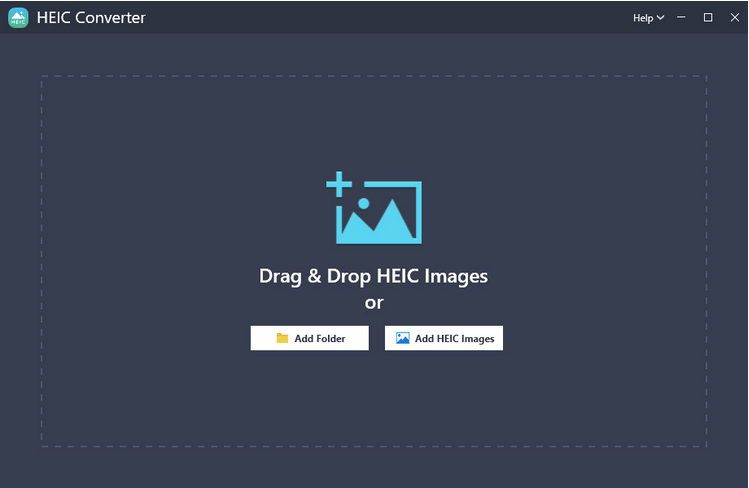
Drag & Drop HEIC Images. In this method, you can select the images you wish to batch-convert HEIC to JPG on your PC and drag them (when selected) with your mouse cursor onto the app interface.
Add Folder. This method allows users to choose a complete folder containing HEIC images.
Add HEIC Images. The final method allows users to use the Windows File Explorer environment to choose multiple HEIC images from their PC.
Step 6: Once you have selected multiple HEIC images using any of the three methods described above, you need to choose the final format between JPG and PNG. Click on the dropdown option under Format and choose JPG.
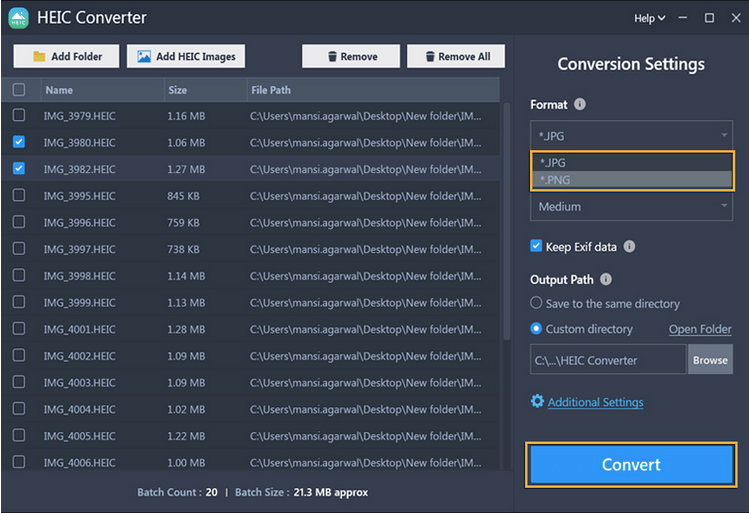
Step 7: The next step is to choose the destination for your converted files. Select the destination directory under Output Path by clicking on the Custom Directory button and then clicking on the Browse button.
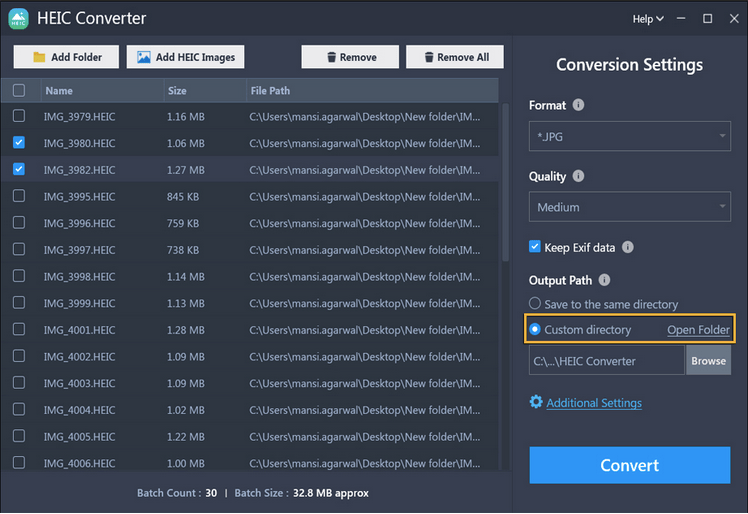
Step 8: Finally, click on the Convert button and wait for some time for the process to complete.
Step 9: You will receive a summary window with details of the HEIC conversion. Click on the Finish button and exit the app.
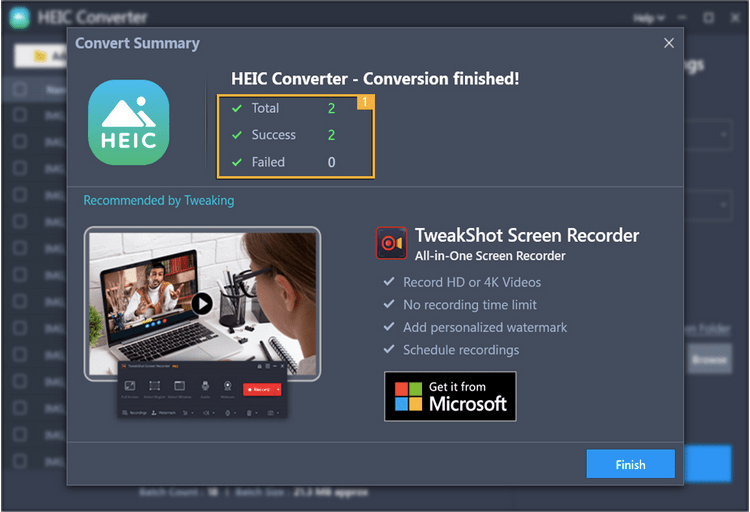
Note: You will find all the HEIC images converted into JPG files in the folder you have selected.
Also Read: How to Convert HEIC to JPG on Mac Easily
|
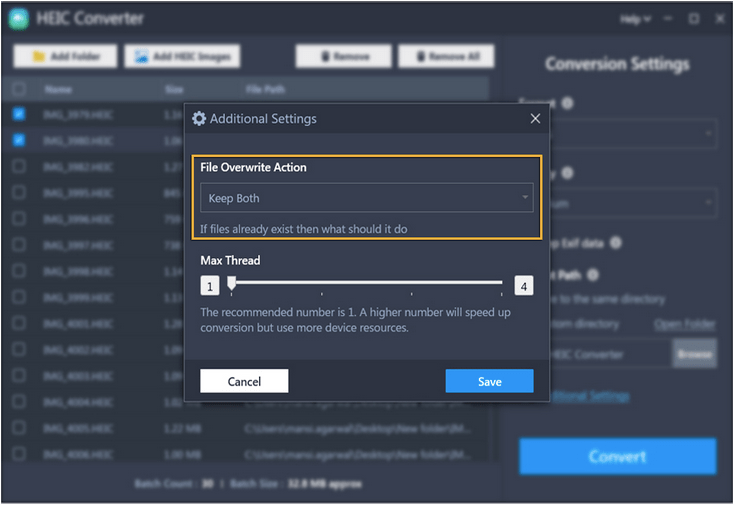
Additional Settings Of The HEIC Converter. The HEIC converter provides two additional settings for advanced users. It allows the users to set options for File Overwrite Action and Max Thread. File Overwrite Action
With this option, users can choose whether to keep the original HEIC file or auto-delete it after the successful conversion to JPG/PNG format. Max Thread
The default thread selected is 1. If you increase the number of threads then the batch conversion process will be faster but at the same time, it will consume more of your PC’s resources. |

Also Read: How To Open HEIC File In Windows 11, 10 PC
Minimum System Requirements Of The HEIC Converter
| Operating System | Windows 10/11 (32 & 64 bit) |
| CPU | 1.6 gigahertz (GHz) or more |
| RAM | 1 GB |
| Disk Space: | 250 megabytes (MB) |
The Final Word On How To Batch Convert HEIC To JPG?
The HEIC Converter is a lightweight tool that is quite simple & swift to use. This app does not require extensive training and can be used by anyone. Once installed and activated, this app can help users batch convert HEIC to JPG image format. Once your images are converted to JPG, you can easily use them in multiple image processing software or upload them on Social media platforms.
Please let us know in the comments below if you have any questions or recommendations. We would be delighted to provide you with a resolution. We frequently publish advice, tricks, and solutions to common tech-related problems. You can also find us on Facebook, Twitter, YouTube, Instagram, Flipboard, and Pinterest.