
Some Windows OS users get an error message that reads, “This setting is maintained by your administrator” when they try to change certain Windows Security settings. This problem warning can be seen directly above the app’s settings for App & browser and Virus & threat protection modules. As a result, they cannot activate crucial Windows Security options that are deactivated or greyed out.
Observing the error message, most of you would think this issue is related to the User Account Admin Privileges, but that is not always the case. Many people that run into this problem are already logged in as Windows administrators. So without further ado, let us check the steps to resolve the Windows 11 “This setting is managed by your administrator” issue.
Also Read: How to Fix “Some Settings are Managed by Your Organization”
Fix Windows Security’s “This Setting Is Managed By Your Administrator” Error.
Although the error “This setting is managed by your admin” is meant to prevent unauthorized changes, there are times when you may need to modify certain settings on your computer. Fixing this error can help you regain control of your computer’s settings and configuration, especially if you have permission from the system administrator.
Method 1: Install Windows Updates.
Some tech experts have recommended updating the Windows OS as the first step to resolve this issue. Here are the steps to check for updates on Windows 11 PC:
Note: Your computer might restart a couple of times during the Windows update process. So save all the work before you initiate Windows Update.
Step 1: Press Win + I to open Windows Settings window.

Step 2: Click On the Windows Update Tab in the left panel of the Windows Settings App.
Step 3: Next, Click on the Check for Updates button.
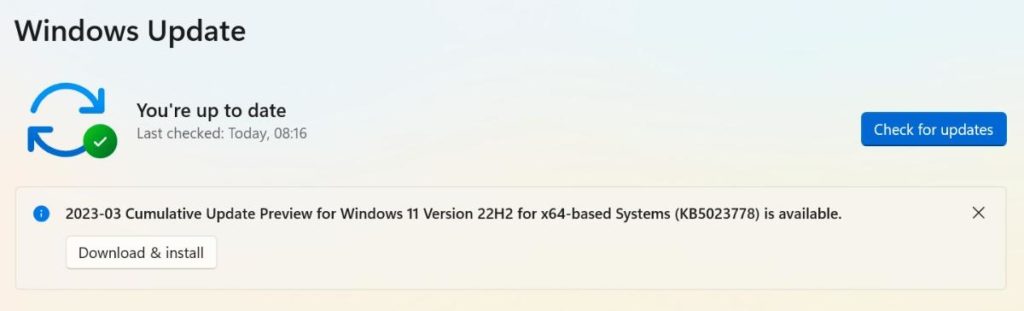
Step 4: A list of updates will appear on the screen. Click on the Download & Install button beneath every update.
Step 5: Once the updates have been downloaded and installed. Click on the Check For Updates button again to ensure there are no more updates left.
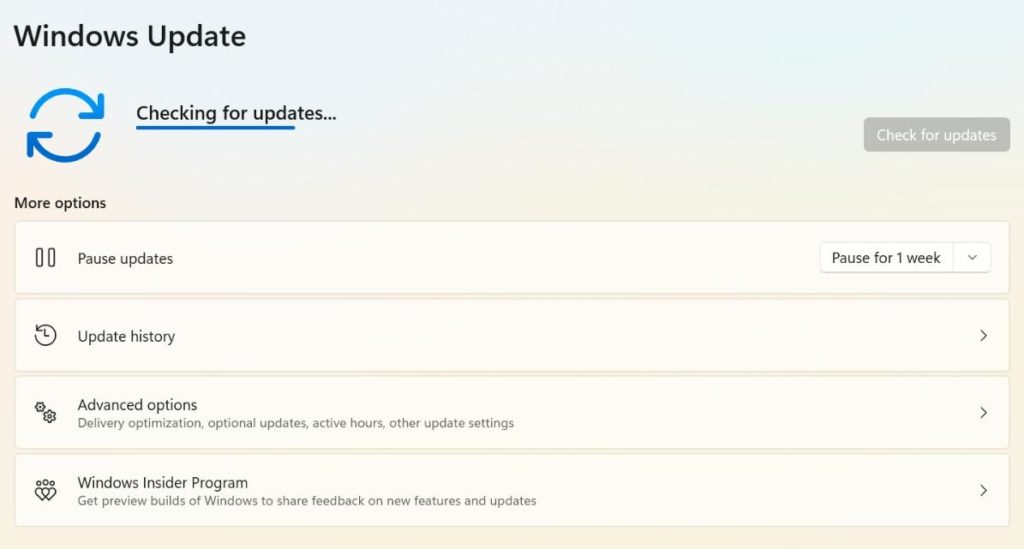
Step 6: Once all the necessary updates are installed. Click on the Advanced Options tab in the right panel.
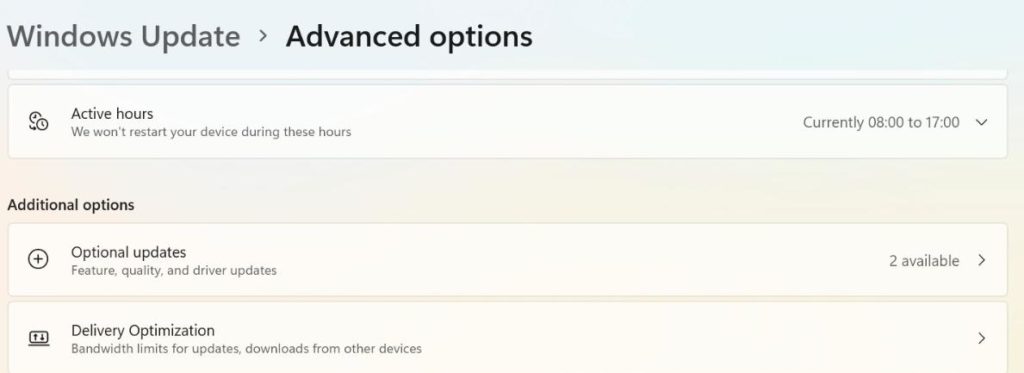
Step 7: Scroll down and click on Optional Updates.
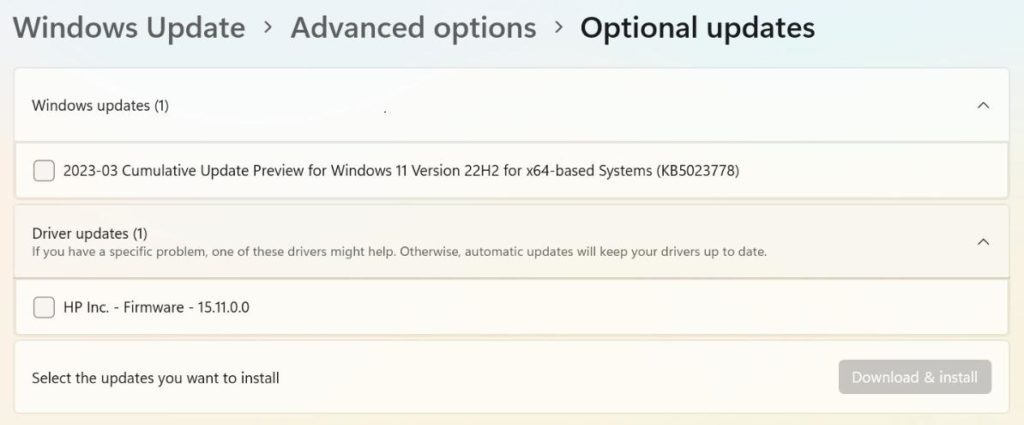
Step 8: Click on Download & Install button and ensure that your PC is fully updated.
Updating your PC regularly will ensure a smooth and error-free function of your computer.
Also Read: FIX: Your Virus And Threat Protection Is Managed By Your Organization Error
Method 2: Reset Windows Security.
The Windows 11 “This setting is managed by your administrator” issue can occur due to a bug in the Windows Security settings. Hence, resetting the Windows Security app may work wonders for you and resolve this issue. Here are the steps to go about it:
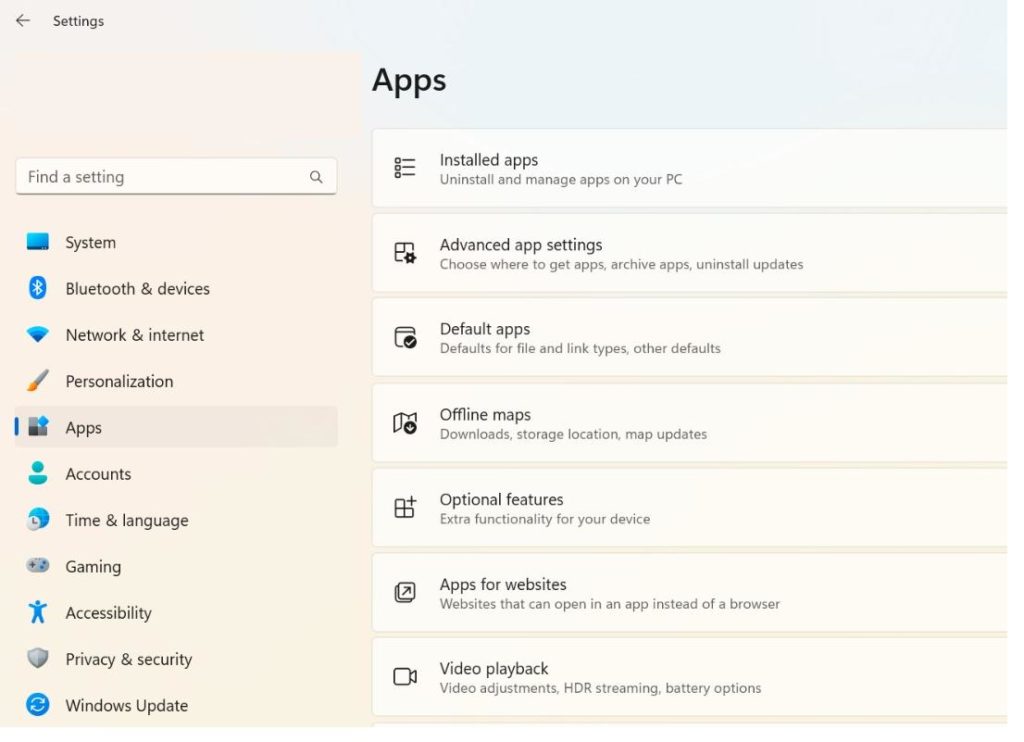
Step 1: Press Win + I to open the Windows Settings App.

Step 2: Click on the Apps tab from the left panel.
Step 3: Next, click on the Installed Apps option in the right panel.
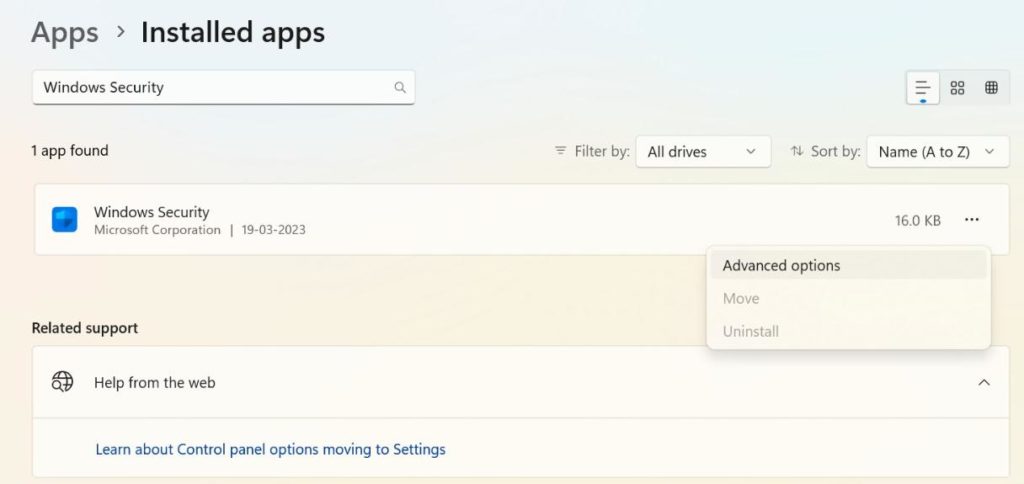
Step 4: A list of installed apps will now appear on your screen. You can use the search bar on the top and type Windows Security to locate this app faster.
Step 5: Once the search results appear, click on the three dots next to Windows Security app and choose Advanced Options.
Step 6: Scroll down in the Advanced Options window and locate the Reset section.
Step 7: Click on the Reset button and reboot your PC.
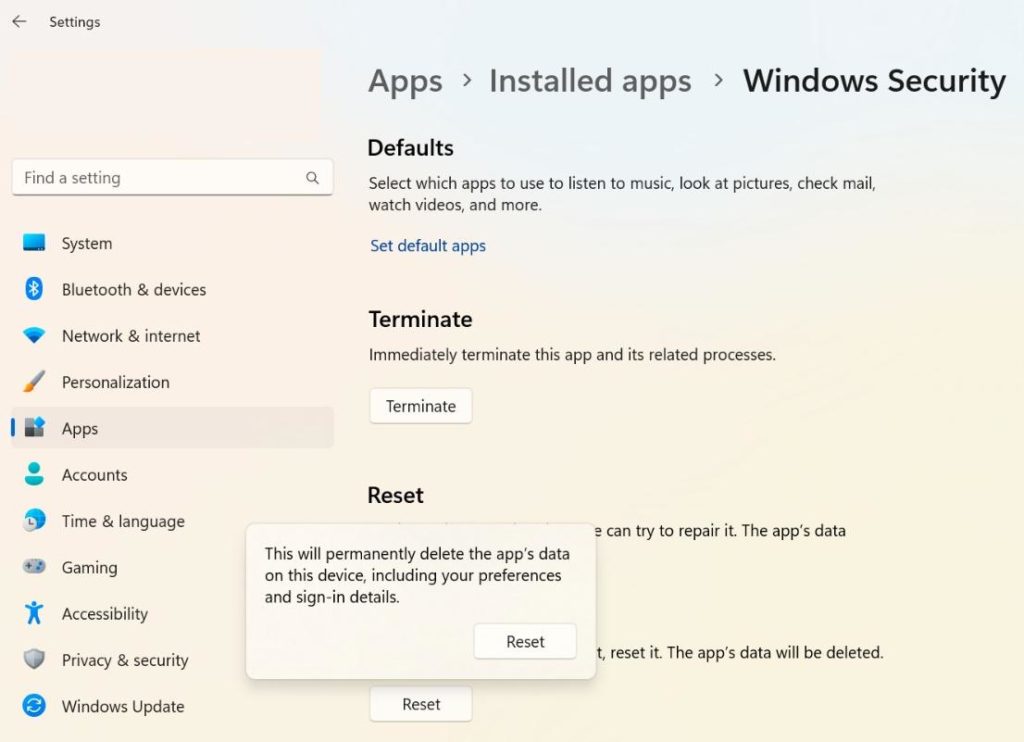
Note: All your customized Windows Security settings will be lost and you will have to configure them again.
Also Read: How To Remove Your Browser Is Managed By Your Organization Message
Method 3: Uninstall Third-party antivirus application.
Several antivirus programs from third parties have the ability to disable certain Windows Security components for their own good. The administrator problem in Windows Security can be fixed if you uninstall conflicting third-party antivirus software. Here are the steps to uninstall any third-party program on Windows PC.
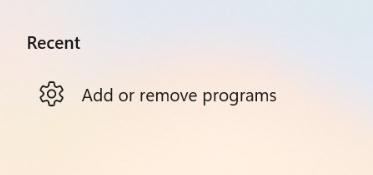
Step 1: Press Win + S to open the Search box.
Step 2: Type “Add or remove programs” and click on the Best Match result.
Step 3: A list of Installed apps will open on your screen. Click the three dots next to the app name you wish to uninstall and then choose Uninstall.
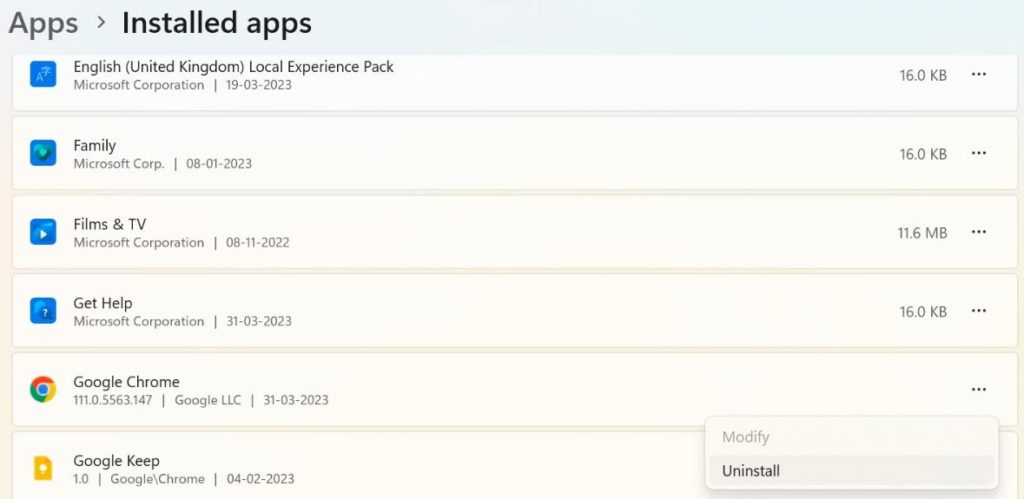
Step 4: Follow the on-screen directions and you will be able to remove the app from your PC.
If this fix resolves the problem, reinstalling the same third-party antivirus virus software is likely to cause it to happen again. Then you would have to decide whether to use Windows Security or your third-party antivirus program.
Also Read: How To Fix Windows 11 Blocking Websites Issues
Method 4: Use The Windows Registry Editor.
By using this tested registry repairing workaround, numerous customers have been successful in resolving the Windows Security administrator problem. The only key that needs to be deleted for this registry adjustment is a DWORD value. To implement this potential fix, modify the registry as follows:
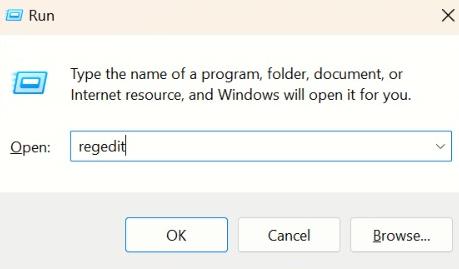
Step 1: Press Win + R to open the RUN command box.
Step 2: Type “regedit” and hit the OK button.
Step 3: Navigate to the following path using the left panel of the Windows Registry Editor app.
Computer\HKEY_LOCAL_MACHINE\SYSTEM\CurrentControlSet\Control\DeviceGuard\Scenarios\HypervisorEnforcedCodeIntegrity
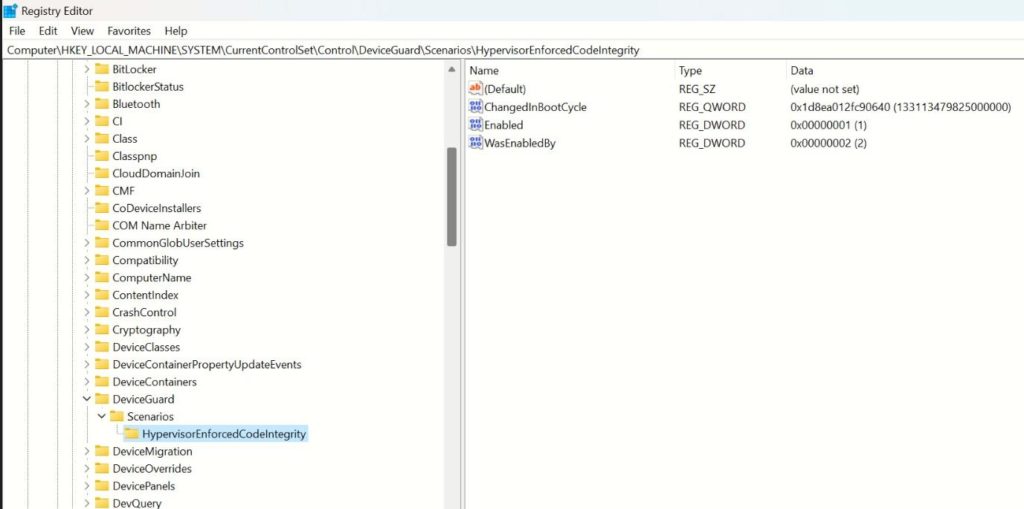
Note: You can copy and paste the above-mentioned path into the address bar of your Windows Registry Editor app.
Step 4: Locate the Enabled key on the right side of the Windows Registry Editor and double-click on it.
Step 5: A small box will open where you have to change the number under Value Data from 1 to 0.
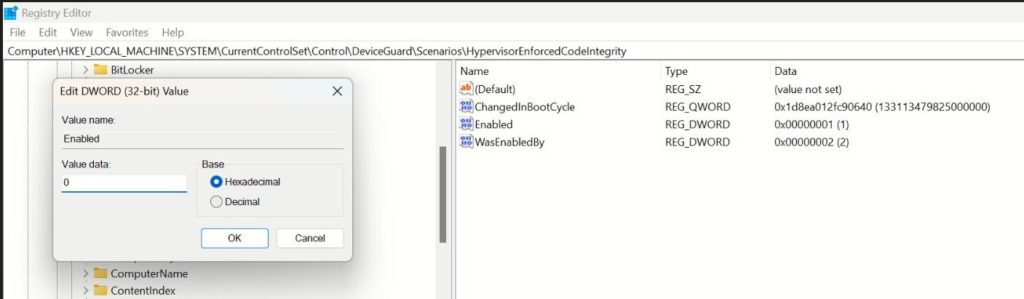
Step 6: Click on OK and exit the Windows Registry Editor.
Step 7: Reboot your PC and check if the issue persists.
Also Read: How to Fix the Install Button Missing From the Microsoft Store
Method 5: Reinstall Windows Security App.
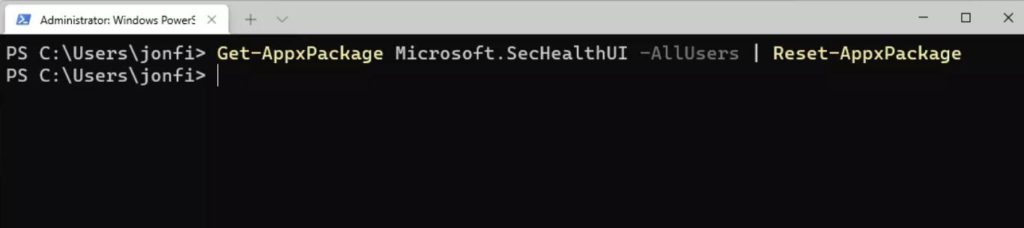
Windows Defender (aka, Microsoft Defender) isn’t installed on your PC like a typical program, so you can’t reinstall it like you do a regular software. Hence, running a PowerShell command can be used to reinstall the pre-installed Windows 11 security program. Try using the following command to reinstall Windows Security:
Step 1: Press Win + X to launch the Windows Power menu.
Step 2: Choose Terminal (Admin) from the list of apps.
Step 3: The Windows Terminal will now open. Click on the downward pointing arrow on the top bar and choose Windows Powershell.
Step 4: Copy and paste the below-mentioned command in the Windows PowerShell window followed by pressing the Enter key.
Get-AppXPackage -AllUsers | Foreach {Add-AppxPackage -DisableDevelopmentMode -Register "$($_.InstallLocation)\AppXManifest.xml"}
Step 5: Wait for the command to execute successfully and then reboot your computer.
Also Read: How To Fix Your Organization Manages Updates on This PC
Overcoming Windows Security Hassles: A Guide to Resolving the “Managed By Administrator” Error
These are the methods that Windows 11 users most frequently mention using to resolve the “setting is managed by your administrator” problem. Applying those suggested fixes will therefore probably make your PC’s “setting is managed by your administrator” problem go away. After that, you can customize any setting in Windows Security as needed.
Please let us know in the comments below if you have any questions or recommendations. We would be delighted to provide you with a resolution. We frequently publish advice, tricks, and solutions to common tech-related problems.
You can also find us on Facebook, Twitter, YouTube, Instagram, Flipboard, and Pinterest.