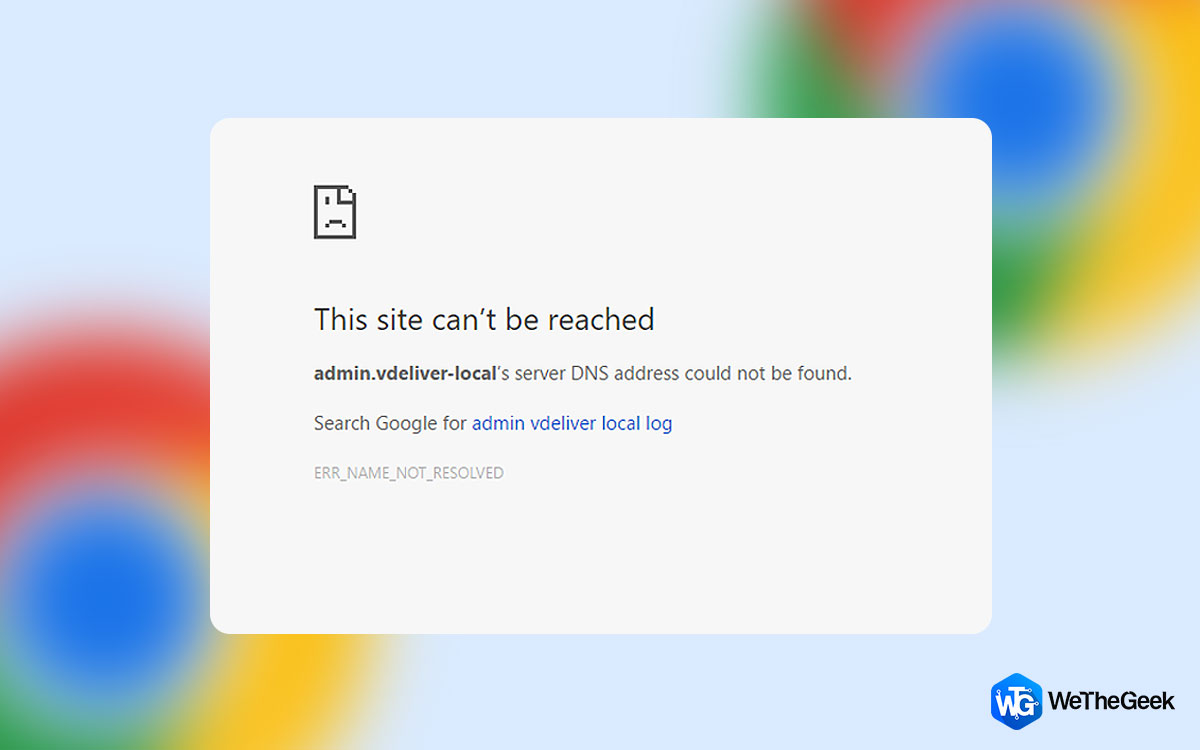
If anything you want to search for, makes you open Google Chrome then it is safe to say that Google Chrome is your default browser. Have you come across the situation when your Google Chrome gave up on you? We mean, have you got this error, “server DNS address could not be found”? If yes, then you are at the right place, as we have listed ways to resolve this issue.
In this post, we have discussed a few ways that will help you to fix, “server DNS address could not be found” error in Chrome.
There are five ways to resolve the issue, let’s know about them!
1. Update Your Drivers:
Drivers installed are recommended to be updated for a smooth functioning of your device. Outdated, corrupt drivers can result in application failure, system errors, and even cause blocking of your Internet access to some websites.
You need to make sure that all your drivers are updated. In case you find any driver outdated, you can manually or automatically update them.
Manually Update Drivers:
Once you know that system drivers are outdated, you can get them updated by visiting manufacturer’s website and look for a recent correct driver. For that, you should know both the manufacturer of the component and manufacturer of your PC. It could be a bit of a complex process, so if you want to avoid the hassle, you can use a third-party software to do it.
Automatically Update Drivers:
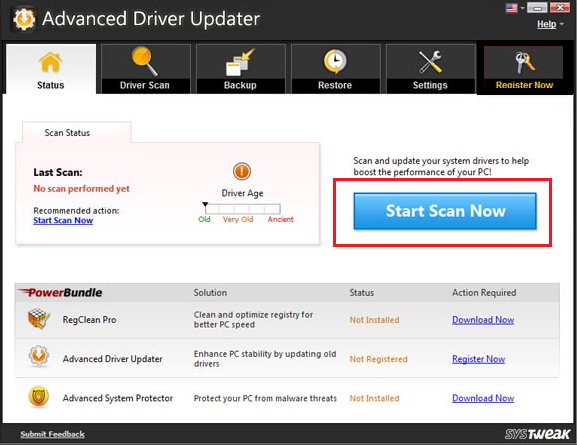
You can use Advanced Driver Updater, which is one of the best software and a good option to get your drivers updated automatically. Be it video, sound, display, graphics or any other driver, Advanced Driver Updater will scan and check, and if any of them is outdated, it fixes them. It results in a faster computer, fewer system crashes and more. The software takes a backup of your current drivers before installing the newer versions. the software is fully compatible with all Windows OS be it 10,8.1,8, 7, or Vista/XP.

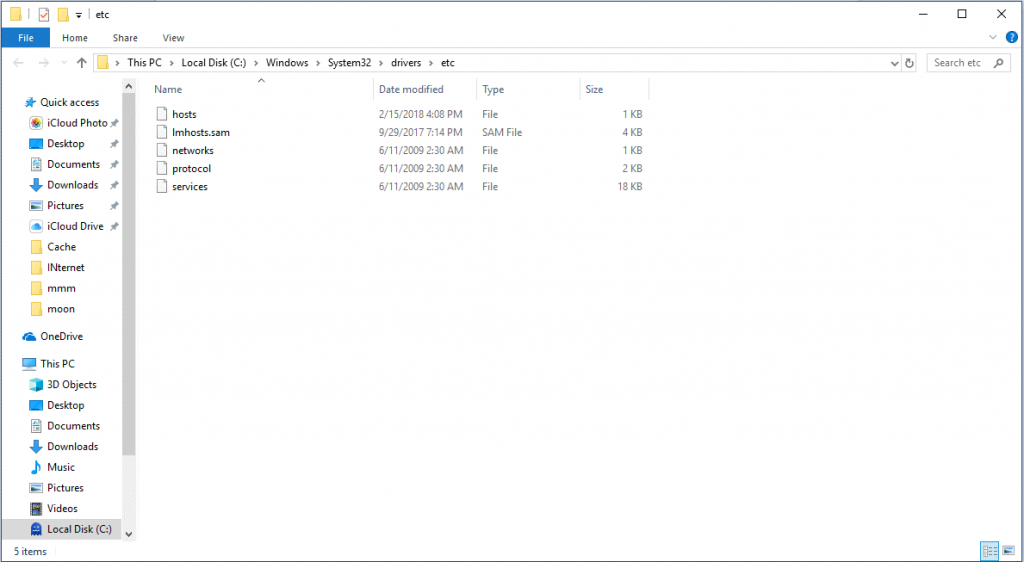
2. Delete all the Files in Your ‘etc’ Folder
It is an easy and simple single step fix to resolve the issue. Follow these steps:
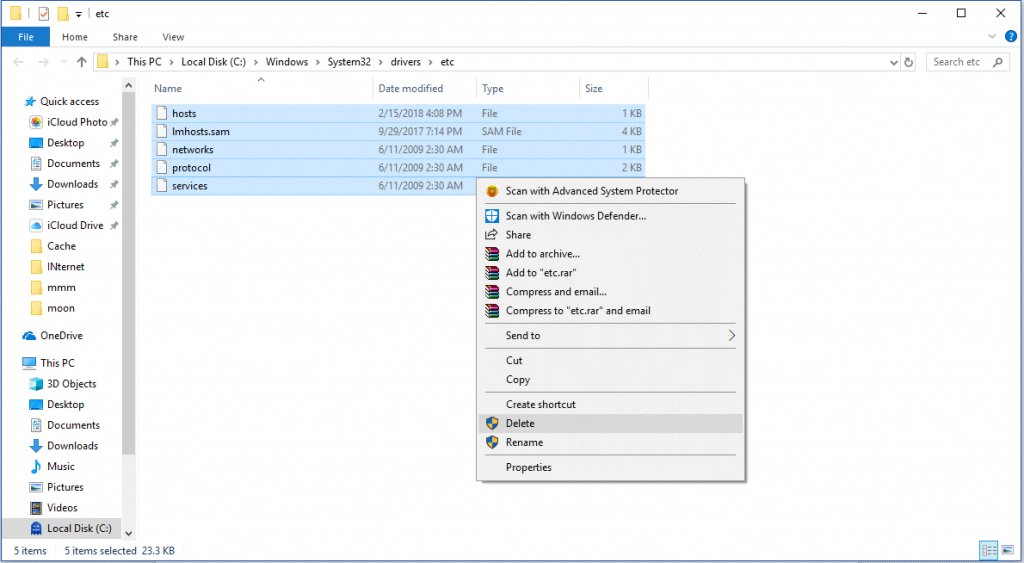
- All you need to do is navigate to the path: C:\Windows\System32\drivers\etc.

- Once you locate the etc. folder, press Ctrl and A to select all the files in the folder and press Delete to delete the files.
- Once the files are deleted, try to access the Internet with Chrome.
3. Clear Chrome’s Host Cache
Sometimes you are not able to access websites on Chrome when Chrome’s host cache is either corrupt or too full. Clearing the host cache can be an easy and simple fix. Follow these steps:
- Open Chrome and in the address bar: type – chrome://net-internals/#dns and press Enter to initiate the process.
- You will get Clear-Host Cache Button and click on it to clear the host cache.
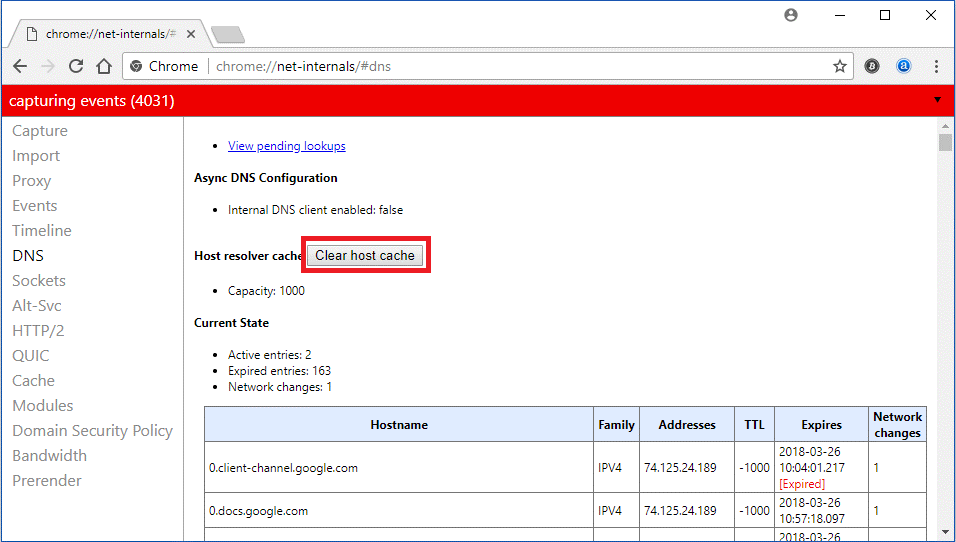
- Now, check whether the issue is resolved.
4. Configure Your DNS Servers
The issue might occur if your DNS server settings are not properly configured. Follow these steps to get them correctly configured:
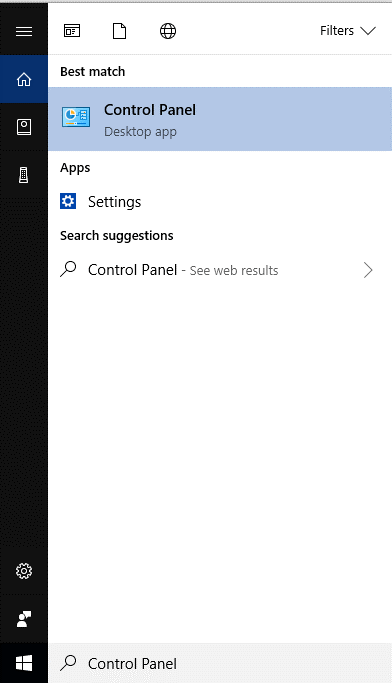
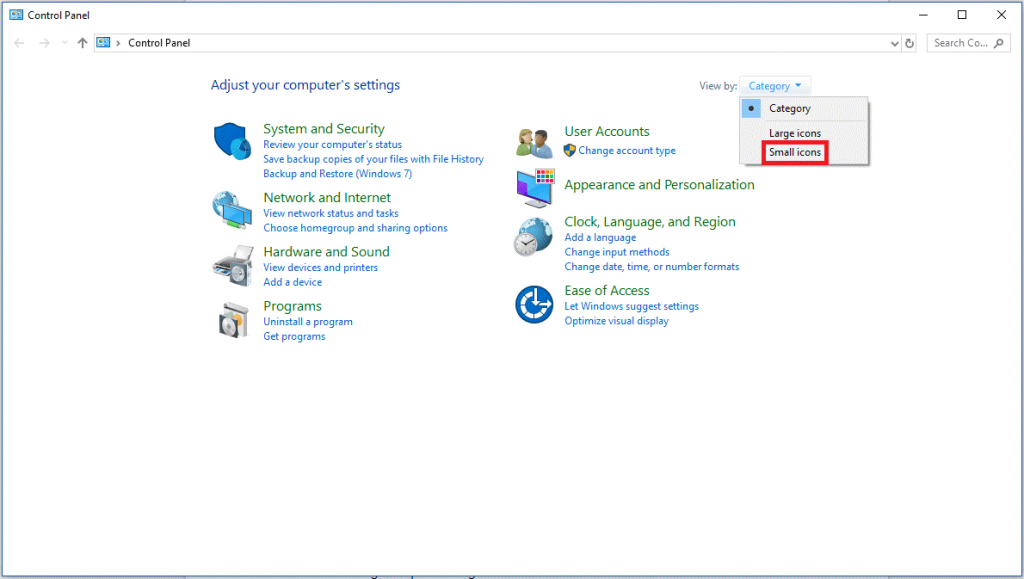
- Go to the search bar beside Start button and type Control Panel and press Enter.
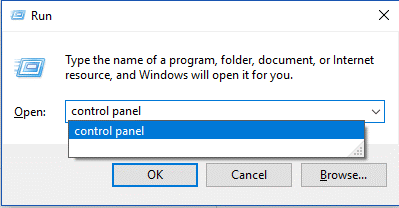
Note: Press Windows and R key to get Run window. Type Control Panel and click OK to open Control Panel.
- You will get Control Panel wizard. Locate View By from the right-hand side top corner and click on it to get Small icons.
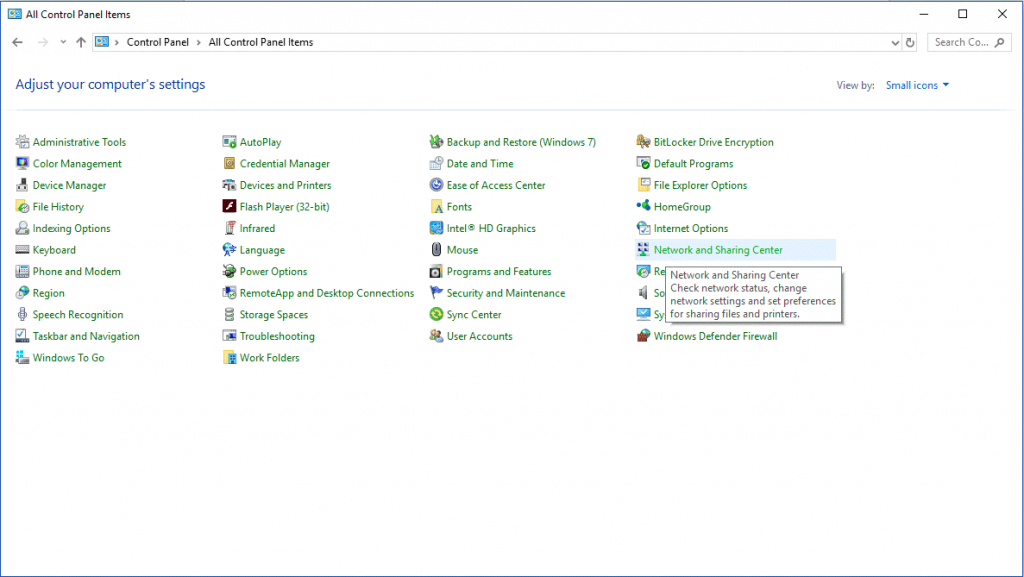
- Now locate Network and Sharing Center and click it to open.
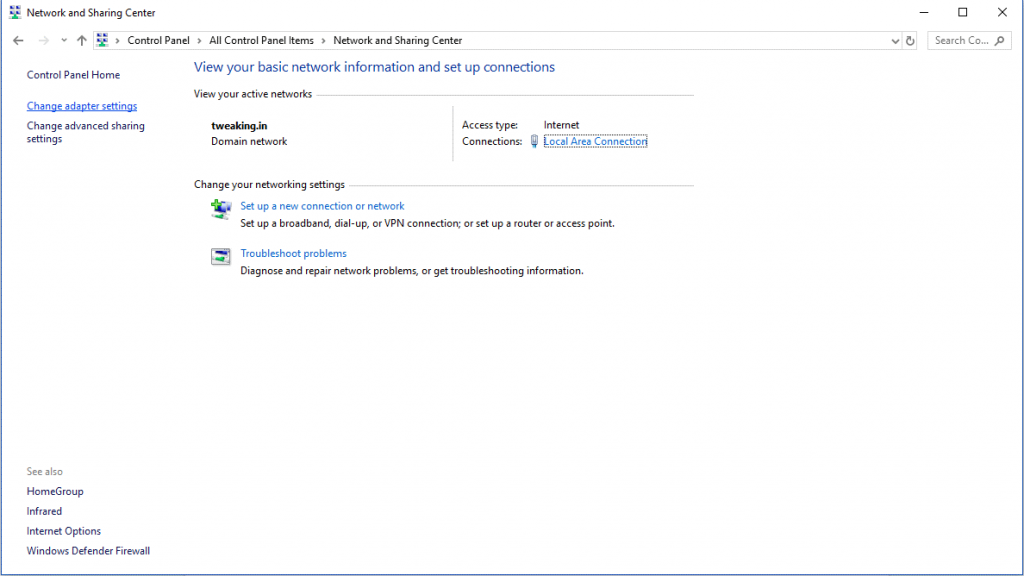
- Click Change Adapter Settings.
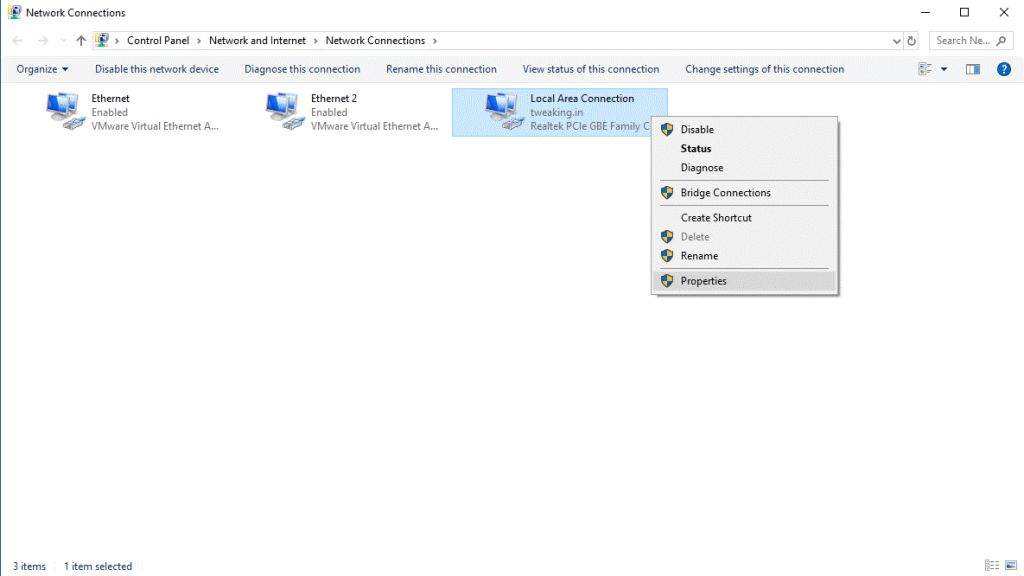
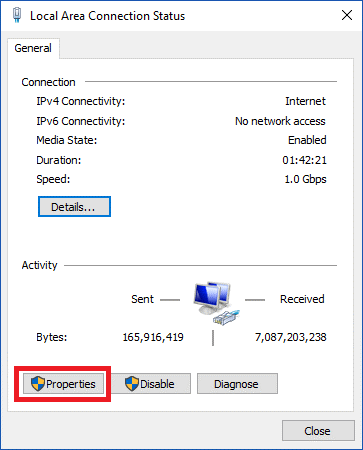
- Now right click on the Connection icon, either Local Area Connection or Wireless Network Connection, then click Properties.
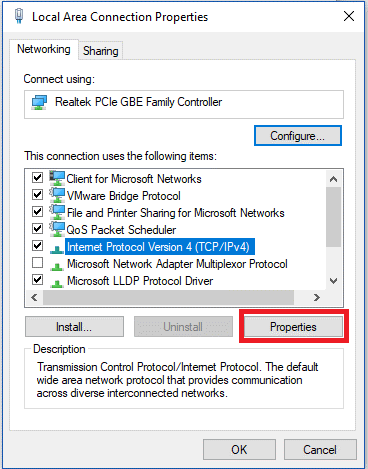
- Click Internet Protocol Version 4 (TCP/IPv4) then click Properties.
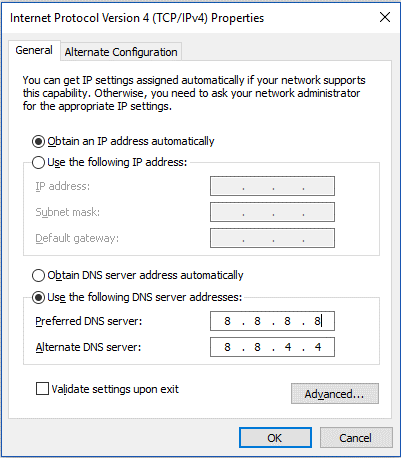
- You will get Internet Protocol Version 4 Properties window, check whether you are on General Tab. On General Tab, check whether ‘Obtain DNS server address automatically’ is selected or not. If not selected, click on it to select and click OK.
- If already selected, then select ‘Use the following DNS server addresses’ instead, then enter the following server address – Preferred DNS server: 8.8.8.8 & Alternate DNS server: 8.8.4.4 and click OK.
- Now check if the issue is fixed.
5. Renew and Flush The DNS
Windows automatically stores the IP addresses of the websites that you visit, so that next time you access them, they open faster than before. Although, if this cache gets outdated, it can prevent from accessing Internet altogether. If you suspect this could be causing the issue, then you can renew and flush the DNS. To do that follow these steps:
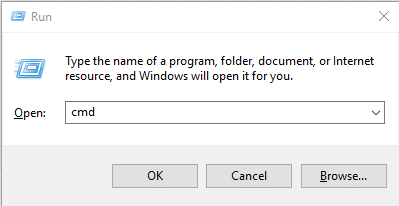
- Go to the search box, type Command Prompt or CMD, when command prompt option comes up, right click on it and select Run As An Administrator.
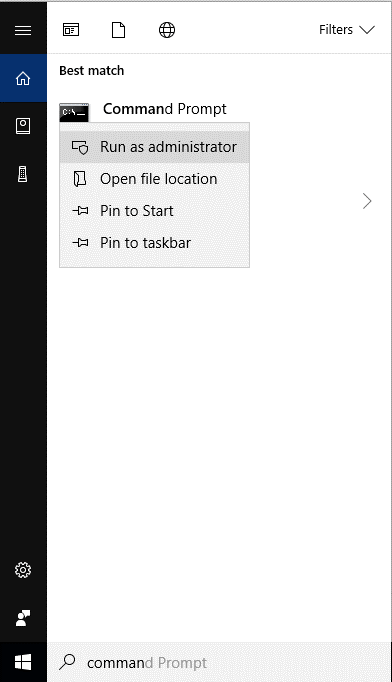
Note: Press Windows key along with R to get Run window. Type cmd then press Shift+Ctrl+Enter to open Command Prompt with admin rights.
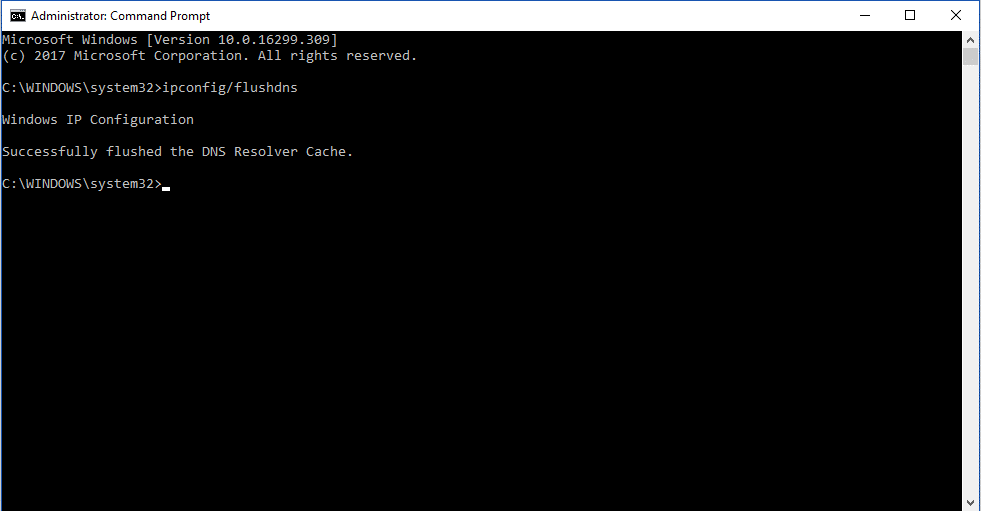
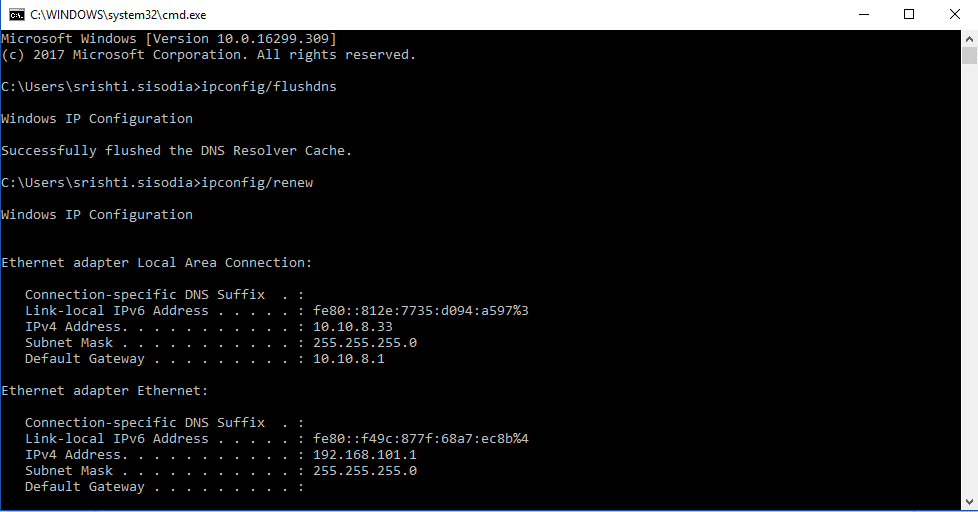
- Type ipconfig/flushdns and press Enter.
- Now, type ipconfig/renew and press Enter.
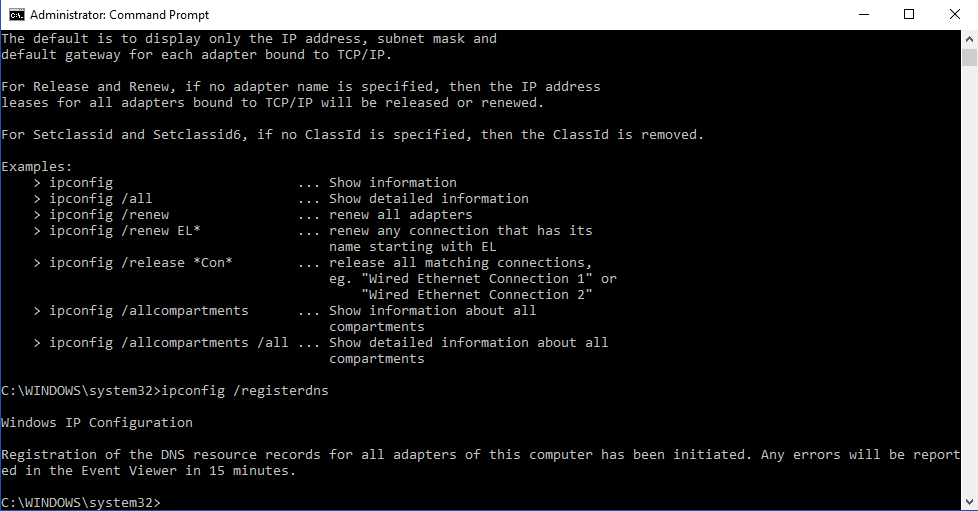
- Type ipconfig /registerdns and press Enter.
- Now restart your PC and check whether the issue is resolved.
So, these are the methods in which you can resolve the “fix server DNS address could not be found in Chrome”. Try them and let us know what worked for you. Also, let us know if you know any other way to resolve the issue.