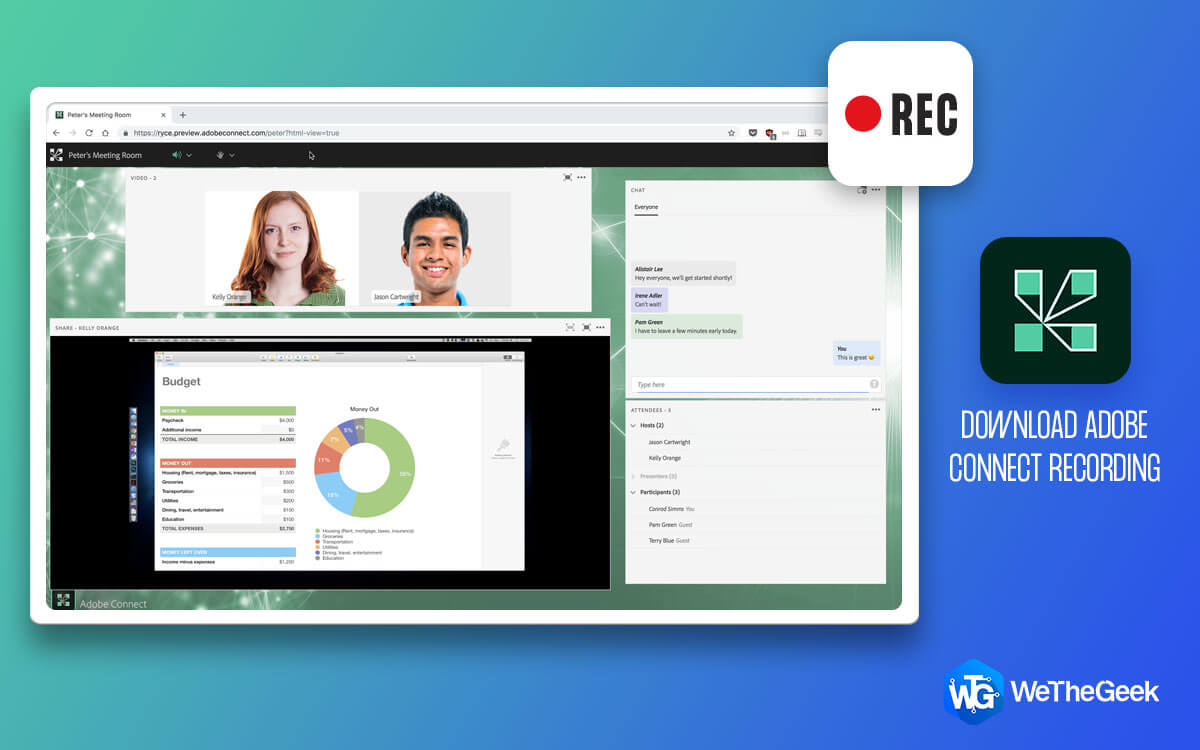
Adobe Connect is an excellent suite of software that helps create online tutorial videos and presentations. It also allows conducting video conferences, sharing desktops, remote training, and more. Using it, you can create unlimited and customizable meeting rooms, carry out breakout sessions, make a VoIP call, record meetings, and beyond.
Fact: By default recorded Adobe Connect videos are available on a local server that can be seen using a recording link. However, if you want to view the recorded video offline, you need to download them. If you are a host it’s easy, but if you are not, you will need to use third-party software.
Best Ways to Record and Download Adobe Connect sessions
Here are the best ways to record Adobe Connect sessions and download Adobe Connect recordings.
Method 1 – Recording Adobe Connect Meeting on Windows Using Built-In Recorder
For those who don’t know, here’s a fact Adobe Connect offers a built-in recorder, but it offers only basic functionality. And if you are okay with using a basic recording tool, continue reading the steps.
However, if you are looking for a tool with some add-on functionalities, jump to method 2 or 3.
In case you don’t want to use either TweakShot or EaseUS RecExperts, you can use the built-in option offered by Adobe Connect.
Note: Only the host can use this option to record Adobe Connect video. When the recording is done, save it on the location of your choice and watch with whenever you want.
Steps to record Adobe Connect:
Step 1. Launch Adobe Connect.
Step 2. Check the microphone.
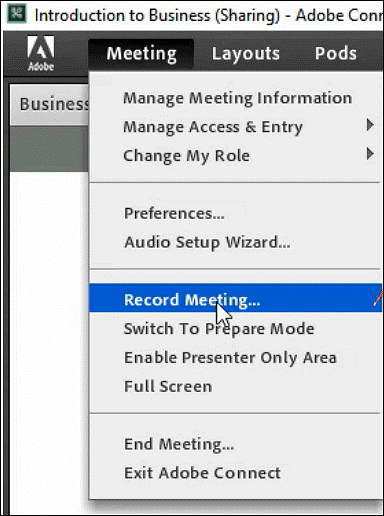
Step 3. Click Meeting option > Recording meeting.
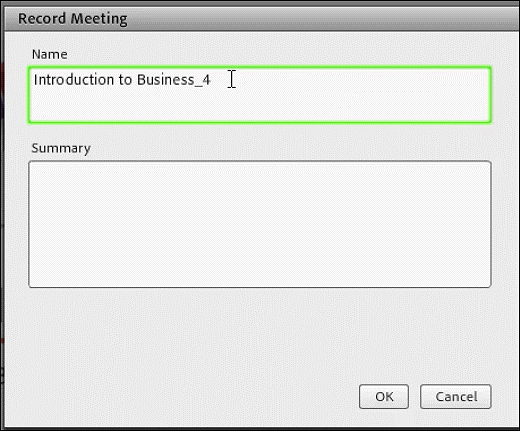
Step 4. Give a name, title, and description to the recording.
Make sure you click the Turn on Audio Conference feature. This will help record the audio too.
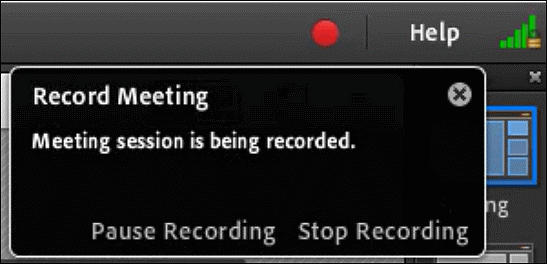
Step 5. To start the recording, click the Record Meeting button. When done, click Stop Recording to save the session recorded.
Even though you are not the host you can record the meeting using the steps mentioned below.
Method 2 – Recording Adobe Connect Meeting using the best screen capture and video recording software
As a powerful screen capture and video recording tool, using it you can record almost anything. You can record Netflix, YouTube videos, Adobe Connect videos, and a lot more. Most importantly, you can capture screenshots, edit them, blur images, pixelate them and do a lot more.
Once the tool is downloaded and installed you see a Big Eye with easy-to-access options. For instance, if you want to record a video, simply select the icon with a video camera that reads capture video.

Features TweakShot
- Capture video including onscreen changes and mouse movements
- Edit captured images
- Select area to capture
- Capture scrolling window
- Screen color picker
- Take an active window screenshot
To use TweakShot follow the steps below:
1. Download and install TweakShot

2. Run TweakShot the screen recording and screen capture tool
3. You will now see a Big Eye at the Taskbar, click it or right-click the TweakShot icon placed in the System Tray.
![]()
4. Select Capture Video from the context menu.
5. This will open a new window. Choose from the list of options – Rectangular Region, Full Desktop Without Transfer, and Full Desktop.
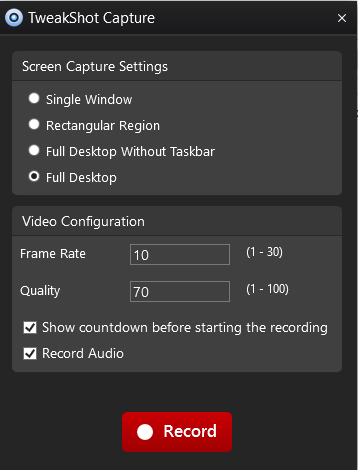
6. Select the Frame Rate and Quality.
Note: You can record the audio, only when a microphone is connected.
7. Click Record, you’ll now see the countdown
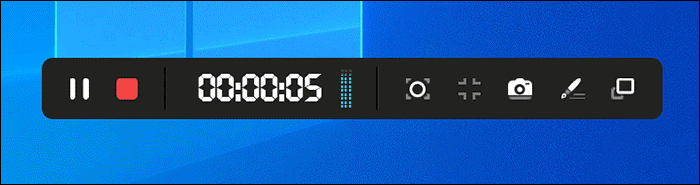
8. When the recording begins, you see a dotted line across the region this implies the recording is on. Also, the TweakShot icon will change into a blinking red icon.
9. When done, right-click the TweakShot icon present in the system tray and hit Stop
10. You’ll now have the Adobe Connect video recording saved.
Method 3. How to Capture Adobe Connect Session Online Using EaseUs RecExperts
Another way to record and download Adobe Connect recording is to use EaseUS RecExperts. This professional video recorder helps record videos in 1080p and 60 fps. Also, you can use it to review the recorded videos, and record videos played via Adobe screen recording utility.
This recorder also offers functions like basic video editing and helps remove unwanted parts. Also, you can use it to record a drawing on the screen, this means you can add annotations and review them later to understand things better.
EaseUS RecExperts
- Select different frame rate, output format, and bitrate
- Record either the full screen or a part of the screen
- Using Task Scheduler, record automatically
- Use it as a Facecam recorder
- Share recordings to YouTube
How to Use EaseUS RecExperts & record video when using Adobe Connect
1. Download and install EaseUS RecExperts

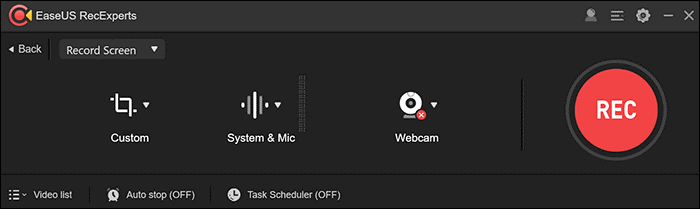
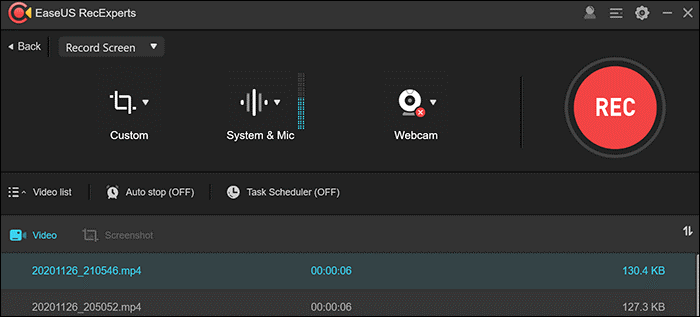
2. Click Record Screen > Custom > mark the area you wish to record.
3. Select the audio source from the System & Mic option.
4. To add the webcam footage, click the Webcam option.
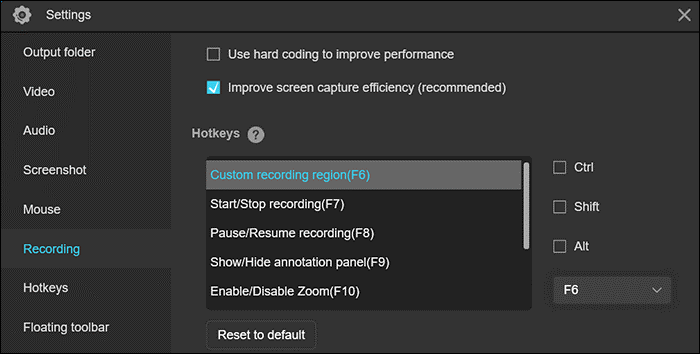
5. After configuring the basic screencast options, go to the advanced options.
6. To open Setting, click the gear icon.
7. Select a format for your screencast and choose other options.
8. When done, click OK and save the settings.
9. Go back to the welcome screen.
10. Click Rec and wait for the software to start recording
11. When done recording click Stop. You are now all set to download the Adobe Connect recording.
12. All recorded screencasts are saved at one location.
13. To view them, from the home screen select Video list and check all the recordings you created using EaseUS RecExperts.
Conclusion
Using either the built-in option, TweakShot or EaseUS RecExperts you can record and download videos from Adobe Connect. We hope you find this information helpful and can record Adobe Connect videos even when you are not the host. Both third-party tools will help record high-quality videos. Without the blink of an eye, you can use either of them. Do let us know which one you picked and why in the comments section.
Frequently Asked Questions
Q1. Where are Adobe Connect recordings stored?
Every recording you make using Adobe Connect is automatically assigned a unique URL and is saved under the Recordings tab for the meeting room in Adobe Connect Central.
Q2. How do I speed up recordings in Adobe Connect?
Adobe Connect does not have an in-built variable speed function. However, if you want to adjust playback speed, you can ask the instructor to make an MP4 version of the recording and use a video player with the option to tweak playback speed.
Q3. How do I record a video in Adobe Connect?
To record a video in Adobe Connect, follow these steps:
1. Launch Adobe Connect
2. Check the microphone > click Meeting > Record meeting.
3. Give a brief description of the meeting
4. When you are done with the recording click Stop.