
The eject option is available to enable users to remove external storage devices safely. If a USB drive is removed while it is still in use, data may become corrupt. All connected Peripherals are shown in the Safely Remove Hardware dialogue window, allowing you to halt them for safe ejection. You can choose an option on Windows 11’s system tray to eject an external USB flash drive after inserting it. The methods listed below allow you to create shortcuts for launching that dialogue even though it can be accessed using a Run command.
Also Read: Unable to Eject USB Drive on Windows 11? Here’s the Fix!
How To Create A Desktop Shortcut For “Remove USB”?
The Run command for the “Remove USB” window is lengthy and difficult to recall. You can make a desktop shortcut from its command to make that feature easier to access. Next, you may modify the shortcut to appear on the taskbar, the Start menu, or the keyboard. To create a desktop shortcut for the “Remove USB” dialogue in Windows 11, follow these steps:
Step 1: Make a Right-Click on any empty space on your desktop and choose New -> Shortcut from the context menu.
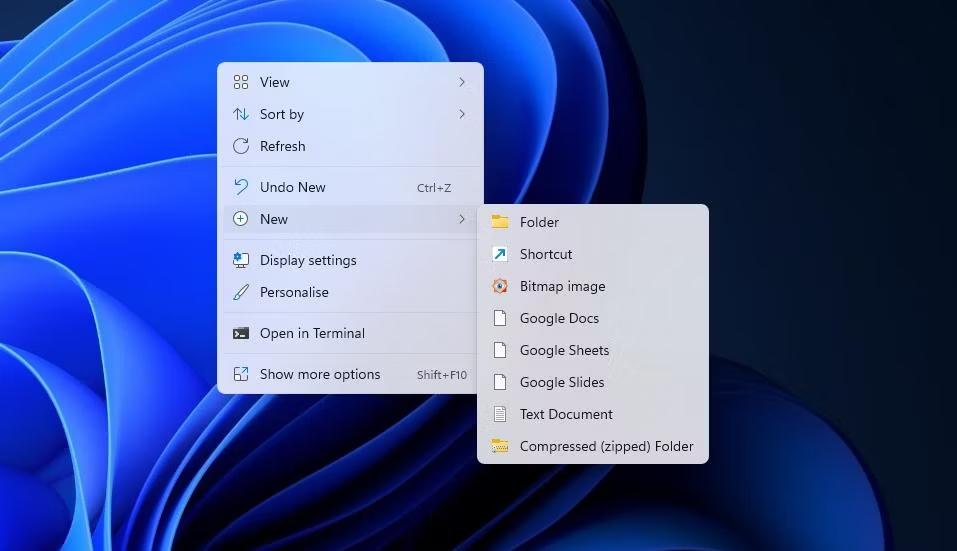
Step 2: A dialog box will open where you have to enter the following command in the Location box.
rundll32.exe shell32.dll,Control_RunDLL hotplug.dll
Step 3: Click on Next and then type a name for this shortcut like “Remove USB”.
Step 4: Click on the Finish button and a shortcut will appear on your Desktop.
Step 5: Double-click on the shortcut created and a new box will open which will list all the devices connected to your PC.
Step 6: Click Stop after choosing the USB device you want to unplug from the list. This will end whatever is currently using the drive, releasing it for removal.
Note: To view a device’s properties in the Remove USB dialogue, you can choose a device, then click the Properties button. This will provide a window with information on the device’s general, event, and driver information.
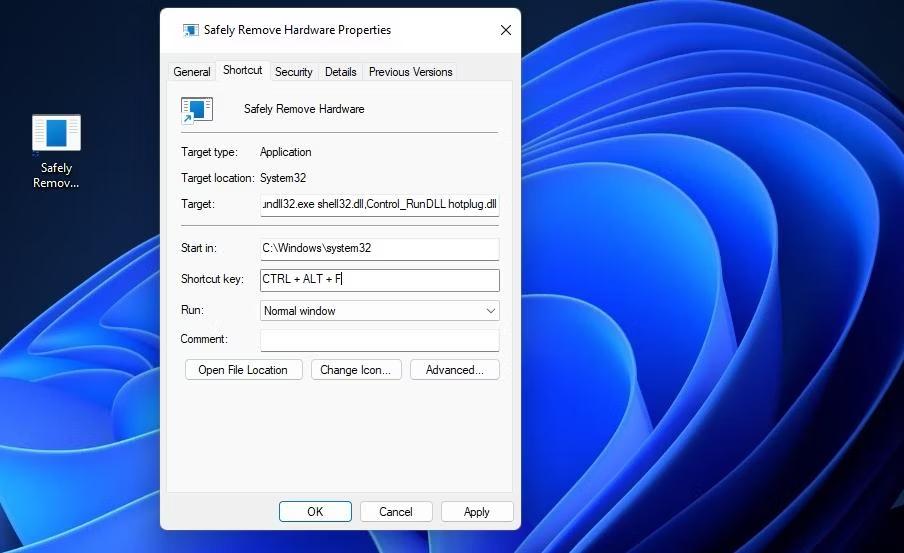
By default, the Remove USB desktop shortcut will be empty. Right-click on the icon and select Properties. Then click on the Change Icon button in the Shortcut tab of the Properties box and select a different icon.
Also Read: 7 Ways to Fix Problem Ejecting USB Mass Storage Device
How To Create Taskbar And Start Menu Shortcuts For “Remove USB”?
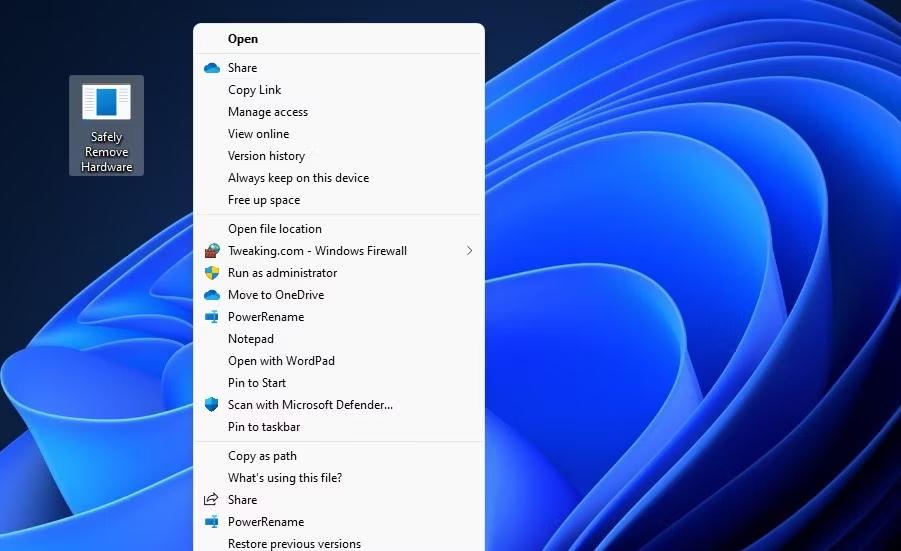
You can pin Safely Remove Hardware to the taskbar or Start menu from the desktop shortcut you have just created in the above step. To accomplish this, right-click the “Remove USB” shortcut icon on the desktop and choose Show More Choices. Windows 11’s traditional context menu offers options to ‘Pin to taskbar’ and ‘Pin to Start menu’. Select any of these options and the shortcut will be created instantly.
Note: The desktop shortcut for “Remove USB” will become unnecessary if you have created the taskbar or Start menu shortcut. You can select the desktop shortcut and delete it to remove redundancy.
How To Configure A Hotkey To “Remove USB”?
In Windows 11, there is no faster method to open anything than by pressing a hotkey. You can open anything with a keyboard shortcut without minimizing windows to access the desktop, bringing up the Start menu, or using the mouse at all.
The desktop shortcut for “Remove USB” remains useful even after the creation of such a hotkey. The desktop shortcut that you assigned to the hotkey is activated. Hence, deleting the desktop shortcut for “Remove USB” will also destroy the shortcut key.
Also Read: How To Fix “The Item That This Shortcut Refers To Has Been Changed ” Error
How To Create A Context Menu Shortcut For “Remove USB”?
A hidden location to add shortcuts for accessing things is the context menu. If you right-click the desktop area, you will be able to open that dialogue by adding a Safely Uninstall Hardware option there. To add a Safely Uninstall Hardware option to the context menu, adhere strictly to the following instructions:
Step 1: Press Win + R to open the RUN box and type Regedit followed by the Enter key.
Step 2: Navigate to the following path in your Registry Editor.
Computer\HKEY_CLASSES_ROOT\DesktopBackground\Shell\
Step 3: Once you have the Shell key highlighted, make a right-click and select New > Key.
Step 4: Rename this key as Safely Remove Hardware.
Step 5: Make a right-click on the Safely Remove Hardware key and again select New > Key.
Step 6: Now, rename the second key as Command.
Step 7: Double Click the string value of the second key and input the following path into the Data Value box:
C:\\Windows\\System32\\control.exe hotplug.dll
Step 8: Click on the OK button.
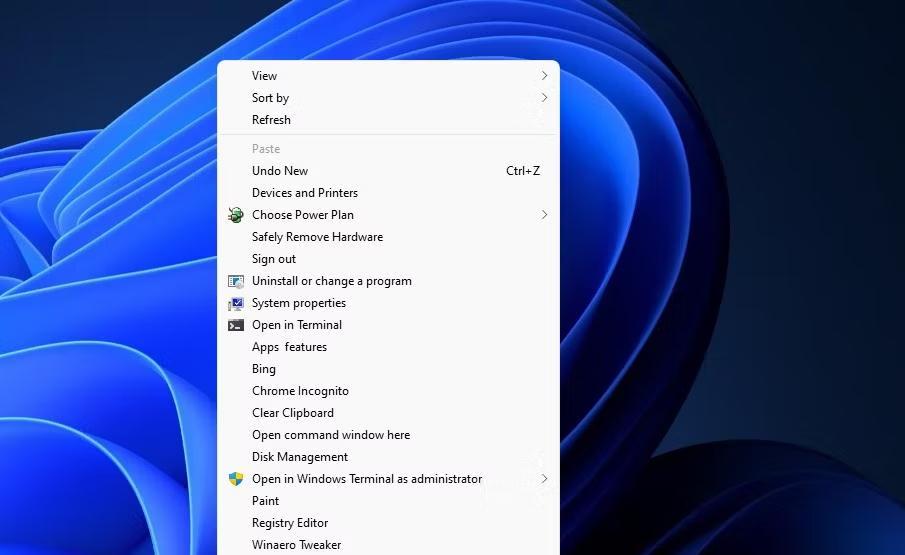
You may now check out the new item you added to Windows 11’s context menu. Make a right-click on any empty space on your Desktop and click on Show More Options to reveal the classic context menu. You will find the option Safely Remove Hardware in the context menu.
Also Read: 150+ Windows 11 Keyboard Shortcuts to Boost Your Productivity
The Final Word On How To Create A “Safely Remove Hardware” Dialog Shortcut In Windows 11?
Any of the aforementioned techniques will enable you to access the dialogue window when you need to remove a device by creating a shortcut for Safely Remove Hardware. With additional options for viewing device information, that dialogue offers customers a convenient substitute method for securely removing USB drives. Use that dialogue to view the linked drives’ properties and choose to stop them so you can remove them without damaging your data.
Please let us know in the comments below if you have any questions or recommendations. We would be delighted to provide you with a resolution. We frequently publish advice, tricks, and solutions to common tech-related problems. You can also find us on Facebook, Twitter, YouTube, Instagram, Flipboard, and Pinterest.