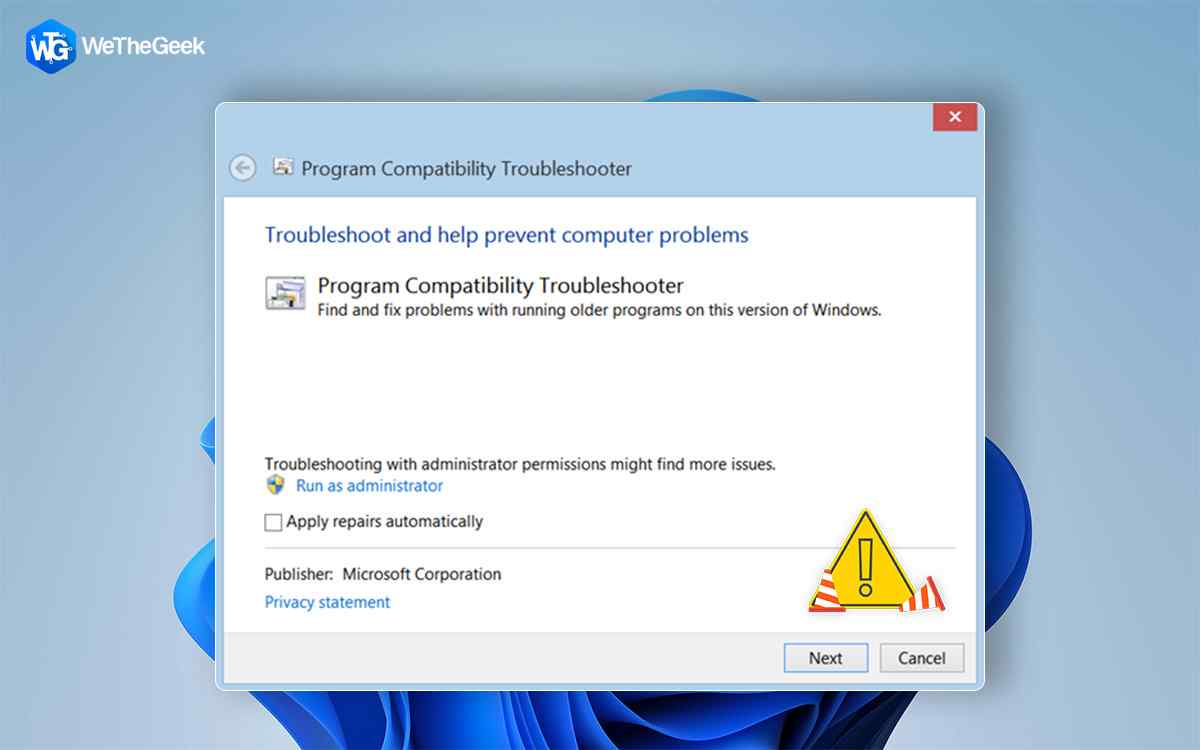
Recently upgraded to Windows 11? Unable to run programs or apps that were running smoothly on the previous versions of Windows? Well, it is a commonly experienced issue where some of your programs (or apps, games, or utilities) might not run or function poorly on your device, especially after the upgrade.
One of the quickest ways to check whether a program is compatible with your current Windows version is by running the compatibility troubleshooter. The compatibility shooter scans and diagnoses the underlying issues.
Is compatibility troubleshooter not working on Windows 11? In this post, we have listed a few solutions that you can use to resolve the issue. But before we begin, let’s learn a little about the compatibility troubleshooter and how to use it on Windows.
Let’s get started.
Also read: How To Fix Windows Update Troubleshooter Not Working
How to Use the Compatibility Troubleshooter on Windows?
Tap on the search icon placed on the Taskbar, and type the name of the program or app that you need to troubleshoot. Right-click on the program’s name and select the “Open file location” option.
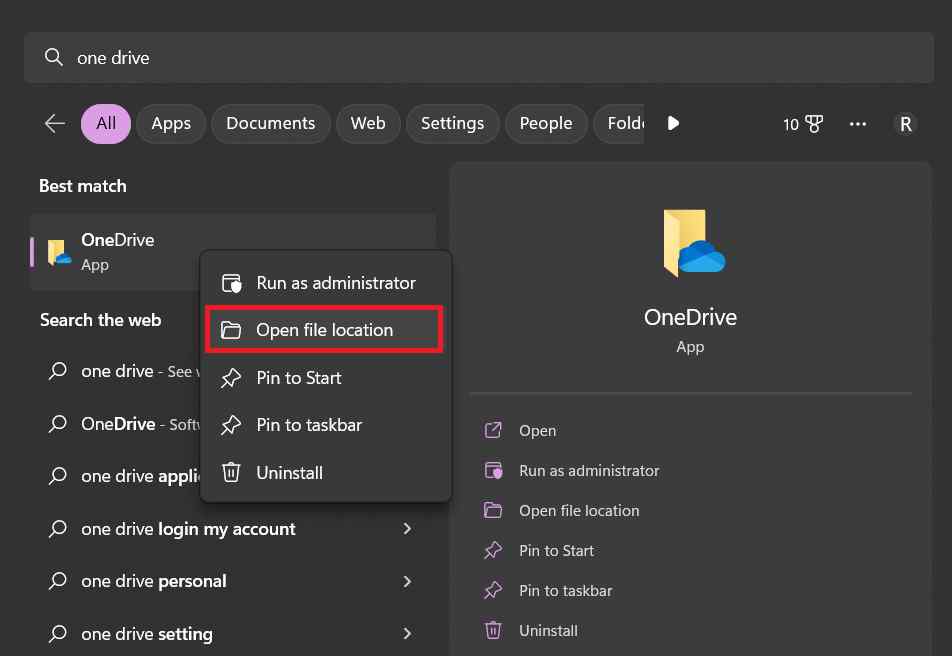
You will now be redirected to the file location. Right-click on the app name and select “Properties”.

The Properties window will now appear on the screen. Switch to the “Compatibility” tab.
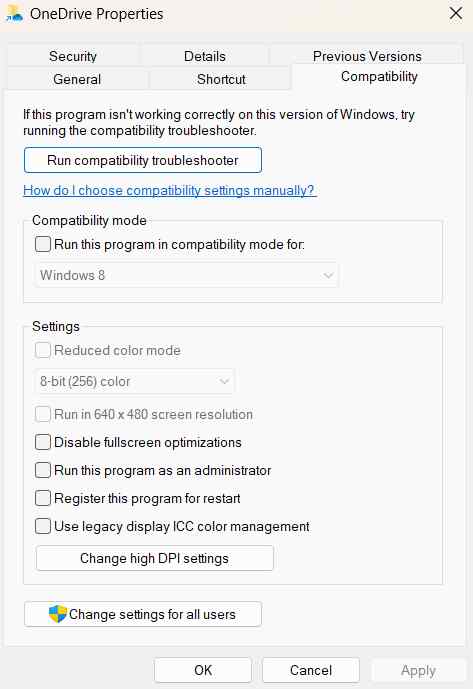
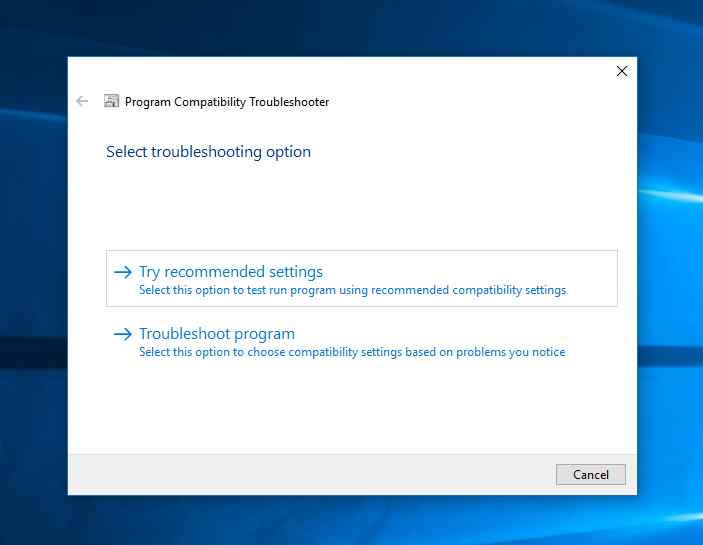
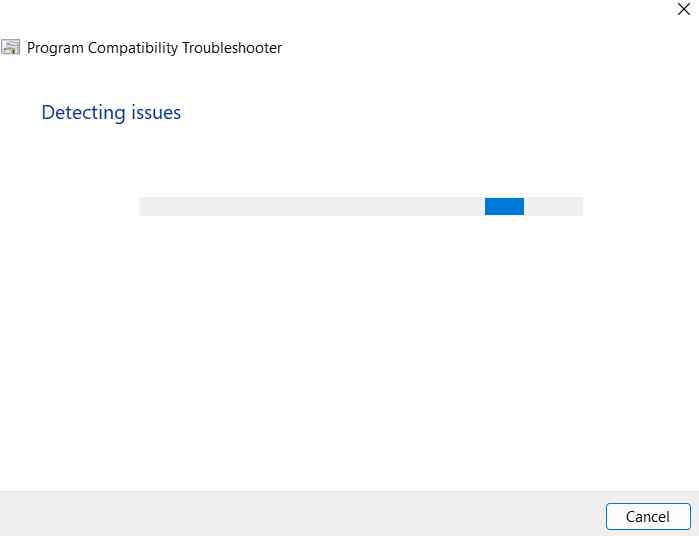
Hit the “Run compatibility troubleshooter” button to get started.
Follow the on-screen instructions to perform the troubleshooting process.
Also read: 7 Ways To Fix Your Ethernet Connection Not Working On Windows 11?
Compatibility Troubleshooter not Working on Windows 11? Try these Solutions
Solution 1: Set the TEMP and TMP Variables
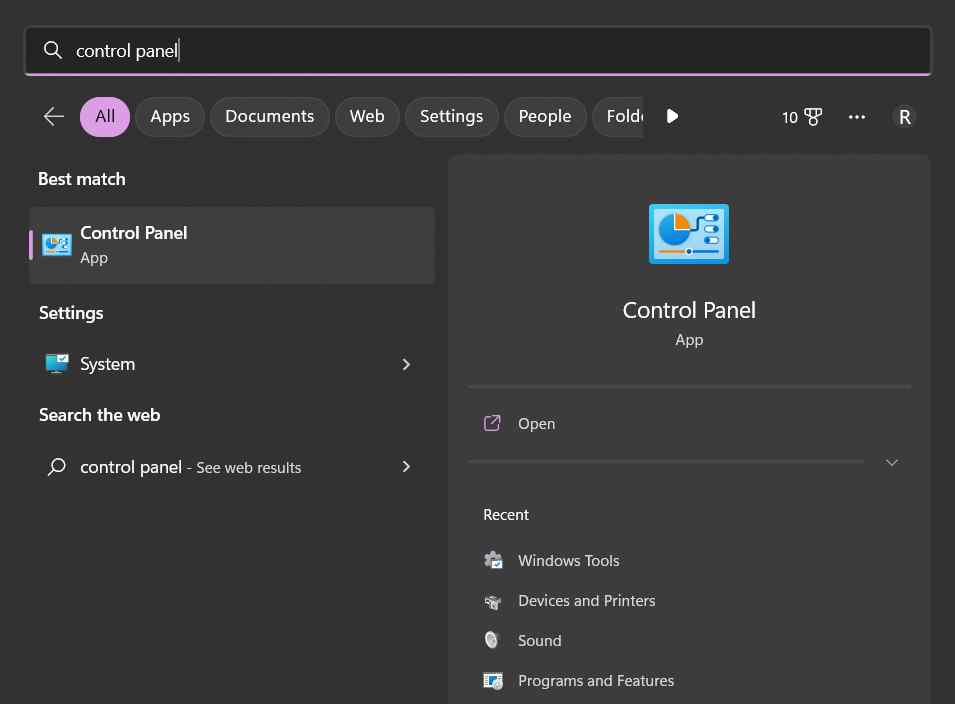
1. Tap on the search icon on the Taskbar, type “Control Panel” and hit Enter.
2. In the Control Panel window, type “Environment variable” in the search box.
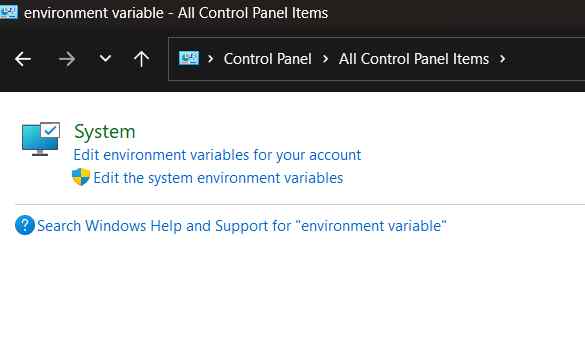
3. Now, select the “Edit the system environment variables” option.
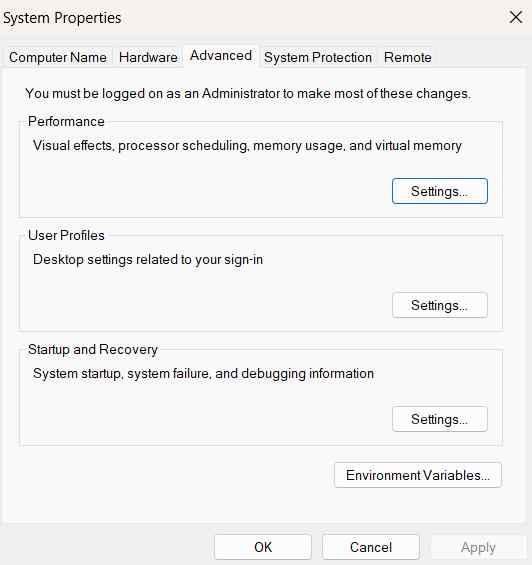
A new window will now appear on the screen. Tap on the “Environment Variable” button.
4. Check if the path of TEMP and TMP variables is set to C: drive. If it is not set to C: drive, select it and then hit on the “Edit” button. Change the variable value to “C:\Temp”.
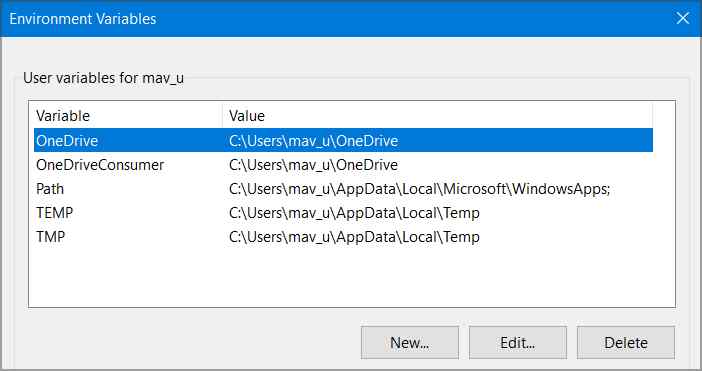
5. Hit on the OK button to save changes.
Modifying the environment variable value can help you resolve the compatibility troubleshooter not working issue. Do give it a shot!
Also read: 9 Ways To Fix Windows Update Fails To Install Windows 11/10
Solution 2: Boot Windows in Safe Mode
1. Tap on the Windows icon, and hit on the “Power” icon. Press the Shift key and tap on “Restart”.
2. Once your device restarts, you will see the following options on the screen:
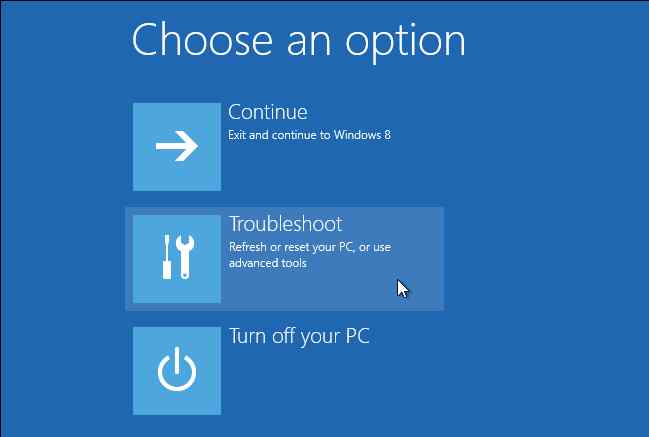
3. Select “Troubleshoot”.
4. Tap on “Advanced Options” and then select “Startup Settings”. Click on the “Restart” button.
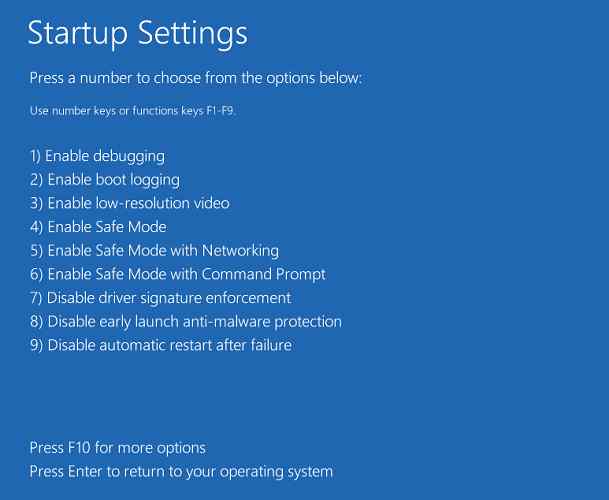
The Startup settings will now appear on the screen. Press the F4 key to select “Enable Safe Mode”.
Your Windows PC will not boot in Safe Mode. Run the Compatibility Troubleshooter and check if the issue was resolved.
Solution 3: Enable the Cryptographic Service
1. Press the Windows + R key combination to open the Run dialog box. Type “Services.msc” and hit Enter.
2. In the Services window, look for “Cryptographic Services”. Double-tap on it to open Properties.
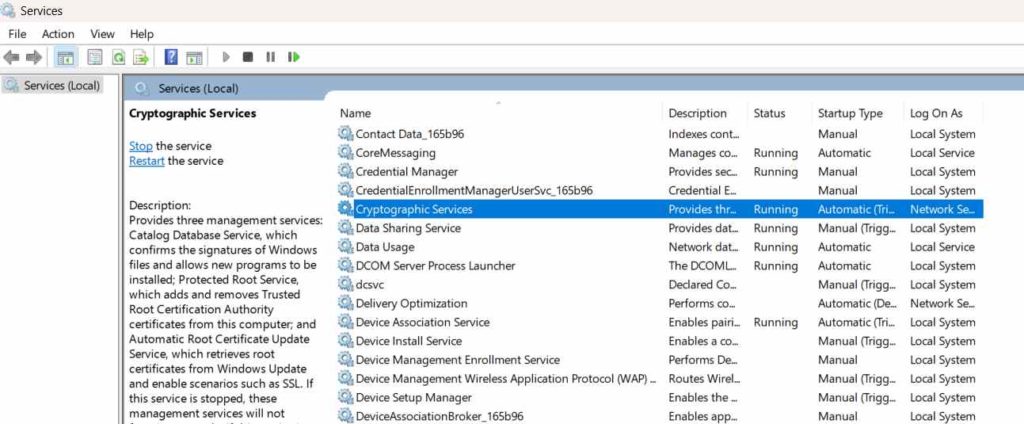
3. Set the “Startup Type” value to “Automatic”.
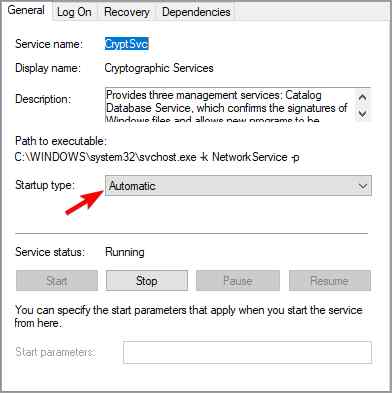
4. Hit on the OK and Apply buttons to save the recent changes.
5. After manually enabling the cryptographic service, run the compatibility troubleshooter and check if the issue still persists.
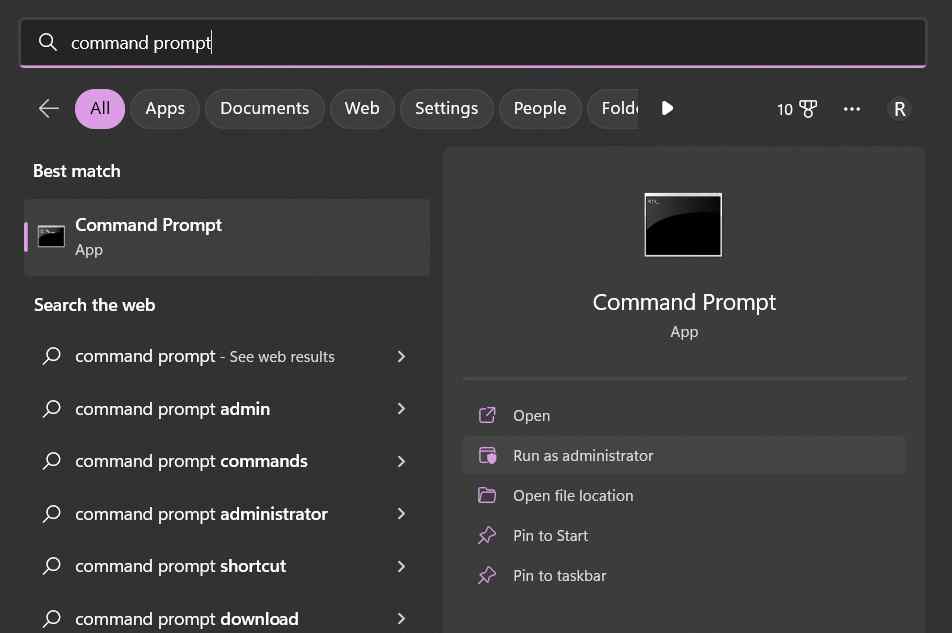
Solution 4: Flush the DNS Cache and Reset Winsock Catalog
Here comes another useful workaround to fix the “Compatibility Troubleshooter not working” issue on Windows 11.
1. Tap on the search icon on the Taskbar, type “Command Prompt” and select the “Run as administrator” option to launch Terminal in admin mode.
2. In the Terminal window, enter the following command and hit Enter to execute it:
ipconfig /flushdns
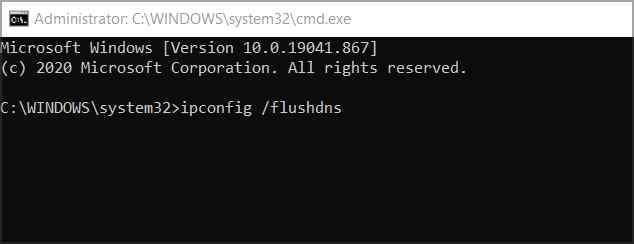
3. Now, run another command to reset the winsock catalog:
netsh winsock reset
After executing both of these commands, reboot your PC and check if the issue was resolved.
Solution 5: Reset Windows
Tried the above-listed solutions and still not able to resolve the issue? Well, you can try resetting your Windows PC as a last resort. Here’s what you need to do:
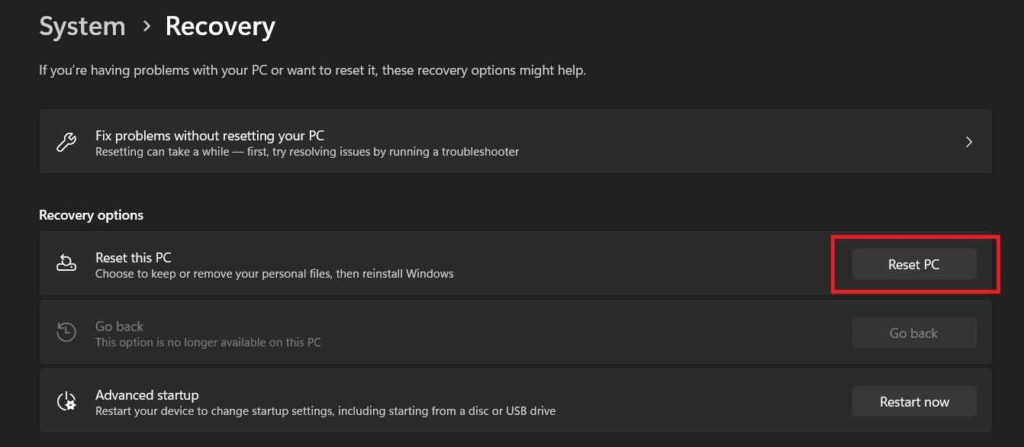
1. Launch the Settings app, and switch to the “System” category from the left menu pane. Scroll down and select “Recovery”.
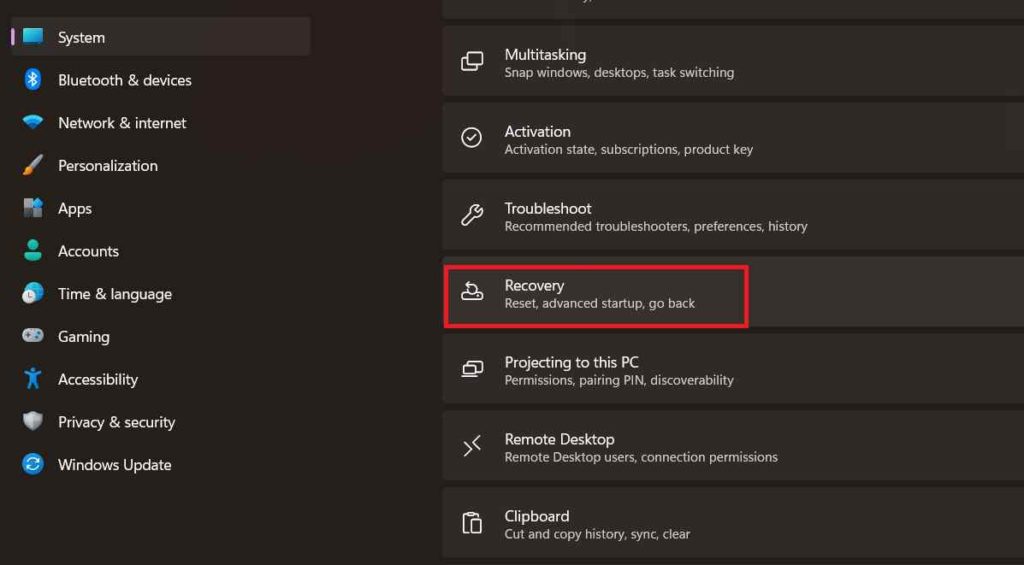
2. Tap on the “Reset this PC” option.
Windows will now offer you two options: Keep my files and Remove Everything.
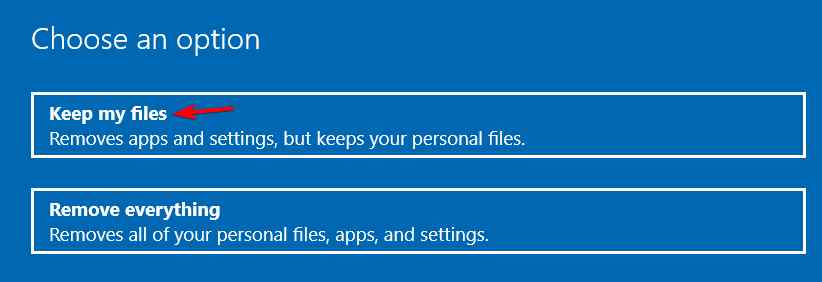
3. Make your preferred choice to proceed. Tap on the “Next” button. Follow the on-screen instructions to reset your Windows PC.
Also read: Control + Alt + Del not Working on Windows PC? Here’s the Fix!
Conclusion
Here were a few simple solutions to fix the compatibility troubleshooter not working issue on Windows 11. So, if you are experiencing any issues in running the compatibility troubleshooter on your device, you can use any of the above-listed workarounds to get past any difficulties.
Was this post helpful? Feel free to share your thoughts in the comments section. Don’t forget to follow us on Facebook, YouTube, Flipboard, Instagram.