
Despite the availability of number of viable communication platforms, iMessage still remains the best bet for several Apple users to exchange text messages and other media files. It’s feature-rich and undoubtedly the most secure messaging platform. So, if you’ve recently switched to Apple and curious to know How to set up iMessage on your Mac, iPhone & iPad devices, then this guide is a treat for you!
What is iMessage?
iMessage is a built-in instant messaging service designed for everyone in Apple’s ecosystem. You can use the platform to communicate with your favourite people via iMessage on iPhone, iPad, Mac, or Apple Watch. What makes it different from regular text messages? It uses the Internet for communication and it’s just not limited to text messages; you can transfer documents, pictures, videos, contacts, voice memo, location, and even group conversation with multiple Apple users.
How To Set Up & Use iMessage On MacOS?
To set up iMessage on your Mac, follow the instructions below:
STEP 1- Launch Messages on your Mac machine from your Applications folder or from dock and sign up with your Apple ID.

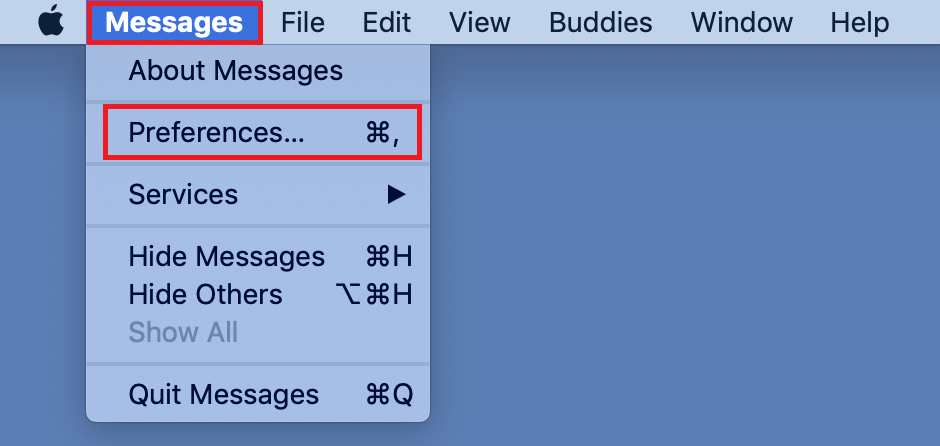
STEP 2- Click on the Messages in the Menu bar > Preferences or you can also reach there by pressing Command + Comma.
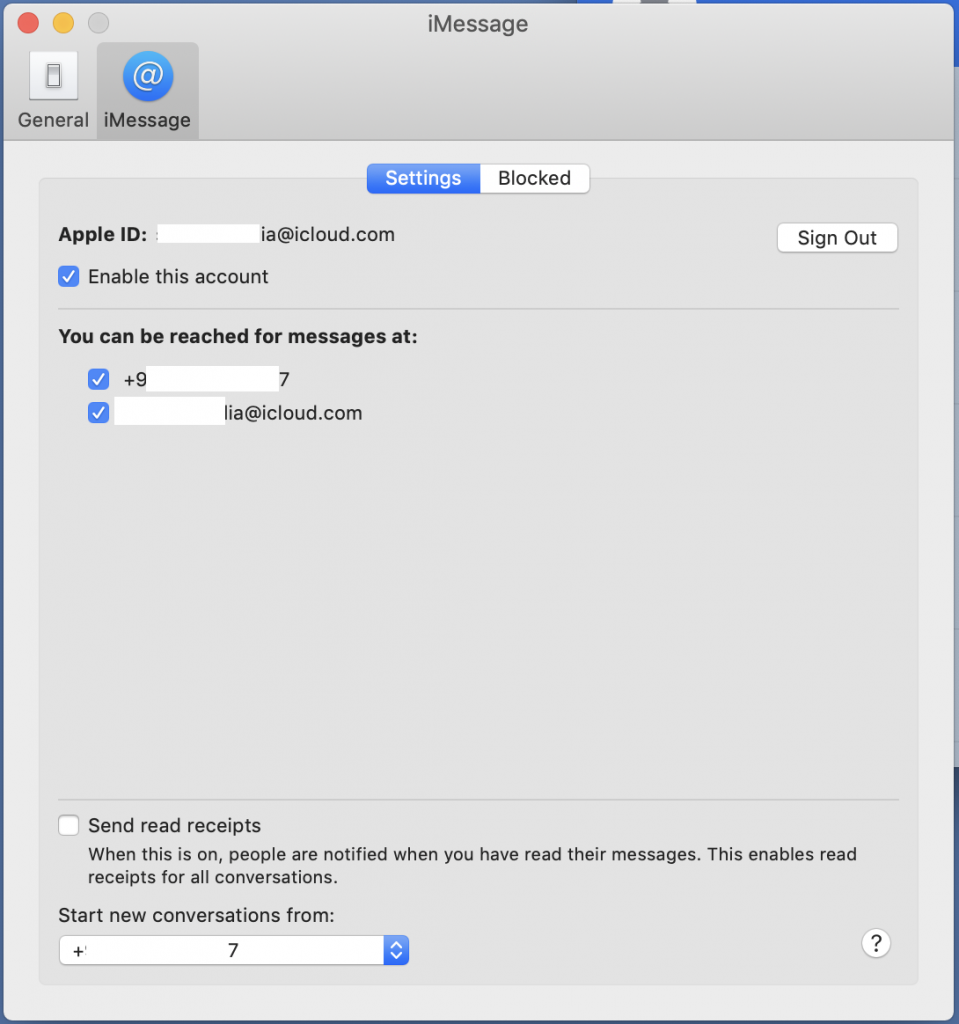
STEP 3- Now under iMessage tab > select the phone number & mail address at which you would like to be contacted.
STEP 4- Once signed in, you can start chit-chat with your friends and family.
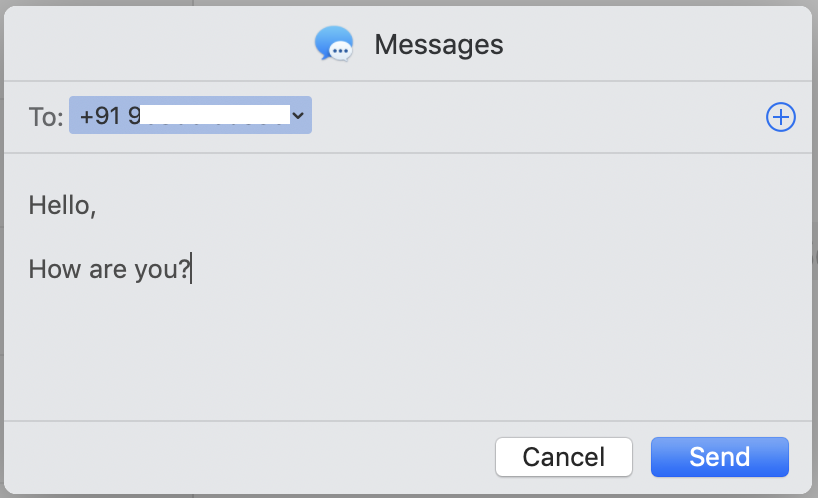
STEP 5- To start your first conversation, click on the new message icon, located next to the Search box.

STEP 6- Type in your message in the text field, add necessary emojis or attachments like photos, videos or documents.
STEP 7- Enter the recipient’s name or phone number & hit the return button to send your message.
That’s how you enable iMessage App on your MacOS!
 How to Fix iMessage not Working on MacFacing issues in iMessage on your Mac? Here is how it can be fixed quickly. Check these settings on your...
How To Activate iMessage on iCloud in MacOS?
To enable Messages on iCloud, all you have to do is:
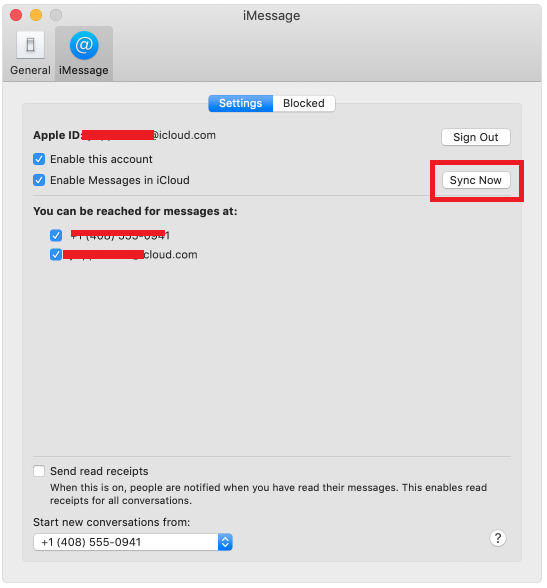
STEP 1- Launch the Messages App in MacOS > Pull down the Messages menu > Preferences.
STEP 2- Click on the Accounts tab > Check the box next to ‘Enable Messages in iCloud.
STEP 3- Hit ‘Sync Now’ button which will let you sync all your messages on iCloud instantly.
Note: Do not forget to turn it on your iPhone or iPad for better synchronization of messages and contacts.
How to Setup And Use iMessage on iCloud in iOS?
Make sure you’re running iOS 11.4 or above to access iMessage service in iCloud. If you’re unable to find the option in your iCloud’s settings, then it’s probably the time to update your device.
STEP 1- Head towards the Settings menu > tap on your name on the top of the screen to launch iCloud settings.
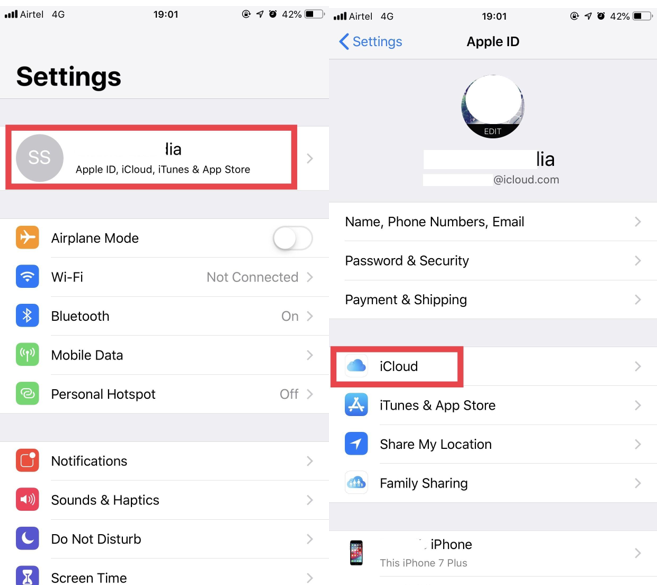
STEP 2- Find & toggle on the Messages option.

STEP 3- Now that you’ve successfully enabled Messages in iCloud, all your messages would be synced between iCloud servers and other apple devices (on which you’re already using iMessage).
How To Delete A Message on iMessage?
To remove a message permanently from your iMessage, just open the conversation > long press message you wish to delete, then you will get a pop-up. Tap on More. Select the messages you want to delete.
Tap on Delete icon located at the bottom left corner to delete message.
Have questions? Let us know in the comment section!
Stay Tuned for more Mac guides, tips, tricks & reviews!