On PCs to identify internal hard disk drives, SD cards, USB, optical drives, and external hard disks, drive letters are assigned. Therefore, when a drive letter is not assigned to an external & USB device, things get complicated & you are unable to access files saved on it. Also, the programs dependent on the drive cannot work properly.,
Generally, Windows assigns drive letters but due to the Virtual Disk service not running and certain other issues, Windows fails to assign it. However, there’s nothing to worry about as in this post, we will learn how to change external drive letters to Windows 10.
Best Way To Fix Windows Doesn’t Assign Drive Letter to External & USB Drive
To make the drive letter available, you’ll need to use the Disk Management console and assign the letter.
Note: Drive letter can only be assigned if Windows recognizes the partition (s) on the connected USB drive and is formatted with NTFS, exFAT, and FAT32. If the disk is unallocated or the system file is detected as RAW, you’ll need to first repair the disk.
Assigning Drive Letter to External Drive via Disk Management
To assign a drive letter, follow these steps:
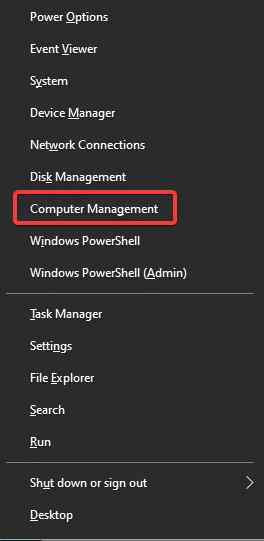
1. Press Win + X > and select Computer Management.
2. Next go to the Storage section -> Disk management.
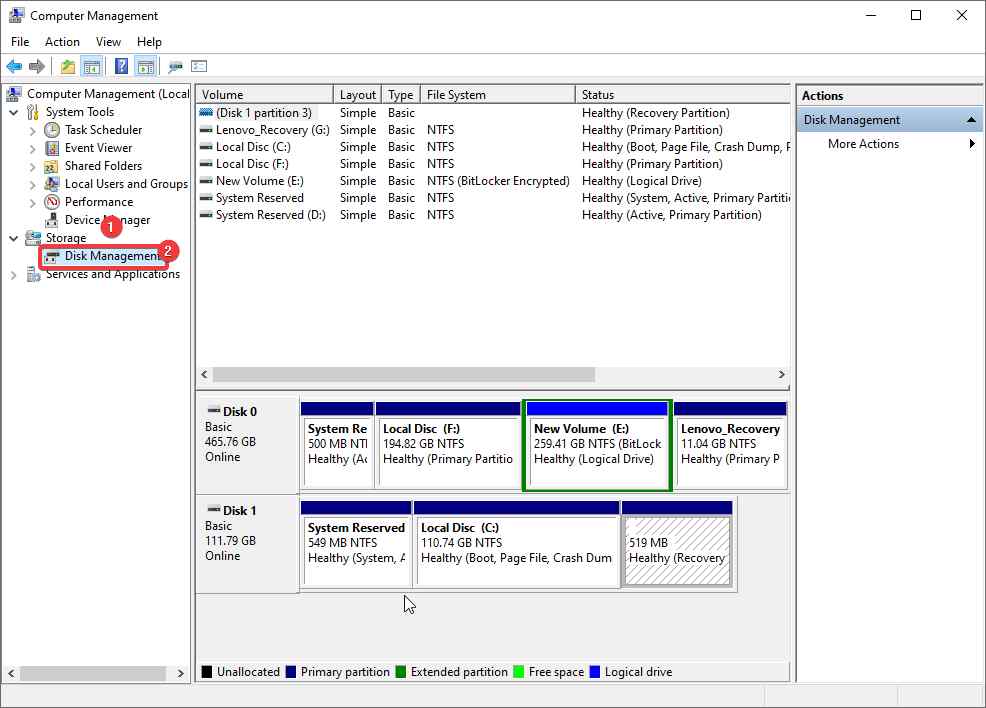
3. In the list of drives, look for the connected removable USB drive.
4. You will see the disk status as online but without a drive letter.
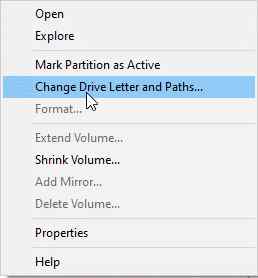
5. To assign a drive letter, right-click on the partition and select the “Change Drive Letter and Paths,” option.
6. In the window that appears, click the “Add” > Assign the following drive letter > from the drop-down list select the drive letter you want
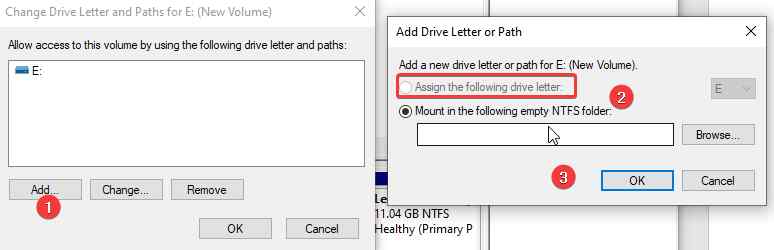
7. Click OK.
That’s it, this way you can assign the drive letter.
Note: Once the USB drive is disconnected or you restart the system, the drive letter needs to be re-assigned. If this annoys you, move to the next step.
To avoid manually assigning an external drive letter, follow these steps:
How to fix Automatic drive letter assigning Windows 10?
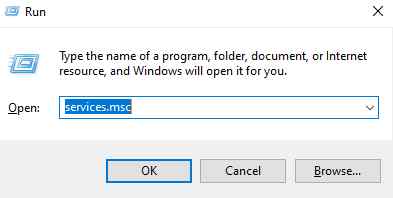
1. Press Windows + R and then open the Run window
2. Type services.msc > Ok
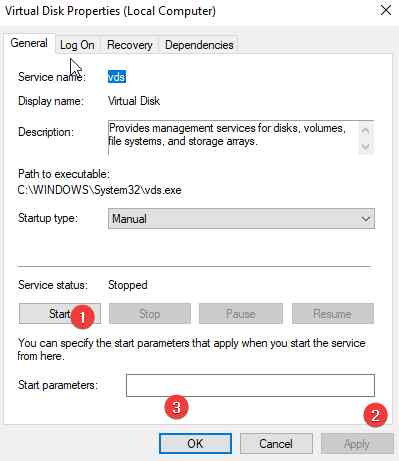
3. Look for Virtual Disk
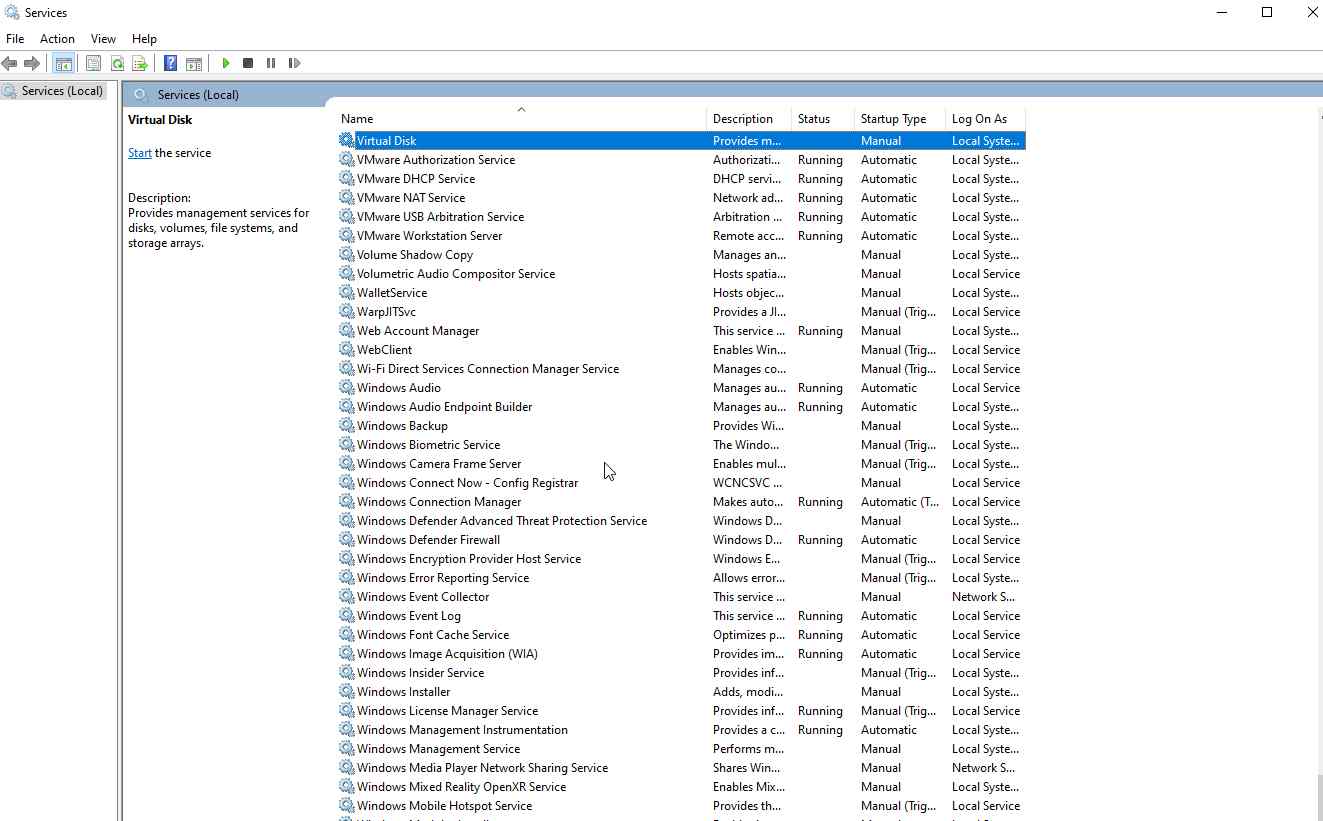
4. Right-click > Properties > Start > Apply > Ok.
Now, try to connect the external drive and see if the problem is fixed or not. If not, you will have to enable automatic mounting of new volumes.
How to enable automatic mounting of new volumes>
To enable automount and assign drive letter automatically, follow these steps:
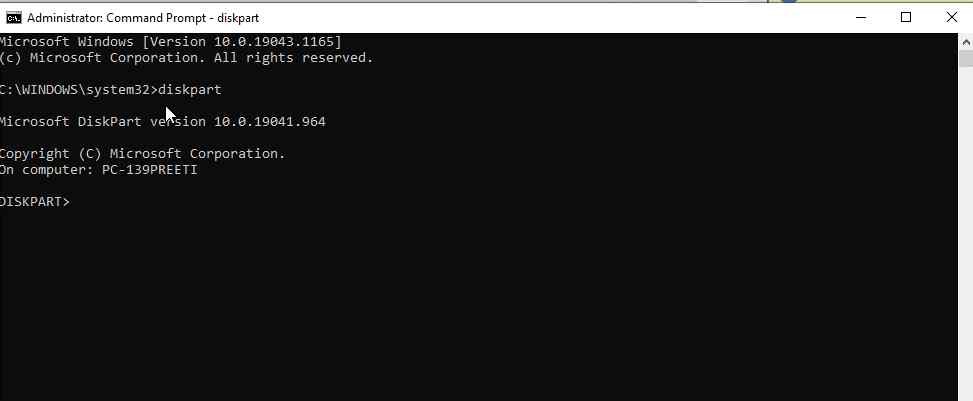
1. In Windows search bar type command prompt.
2. Select the best search result > right-click > Run as Administrator.
3. Type diskpart > Enter
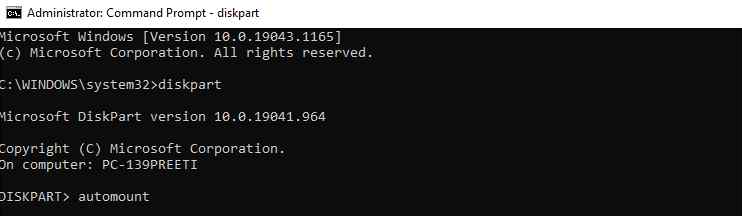
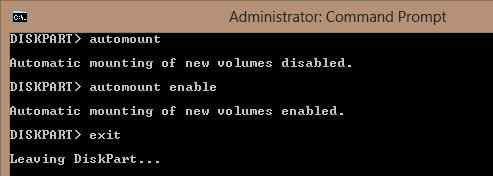
4. Type automount
5. If you get the message: Automatic mounting of new volumes disabled you need to enable it.
6. To enable it in the elevated command prompt window type: DISKPART> automount enable
7. Next, type Diskpart > exit.
8. Restart the system and check the drive letter should now be automatically assigned.
If this too doesn’t help, check if attributes like “hidden” and “do not assign a drive letter” are set for the partition on the USB drive. To do so, follow these steps:
1. Open elevated Command Prompt
2. Type Diskpart > Enter
3. Type list disk
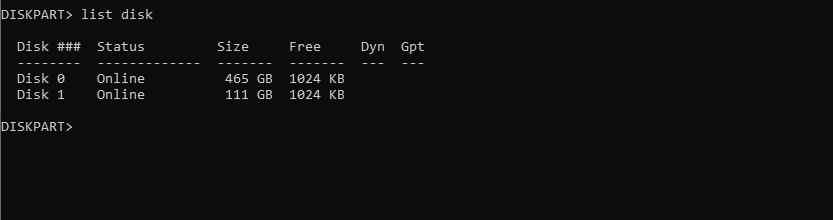
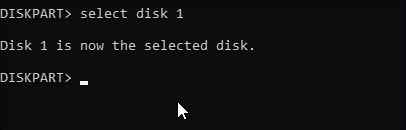
4. Make note of the disk number assigned to the external or USB drive. If it is one type select disk 1
5. Thereafter, type: list part

6. Select the looked-for partition: select partition 2

7. Type: attributes volume
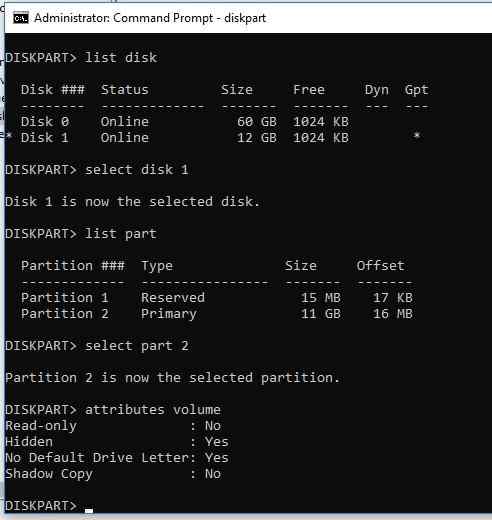
8. If you see Yes against “Hidden” and “No Default Drive Letter” it means these attributes are enabled for the volume.
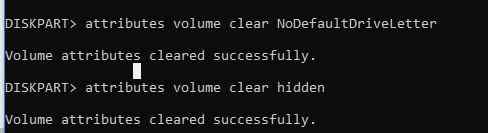
9. Disable these attributes using:
attributes volume clear NoDefaultDriveLetter
attributes volume clear hidden
Volume attributes cleared successfully
10. Exit diskpart.
This should show the USB flash drive letter on any computer.
In addition to this, if you are looking for a particular drive letter and can’t find it, here’s how to fix that.
How to fix the drive letter not available issue?
To fix unavailable drive letters, some modifications in the Registry need to be made.
Before making any changes to the registry, we suggest you take a complete backup of the registry. Once that is done, follow the steps shared below:
1. In Windows search bar, type regedit, and press Enter
2. Expand the entries on the left-hand pane.
3. Next, navigate to the following path:
HKEY_LOCAL_MACHINE\SYSTEM\MountedDevices
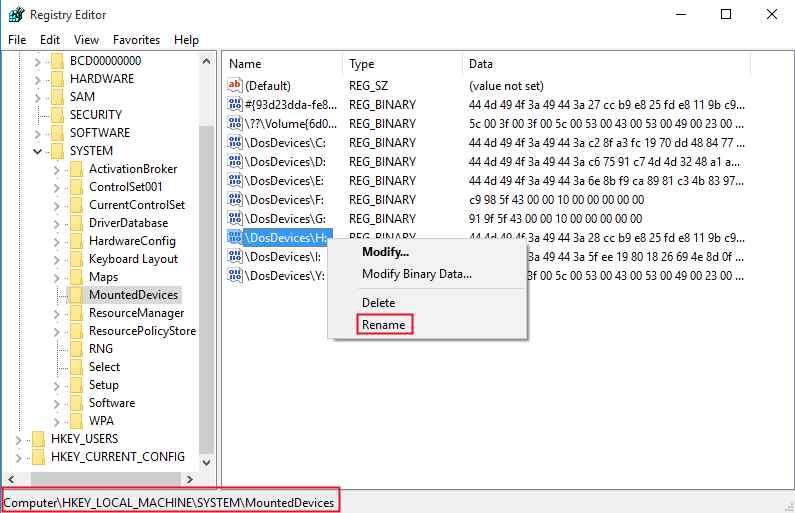
4. Right-click the device with the drive letter, you are looking for > Rename. Change the letter to an unused one.
5. Exit Registry Editor and restart your computer.
This should release the unavailable drive letter for you.
Fix – Windows 10 Fails to Assign Drive Letter to External & USB Drive
Hopefully, you like the tips to assign drive letters to external and USB Flash drives. In case you face any problems while using the steps, do let us know. We will try our best to help.
Also, for complete system optimization, we suggest using the best PC Optimizer tool. Using it, you can prevent most problems from occurring. Also, it will help keep the system clean, malware-free, and more. To use Advanced System Optimizer, click the button below to download it and enjoy using the software. Also share your feedback with us, in the comments section.
Next More :-