
Telnet is a powerful tool that allows you to connect to other computers and servers over a network and run commands on them remotely. It’s been around for decades and has been used by many professionals for various tasks, from diagnosing network issues to automating tasks. If you’re working with Windows 10 or 11, you’ll be happy to know that enabling Telnet is a relatively straightforward process. In this article, I’ll show you three easy methods to enable Telnet in Windows 10 & 11.
So without further ado, let’s get started.
How to Enable Telnet on Windows PC?
Telnet stands for Terminal Network, and it’s a protocol that’s been around for a long time. With Telnet, you can remotely run commands on other computers or servers and access them as if you were right in front of them. Essentially, it’s like having direct access to another computer, even if you’re miles away. This can be incredibly useful if you need to access another machine for troubleshooting purposes or to run specific commands that you can’t run on your own computer.
If you’re using Windows 10 or 11, Telnet is actually disabled by default, so you’ll need to enable it if you want to use it. To do this, you can follow these methods:
Method 1: Enable Telnet on Windows PC by Using Command Prompt
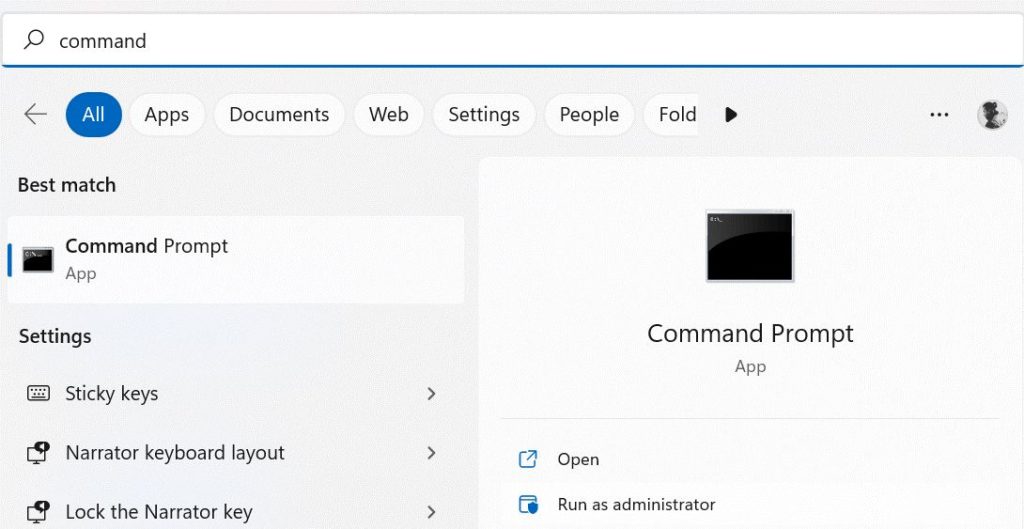
Step 1: Click on the Search icon from the Taskbar and type the command and now open the Command Prompt by clicking on Run as Administrator.
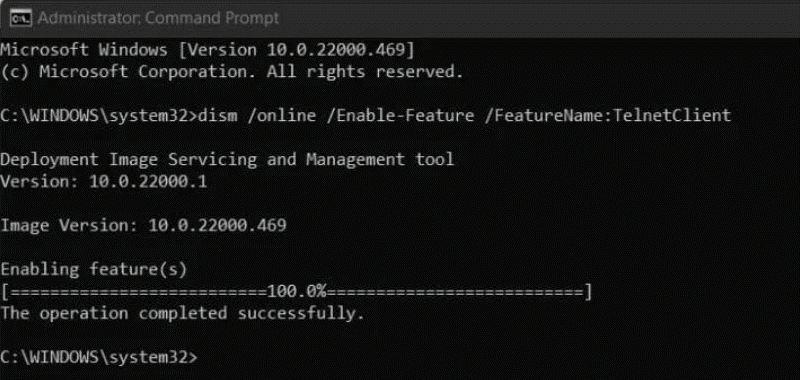
Step 2: Type this exact command and press the Enter key: dism /online /Enable-Feature /FeatureName:TeleClient
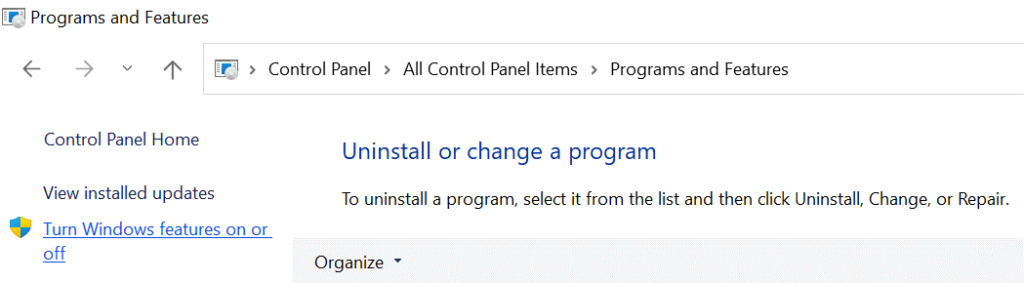
Method 2: Enable Telnet on Windows 11/10 by Using Control Panel
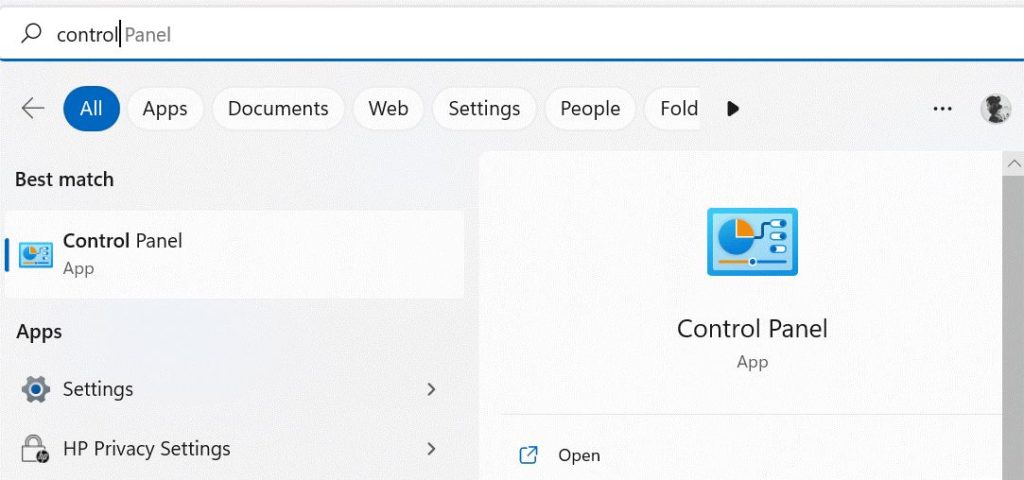
Step 1: Click on the Search icon from the Taskbar and type the control, open the Control Panel by clicking on Open.
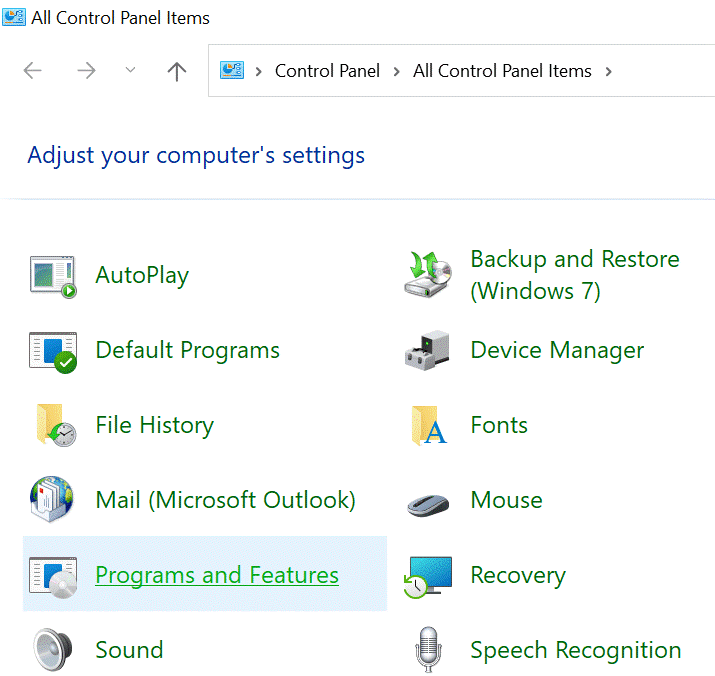
Step 2: Now click on the Programs or Programs and Features option.
Step 3: From the top-left corner tap on Turn Windows features on or off.
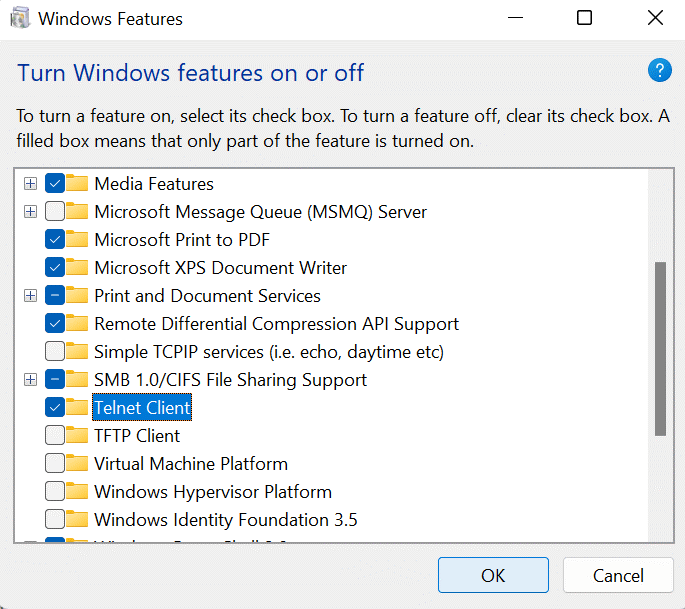
Step 4: A pop-up box will appear, scroll down through the list and select Telnet Client and press the OK button.
And in case you facing a problem opening the Control Panel on Windows 11 here’s a guide for the same.
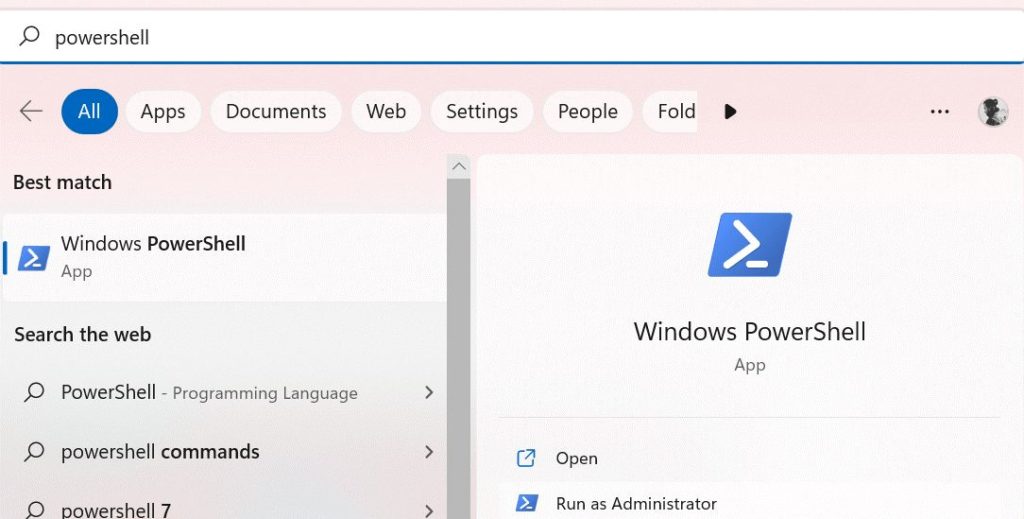
Method 3: Enable Telnet on Windows 10 and Windows 11 Using PowerShell
Step 1: Click on the Search icon from the Taskbar and type the PowerShell and open it by clicking on Run as Administrator.
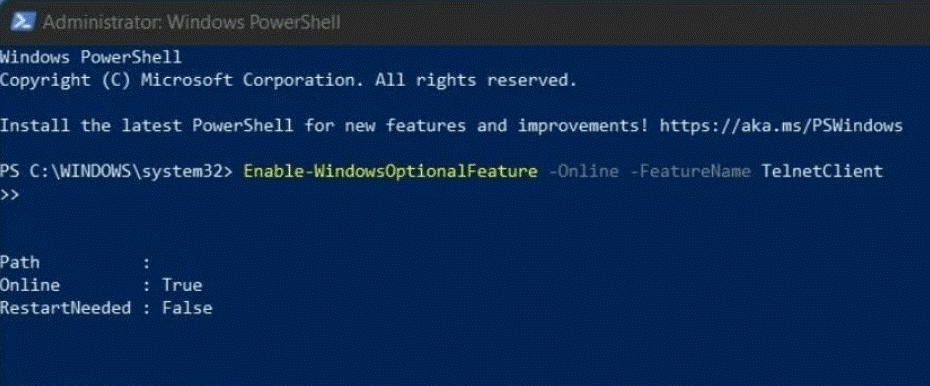
Step 2: Type this exact command and press the Enter key: Enable-WindowsOptionalFeature -Online -FeatureName -TelnetClient
Read Also: How to Update Powershell on Windows 11
And to make sure everything is in order, it’s always a good idea to restart your PC afterward. Once you’ve enabled Telnet, you can use it from the Command Prompt by typing “Telnet” followed by the address of the remote computer you want to connect to.
To Wrap This Up
So, these are the 3 ways you can enable Telnet on Windows 10/11 PCs. Back in the day, it was a popular choice for system administrators. But now, things have moved on and they prefer to use a more secure option called SSH. The reason is, Telnet has a major drawback – it’s not secure. In fact, it’s quite prone to a man-in-the-middle attack, which is a type of cyber attack where a third party intercepts the communication between two computers.
And for such troubleshooting guides and tips & tricks related to Windows, Android, iOS, and macOS follow us on Facebook, Instagram, Twitter, and YouTube
Next Read: