Prepared a Google Sheet and put a lot of numbers and data in it? Afraid someone could change the values accidentally or intentionally? Want to protect individual cells to prevent anyone from changing it? Well, Google Sheets provides you with an option to protect individual cells to avert people from making changes in the document.
So, without further ado, let’s know how to protect cells from editing in Google Sheets.
Google Sheets allows anyone to access sheets and edit to make it easy to collaborate on documents in the cloud. But not always would you want to allow people to make changes to the document you share. Well, you can always revoke the right to edit your document anyway. What if you just want to revoke the ability to edit a few cells instead of the whole document? That can also be done.
In Order To Protect Individual Cells From Editing, Follow These Steps:
Step 1: Launch your browser. Open Google Sheet which contains the cells which you want to protect.
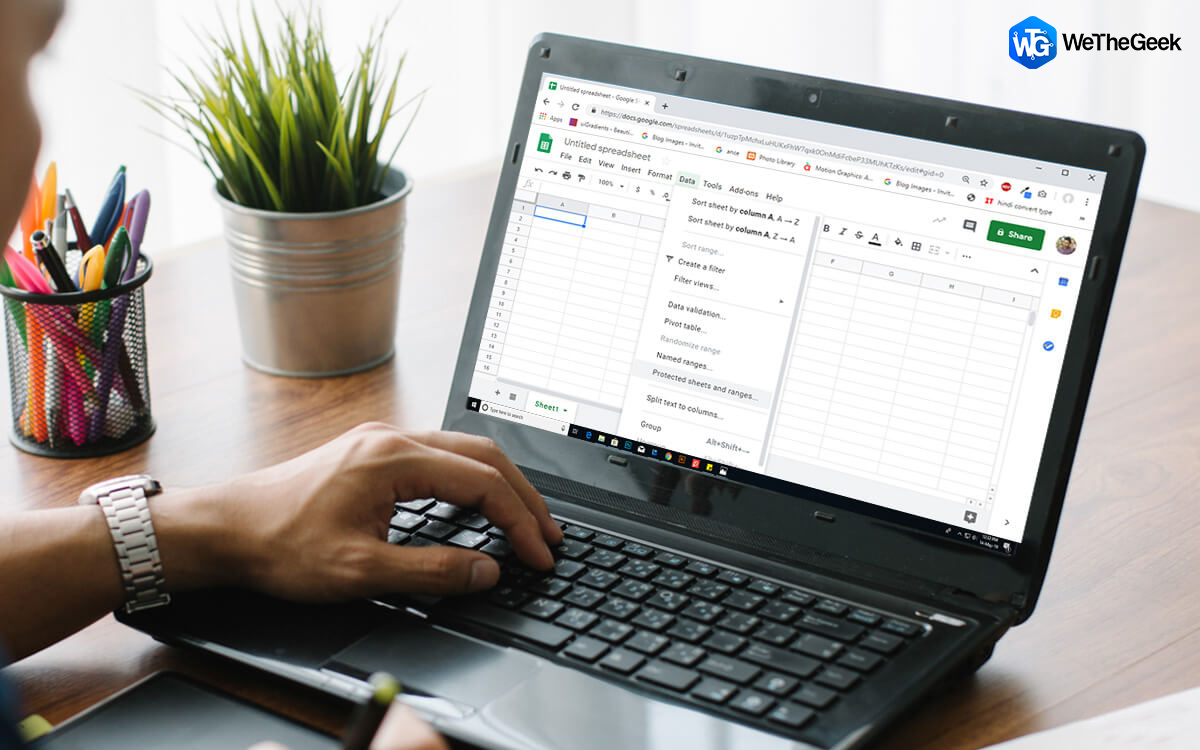
Step 2: Select the specific cells, open Data menu and click Protected sheets and ranges.

Step 3: You will get Protected Sheets and Ranges pane on the right-hand side.
Step 4: You can type in a brief description and select Set Permissions to modify the protection permissions of the selected cell.
Note: if you have given permission to anyone to edit the sheet has a right to make changes in every cell by default.
Step 5: To Change Permissions, Under Restrict Who Can Edit This Range, click the drop-down menu and change the Permissions for the selected cells.

In the drop-down menu, you will get a list of people who have permission to make changes. To edit the permissions, remove the checkmark beside the names of people and click OK.
Once you have edited the permission, click Done to complete the action.
Note: After changing the permissions, if anyone not authorized to edit the cells tries to make changes, a prompt in Sheets will come up saying, “You are trying to edit a protected cell or object. Please contact the spreadsheet owner to remove protection if you need to edit.”
 How to Insert A Checkbox In Google SheetsMaintaining a list to keep a note of things that need to be done or have been done, could be...
Steps To Show Warning Message While Editing Cells:
If you don’t want to change the permissions and allow people to edit but keep an eye on them while making changes, then that can be done.
You can customize to send a warning message for anyone who attempts to make changes in a particular cell. So, to get it down, follow these steps:
Step 1: Go to Sheets document, locate Data.
Step 2: Under Data-> click Protected Sheets and Ranges.

Step 3: Click the Permission rule which you want to change.
Step.4: Now select “Set Permissions.”

Step 5: Choose “Show a warning when editing this range” & click Done.

Now, whenever someone attempts to make changes to the protected cells, they will get the following message.
Steps To Protect the Whole Sheet
Don’t want anyone to make changes, then you need to protect the entire sheet. Nobody but you can make changes to the sheet. You can still share the sheet, but only with the right to view, not edit.
However, if you want to allow to edit some cells but not the entire sheet, then first you need to protect the whole sheet and allow access to some cells
To do that, follow these steps:
Step 1: Go to Sheets document, locate Data.
Step 2: Under Data-> click Protected Sheets and Ranges.

Step 3: On Protected Sheets and Ranges, click Sheet. Now from the drop-down menu, select a sheet and click Set Permissions.
In the following window, now you can access permissions to people you can make changes in the sheet.

Step 4: Select “Restrict Who Can Edit This Range,” from drop down and choose “Custom” to make changes to permission to edit for the selected sheet.
Step 5: Deselect the person from the list, whom you don’t want to edit and click Done
So, anyone who has access to your document can open the sheet, view the protected content on the sheet but can’t make changes to the actual Google sheet.
Steps To Add Exceptions On Protected Sheets
When you set to protect an entire sheet, Google sheets lock every cell. However, if you wish to allow editing a few calls you can determine which cells can be edited.
Step 1: Go to Sheets document, locate Data.
Step 2: Under Data-> click Protected Sheets and Ranges.

Step 3: From the following window, click the protected sheet rule and select the area, which you want to allow for editing. Click Sheets from the box
Step 4: Enable Except Certain Cells and then click on the range of cells that you want to make editable.

Step 5: Click On Done to finish.

Now whenever anyone tries to make changes to a cell which are not editable, they will get a prompt saying they can’t edit them.
Steps to Remove Permission Rules
If you want to delete any permission rules
Step 1: Go to Sheets document, locate Data.
Step 2: Under Data-> click Protected Sheets and Ranges.

Step 3: Locate any of the rules that you want to delete.

Step 4: Once located, click the Trash icon beside the rule’s Description.
Step 5: You will get a prompt to confirm whether you want to remove the protected range. To confirm, click Remove.
To remove other permissions, follow the same process and delete.
So, in this way you can add/ edit or remove protection of cells on your Google Sheets. Now make changes to Google Sheets and allow or deny anyone from editing protected cells to preserve your data.
dr. Memals
Thanks for that clear and concise set of examples. I have been going nuts with different permissions reporting one thing and Google Sheets telling user something else. I also found at the bottom of the long list of ranges a “show all ranges” that revealed even more conflicting permission sets. Google really need to make this easier to understand for businesses to use.Srishti Sisodia
Hi Memals, Thank you for your comment. We appreciate that you read our content and it could be of your help. For more useful tips, do subscribe to our Newsletter.