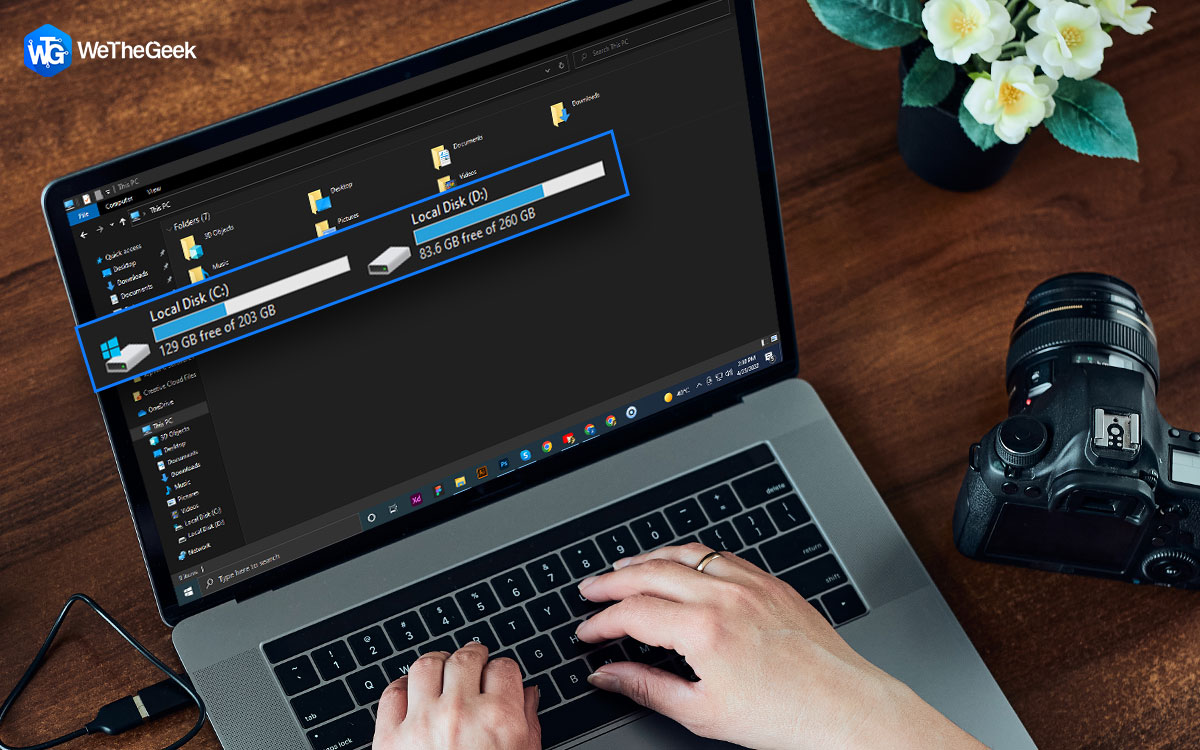
Most of us seem to run out of storage space on our PCs due to a large number of digital files consisting of images, audio, videos, and documents. The most commonly suggested solution for this issue is to store the least required files on an external storage device or the cloud. However, there are a few technicalities of our Windows storage system that can be altered from their default state to recover the lost hard disk space that you always had but could not use.
How To Restore Hard Disk Capacity And Recover Missing Space
There are a few expert-recommended methods on how to recover hard drive space. These methods may seem difficult at first but make sure you read all the steps first and then attempt them.
Delete or Reduce The Hibernation File Size
The hibernation file (hiberfil.sys) is a hidden system file in the root folder of the partition on which the operating system is installed. They are “invisible” by default and will not be visible until you force all hidden system files to be visible.
During the installation, the Windows operating system sets aside space for its hibernation file. This file’s size is determined by the amount of system memory (RAM) available on a particular computer. The default amount does not exceed 75 percent of the total RAM available in most circumstances. You can disable this feature or lower the size of the hibernation file if you choose by the below-mentioned steps:
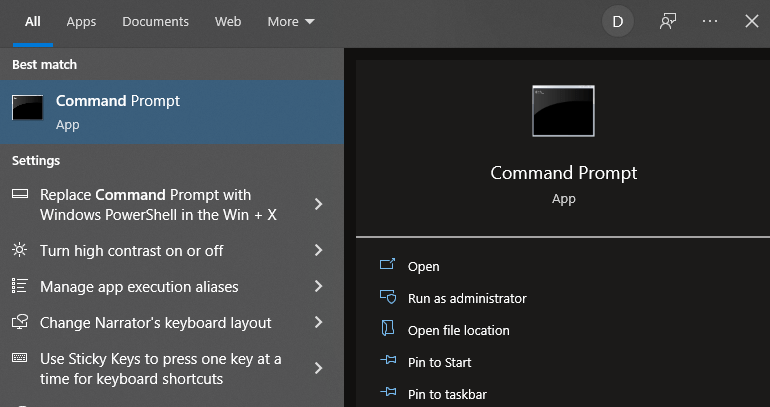
Step 1: Press Windows + S on your keyboard and type the command prompt.
Step 2: Once the Command Prompt is displayed in the search results, hover your mouse over it and then choose Run as Administrator.
Step 3: Once the window opens, type the following command followed by the Enter key.
powercfg -h off
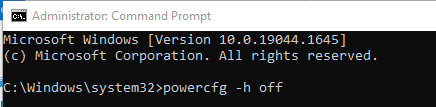
Step 4: Next, type Exit followed by Enter to close the command prompt.
When you do this, the file hiberfil.sys will be removed from the root directory, and the disk space it previously used will be free to record new data. If you want to keep the hibernate mode, use the following command in the Command Prompt with administrator access to lower the amount of disk space it requires.
powercfg -h -size 50%
When you run the command, the size of the hibernation file will be reduced by the percentage you specify.
Delete or Reduce The Paging File Size
Because data from RAM can be read much faster than data from the hard disk, the operating system usually maintains files, programs, and other data that you use frequently in your computer work in the system memory (RAM). When the system memory is full, Windows will transfer some data from RAM to the hard disk and store it in the paging file.
It is critical to have a pagefile.sys file because a lack of RAM can cause errors or crashes in particular applications or even the entire operating system, which commonly occurs when the system memory is full. Some machines, on the other hand, may have settings that result in an extremely large paging file, which means more time is spent processing the apps that are executing at the time. In this case, you can consider shrinking the paging file or even removing it entirely to free up additional disk space.
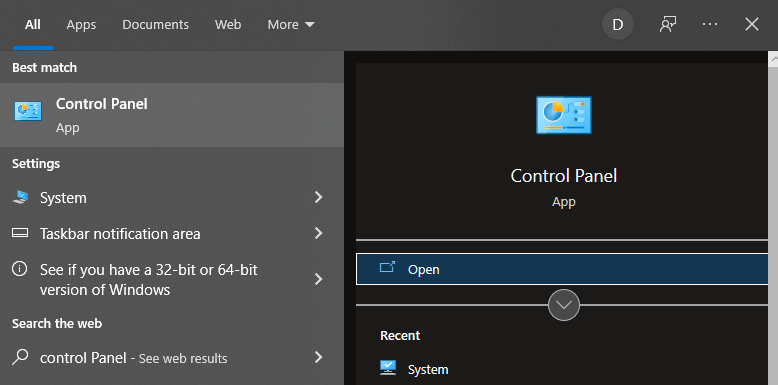
Step 1: Press Windows + S on your keyboard and type Control Panel.
Step 2: Click on the relevant search result and the Control Panel window will open.
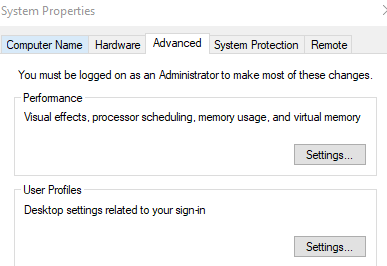
Step 3: Click on System from the list of options.
Step 4: Now locate Advanced System Settings on the right side of the System Window and click on it.
Step 5: The System Properties box will open. Click on the Advanced tab and then click on the Settings button under the Performance section.
Step 6: A new box will further open and you have to click on the Advanced tab in this new box.
Step 7: Next, click on the Change button under Virtual Memory and a new Virtual Memory box will open.
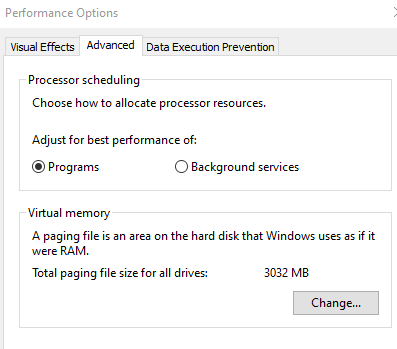
Step 8:Uncheck the box for Automatically manage paging file size on the virtual memory settings page to manually modify settings.
Step 9: Choose Custom size and fill in the maximum paging file size in the appropriate slot.

the choice you can choose to remove this file by selecting No paging file.
Step 10: Additional disk space will be freed after the paging file size has been changed, and you can utilize it to write new data.
Disable Internal System Protection
System protection is a built-in feature that produces and maintains backups of the computer’s system files and settings regularly, as well as earlier versions of files that have been modified. All of these files are saved to restore points, which are produced prior to major system events like the installation of new apps or the update of device drivers. As a result, regularly employing the system protection feature increases overall security – but at the cost of a significant amount of disk space. However, you can somewhat reduce the amount of space used by modifying the protection level.
Step 1: On your keyboard, press Windows + S and type Control Panel.
Step 2: The Control Panel window will open after you click on the relevant search result.
Step 3: Select System from the options.
Step 4: Now, on the right side of the System Window, select System Protection and click on it.

Step 5: To find Protection settings in the new System Properties window, go to the tab System
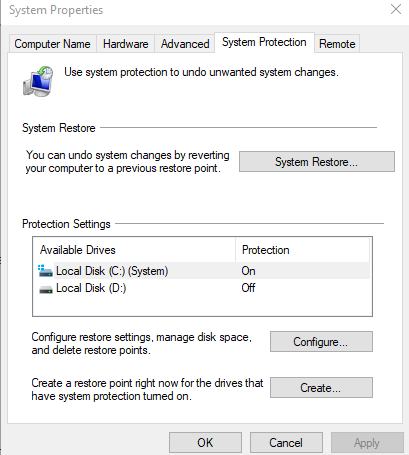
Protection, pick the needed disk (for example, local disk C:), and click Configure.
Step 6: The new system protection window for local disk C: will recommend that you specify the maximum disk utilization for the system protection function in the section Disk Space Usage.
Step 7: Reduce the maximum utilization by adjusting the slider to the desired value. Older restore points will be automatically erased to make place for new ones as the disk space allotted for system protection fills up.
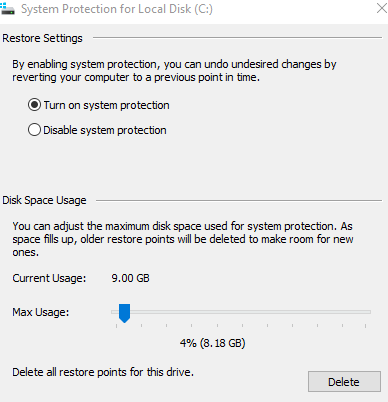
Step 8: You can also delete all restore points and clear up disk space if necessary by clicking the Delete option. Then, to make the changes take effect, click Apply and OK.
Partitions That Are Not Visible
Many computers, particularly laptops, include some hidden partitions, such as a recovery partition or a system-reserved sector. Furthermore, modern versions of the Windows operating system (starting with Windows 7) produce secret partitions after installation, including an EFI system disk for UEFI and a system-reserved partition for the older BIOS. In Disk Management, some of the secret partitions will be visible. Other hidden partitions will be available for viewing and editing only when you use third-party applications for displaying hidden partitions – and there are plenty of them on the Internet. Installing and using them is simple and quick, so even inexperienced users can grasp these programs.
Because some partitions are required for the operating system’s full functionality and security (for example, those involved in system recovery or booting), Windows hides them to prevent unintended consequences from system errors or virus attacks. It is not recommended to delete such partitions to gain a few extra gigabytes. If you don’t need certain hidden partitions (for example, if you’ve already produced a system backup copy), you can delete them to free up disk space.
Bonus Tip: Delete Duplicate Files
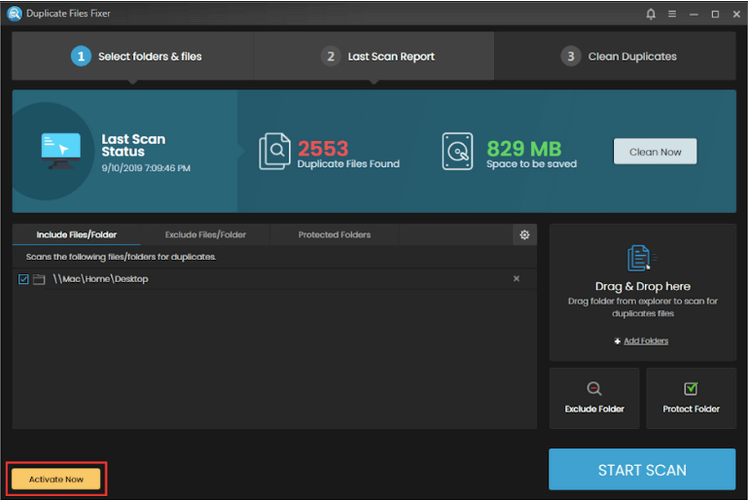
Duplicate Files Fixer is a clever program that detects duplicates in files such as photographs, movies, documents, music, and other types. This scan yields the total number of files packed in your PC and takes up space, as well as a request for permission to delete them. You can choose which files to delete and which to keep from this menu. Once these duplicates have been selected, all you have to do is click to remove them from your device, freeing up space and allowing you to use it for other things.
- The program has been developed to be exceptionally user-friendly and easy to use with an interactive interface.
- You can select duplicates to delete by location, size, group, and more using an active Selection Assistant.
- Duplicate files can also be readily removed from an external storage device. Simply connect your external hard drive to your computer and run the duplicate fixer.
- More than 14 languages are supported by the software, including German, French, Japanese, and others.


The Final Word On How To Restore Hard Disk Capacity And Recover Missing Space?
The above methods will surely help you to gain the hard disk space that was always there but not accessible to you. Though the methods described above are a bit technical but are not difficult to follow. With the help of these methods, you can free up storage space on your existing disk and eliminate the need of purchasing a new storage device,
Follow us on social media – Facebook, Instagram, and YouTube. For any queries or suggestions, please let us know in the comments section below. We would love to get back to you with a solution. We regularly post tips and tricks, along with answers to common issues related to technology.