Users expect their desktop to be an organized space where they can quickly access frequently used files, folders, and applications. However, desktops often become cluttered over time, resulting in the common issue of overlapping icons. This can be annoying, especially if you need to quickly find a file or program. The good news is that resolving this issue is rather straightforward, and we will give you in-depth methods to do so in this tutorial.
Also Read: FIX: Desktop Icons Disappeared After Upgrading to Windows 11
How To Fix Overlapping Icons On Your Windows Desktop.
Overlapping icons on Windows PC can make it difficult to locate and access the programs you need. Fortunately, there are some effective methods you can try to fix this issue.
Method 1: Alter The Size Of The Icon
Reducing the icon size is the first action we advise taking to see whether it affects the situation. Consider setting the desktop icon size to small if it is currently set to large or medium. Here’s how to go about it:
Step 1: Right-click a blank area of your desktop.
Step 2: Choose Small Icons from View.
![]()
Step 3: Verify If the issue has been resolved.
Also Read: Desktop Icons Not Showing on Windows 10, 8, 7? Find Fixes
Method 2: Change The Necessary Registry Keys
You might potentially be dealing with this issue as a result of the inappropriate Registry keys’ values. This is a known error, and you can easily remedy it by going back to the Registry’s normal icon spacing. To be safe, we advise making a Registry backup before moving forward. All you must do is as follows:
Step 1: To launch Run, press the Win + R buttons simultaneously.
Step 2: Hit Enter after typing regedit in Run.
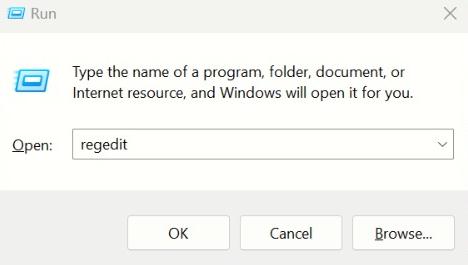
Step 3: On the User Account Control window, select Yes.
Step 4: Go to the location listed below once you are in the Registry Editor:
HKEY_CURRENT_USER\Control Panel\Desktop\WindowMetrics
Step 5: Locate IconSpacing in the right panel and double-click on it.
Step 6: A small box will open where you have to enter -1125 under Value Data.
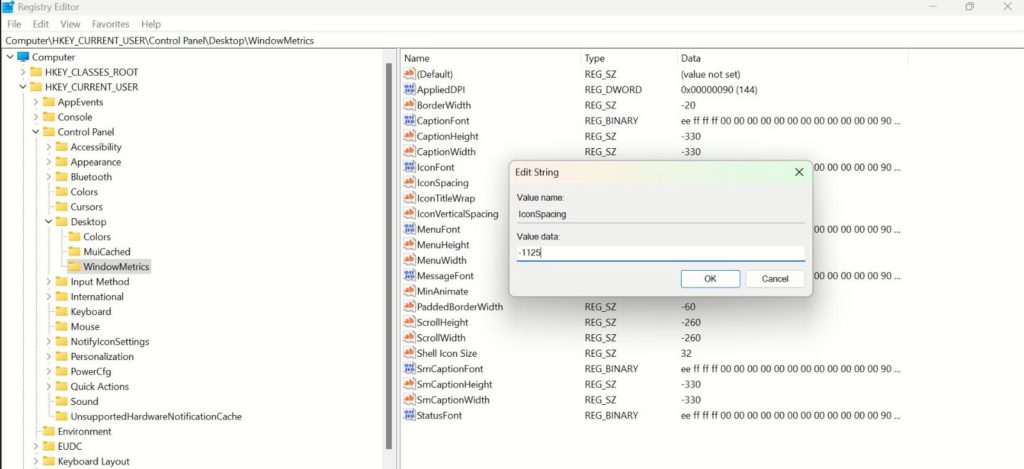
Step 7: Click on OK.
Step 8: Repeat Steps 6 & 7 for another key located in the right panel of the Windows Registry Editor which is labeled as IconVerticalSpacing.
Step 9: Close the Registry Editor and reboot your PC.
Also Read: How To Remove Icons From Desktop
Method 3: Enable Icon Features.
The desktop icons may overlap because the two most important relevant options, “Align icons to grid” and “Auto-arrange icons,” may be disabled.
The former makes sure that the icons are properly spaced apart and positioned to prevent overlapping. On the other side, the auto-arrange feature automatically organizes and arranges the desktop’s icons. This implies that the empty spaces left after deleting any icons will be reorganized and that this function will place a new icon in the next available slot when it is added to the desktop. Here’s how to turn on these features in Windows 10 and Windows 11:
Step 1: Right-click a blank area of your desktop.
Step 2: Choose View from the context menu, then select both features namely Align icons to grid & Auto-arrange icons.
![]()
Step 3: Click on each feature and ensure there is a tick mark in front of these features.
Also Read: How to Add Widgets to The Windows 11 Desktop
Method 4: Update Windows.
If you are running an outdated version of Windows, you may experience a number of problems, including display abnormalities, system crashes, and app failures. The majority of these issues are brought about by incompatibilities between the system and its processes, while some can also be a result of corruption faults that may have crept into the system as a result of its vulnerability.
Note: During the Windows update process, your computer could restart a few times. Hence, save everything before running Windows Update.
Step 1: Open the Windows Settings window by pressing Win + I.
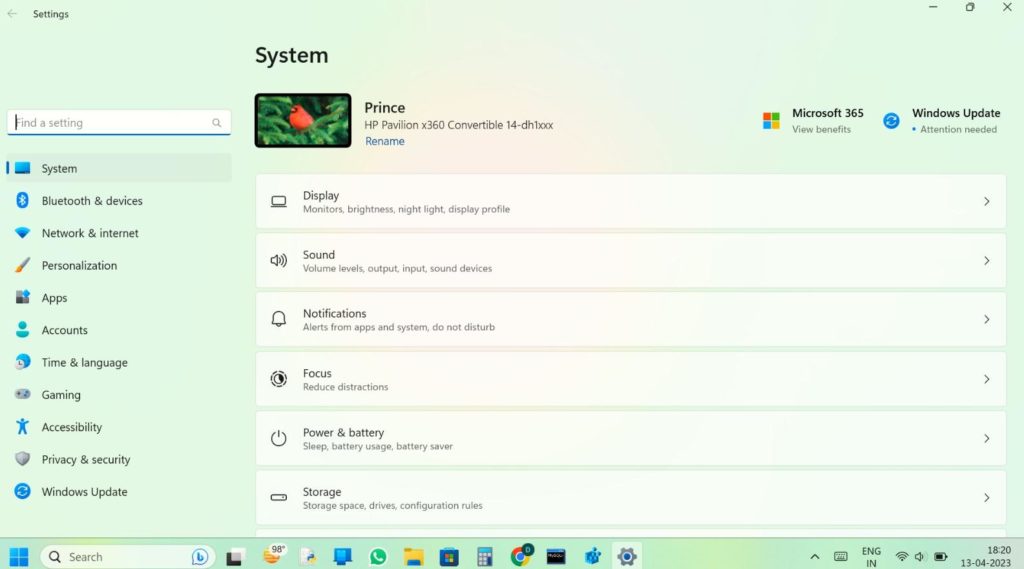
Step 2: In the Windows Settings App’s left side, select the Windows Update tab.
Step 3: Next, select the button that says “Check for Updates.”
Step 4: The screen will show a list of updates. The Download & Install button is located next to each update.
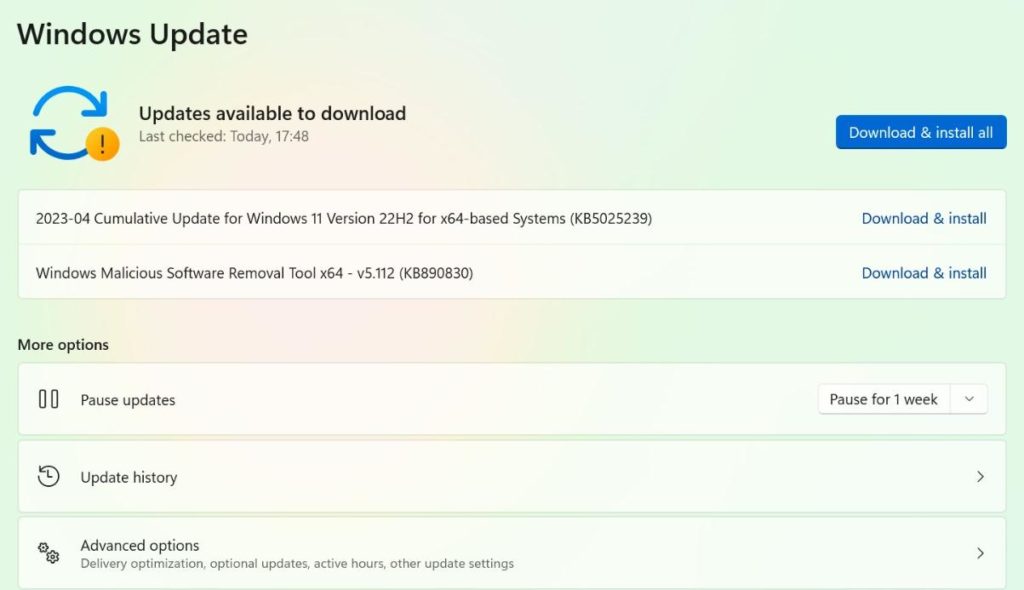
Step 5: After downloading and installing the updates. To confirm there are no more updates available, click the Check For Updates button once more.
Step 6: After installing all required updates choose the Advanced Settings tab on the right side.
Step 7: Scroll down, select Optional Updates.
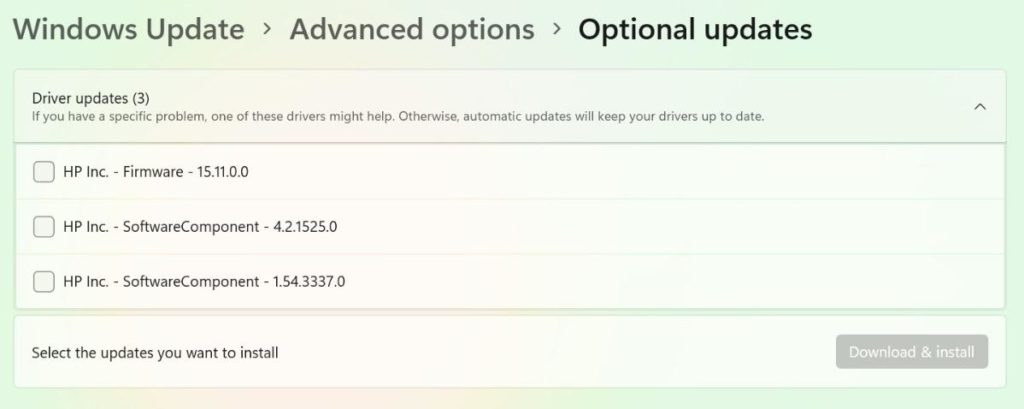
Step 8: Make sure your PC is fully updated by clicking the Download & Install option.
Note: Regular PC updates will guarantee a seamless and error-free operation of your machine.
Also Read: How To Fix Missing Start Menu Icons In Windows PC
Have You Fixed The Desktop Clutter Of Icons?
Your ability to access apps quickly can be seriously hampered by dealing with a disorganized, cluttered desktop. But, the remedies we’ve covered in this article can assist you in resolving the issue of overlapping icons and permanently cleaning up your desktop.
Please let us know in the comments below if you have any questions or recommendations. We would be delighted to provide you with a resolution. We frequently publish advice, tricks, and solutions to common tech-related problems. You can also find us on Facebook, Twitter, YouTube, Instagram, Flipboard,and Pinterest.
Also Read: System Tray Icons Missing on Windows 11? Here’s the Fix!