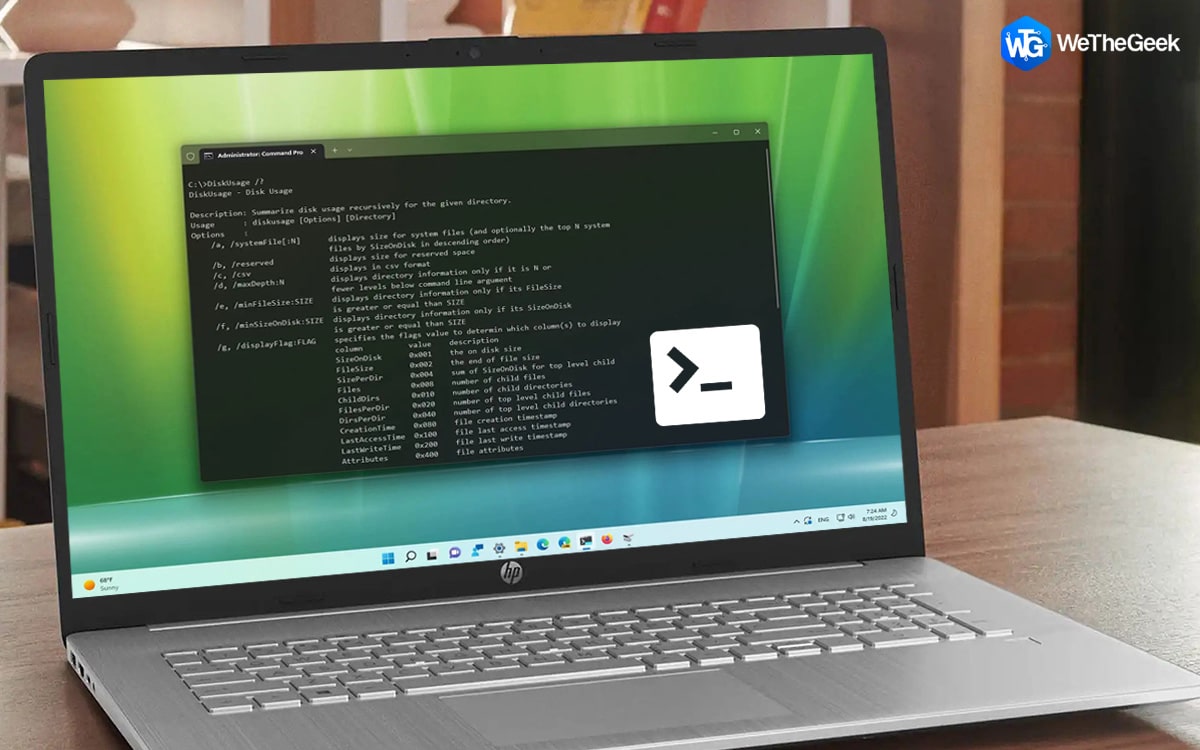
The DiskUsage.exe program can be used to examine the contents of any drive or folder on your Windows 11 PC. The command line interface for DiskUsage provides access to a variety of options for filtering and enhancing the file data that can be output. This can make it much more beneficial than GUI tools like Storage Sense in some circumstances. Using DiskUsage.exe to view and examine how the space in your drives is being used can be done in the following ways.
Steps On How To Use The DiskUsage Command To Analyze Drive Space On Windows
To get a quick overview of how space is currently being used in almost a drive or folder, use the DiskUsage command line tool in the following way:
Step 1: Press Win + R to open the RUN command.
Step 2: Enter “cmd” in the text space and press Ctrl + Shift + Enter to open the Command Prompt window in admin mode.

Step 3: Next type DiskUsage command followed by the folder path which you wish to analyze and press the Enter key.
Step 4: You can add “/h” at the end of the command to display the SizeOnDisk number in KBs and MBs.
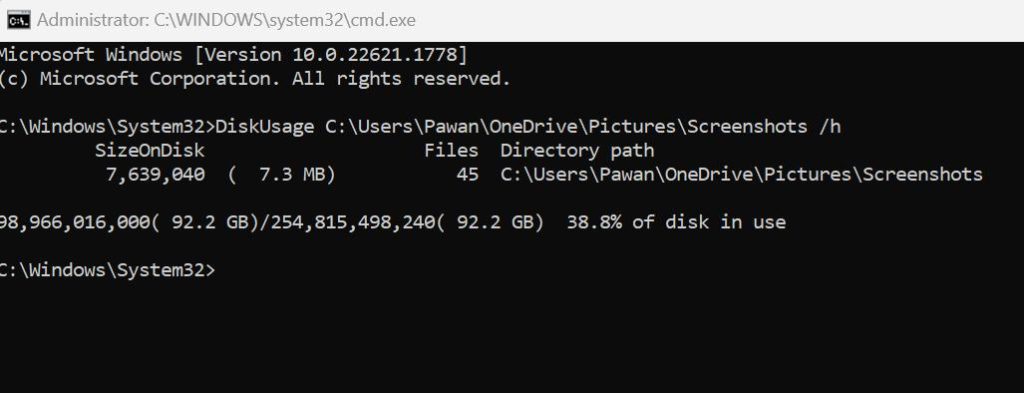
| I wanted to analyze the Screenshot default folder on my PC. Here is what the command will look like:
DiskUsage C:\Users\Username\OneDrive\Pictures\Screenshots /h Replace the username with your PC name. To get the path of the folder you want to analyze, navigate to the folder vis the File Explorer window and click on the address bar to get the path. |
How To Identity Large Files Using DiskUsage Command?
Lack of storage space is one of the most frequent issues faced by all PC users. You can refine the data displayed in DiskUsage based on file size. Therefore, you can configure it to ignore smaller files if, for instance, you only want to include files larger than 500MB. To identify large files and sort them, we can use the following commands using the DiskUsage tool.
Step 1: You must add the minFileSize option to the command if you want to only include files larger than a particular size.
DiskUsage /minFileSize=6553600 C:\Users\Username\OneDrive\Pictures\Screenshots /h
Step 2: Only files greater than 500MB will appear in the result. You might need to use an online conversion tool to convert MB to Byte because the file size value must be provided in bytes.
Step 3: Add the “/u=10” command to list the top ten largest files in a particular folder.
DiskUsage/minFileSize=6553600 C:\Users\Username\OneDrive\Pictures\Screenshots /h /u=10
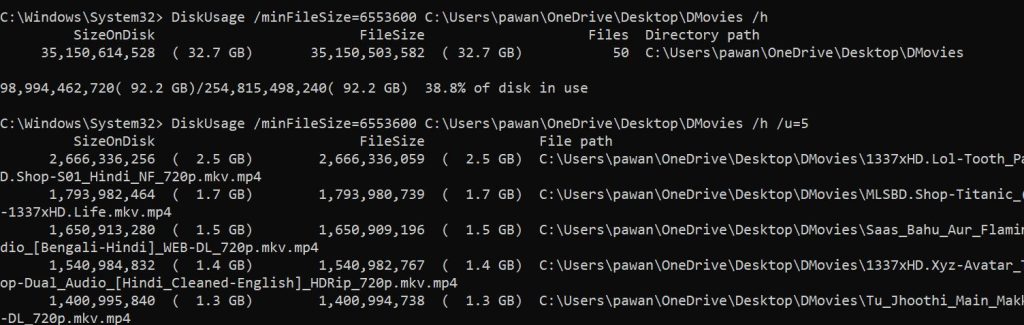
The Command Prompt window will now provide a list of the 10 largest files in the Screenshots folder.
Also Read: How To Find Compressed Files In Windows 10 Using Disk Analyzer Pro
Bonus Feature: Use Disk Analyzer Pro To Analyze Your Hard Disk
Disk Analyzer Pro is an amazing application that scans your computer and presents a report of all the files present on your PC and segregates them into various categories. In addition, a few of the most crucial characteristics are:
- With the aid of Disk Analyzer Pro, the used storage space can be managed and divided into various file types.
- You can use this utility to eliminate any duplicate files while keeping the originals and free up more space on your PC.
- All unnecessary and outdated files are removed from your system by Disk Analyzer Pro.
- You may clear up a lot of space on your hard disk by using this option alone to eliminate all the large and dated files.
- To find out how quickly your hard drive fills up, you can either conduct a time-based investigation or save your disk management reports for later analysis.
Also Read: How To Export Disk Space Reports To Different File Formats With Disk Analyzer Pro?
How To Use The Disk Analyzer Pro To Analyse Disk Space On Windows?
Step 1: The Disk Analyzer Pro software can be downloaded and installed using the button down below.


Step 2: Open the program and sign up for full features.
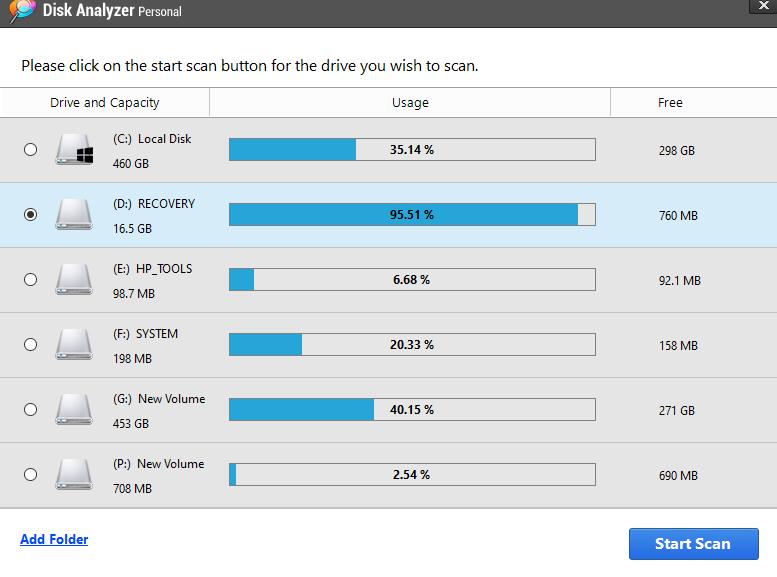
Step 3: Next, select the drive you want to scan, and then click Start Scan.
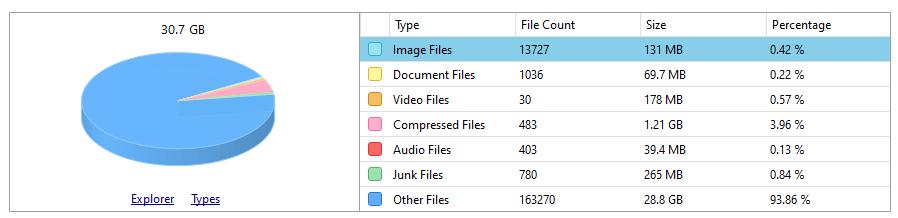
Step 4: When the scan is finished, the app window will show the categorization of your files.
Step 5: To view the files listed under any category, double-click on it. The list of files will appear in a new window.
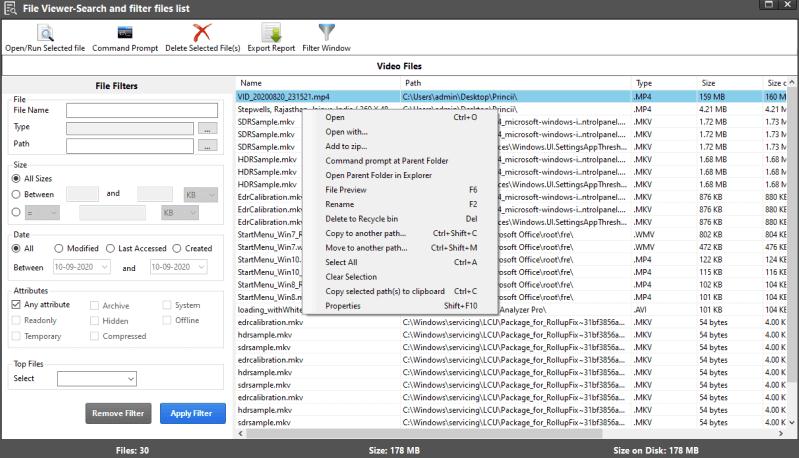
Step 6: Any file can be opened or deleted by clicking on it. Numerous further actions are available, as shown in the context menu in the above screenshot.
Also Read: Manage Your Data Storage and Space Consumption with Disk Analyzer Pro
The Final Word On How To Use The DiskUsage Command To Analyze Drive Space On Windows
Although the inbuilt tool from Microsoft to analyze your disk space is quite efficient. But it is better to use a graphical user interface tool like Disk Analyzer Pro instead of DiskUsage.exe. This makes things easier and faster for all users. Also, you can easily delete unwanted files using Disk Analyzer Pro and save unnecessarily occupied storage space.
Please let us know in the comments below if you have any questions or recommendations. We would be delighted to provide you with a resolution. We frequently publish advice, tricks, and solutions to common tech-related problems. You can also find us on Facebook, Twitter, YouTube, Instagram, Flipboard, and Pinterest.