
Taking screenshots, capturing screen has become easy with the arrival of macOS Mojave. With MacOs Mojave, a tool named Screenshot was added to Mac’s native app arsenal. The tool can take screenshots of the entire window, entire screen or selected region. You can record the entire screen or record selected portion of the screen as well.
In this post, we will talk about how to take screenshots or record screen on macOS Mojave.
Let’s start with screenshots.
Different Ways to Take a Screenshot on MacOS Mojave
Conventional way:
Press Shift + Command and 4 key to get plus sign to select the region to take a screenshot.
Screenshot Toolbar:
Press Shift + Command and 5 key to bring up screenshot toolbar. You will get five options: capture the entire screen, capture selected window, capture selected area, record the entire screen and record selected area on the screen.
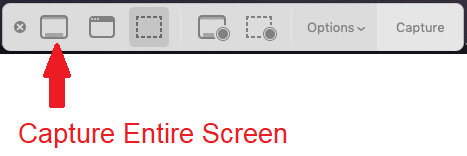
To take a screenshot, you can choose from the first three options: capture the entire screen, capture selected window, and capture selected area as per your preference.
If you have selected to Capture Entire Screen, then a screenshot will be taken and saved on the desktop of your screen.
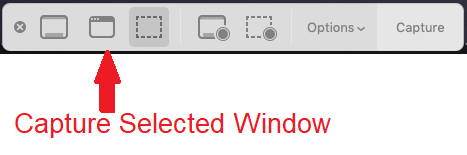
To take a screenshot of a window, click on Capture Selected Window and you will get camera icon. Hover the mouse over the window you want to take a screenshot of and click on it to capture the screenshot.
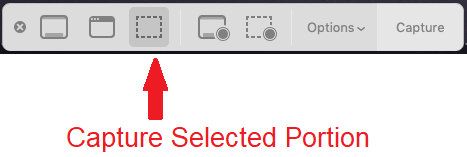
If you want to take a screenshot of a selected region, select the third option, Capture Selected Portion. It will allow you to take a screenshot by selecting a region. Once selected, click Capture to save the image on your desktop.
Once the screenshot is taken, control-click or right click on it. You can also choose to save the screenshots at the desired place. You can delete it, send it, mark it up, show it in Finder.
Record Your Screen On MacOS Mojave
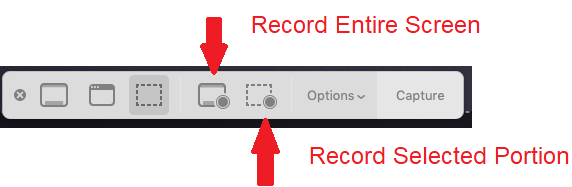
From the five options available, the last two options allow you to record your screen.
Step 1: Just press Shift +Command + 5 to get the screenshot toolbar.
Step 2: Click the fourth option or fifth option, Record Entire Screen or Record Selected Portion to capture a screen recording of the entire screen or selected portion.
Step 3: Click Record on the screenshot & recording control bar.
Step 4: Press Stop once you are done recording the screen.
Step 5: You will get screen recording at the bottom-right side of the screen, right-click or control-click on it. You will get a context menu to save the recording in a preferred location, show it in Finder, send it, mark it up, and delete.
Steps To Edit a Screenshot in macOS Mojave
Step 1: Once a screenshot is taken, you can control-click, or right-click on the screenshot that appears in the bottom right corner of the screen.
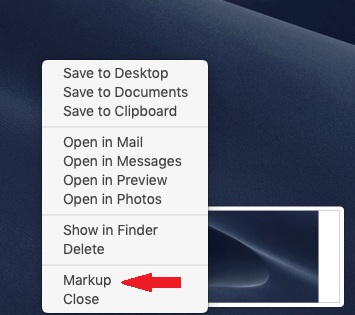
Step 2: Click Markup.
Step 3: You will get a toolbar which you can use to draw, highlight, write, insert text or signature.
Step 4: Click Done to finish.
Steps To Edit A Screen Recording In MacOS Mojave
Step 1: Once screen recording is captured, it will appear in the bottom-right corner, control-click or right-click on it.
Step 2: Click Markup.

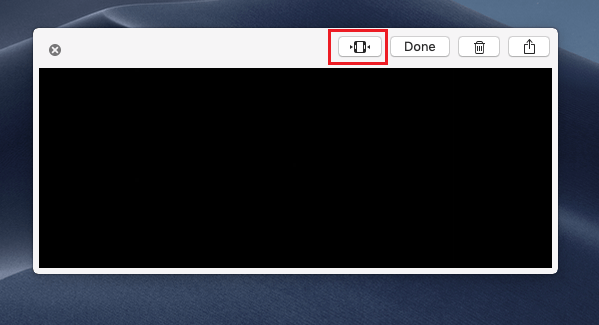
Step 3: Locate Trim from the upper-right corner of Quick Look window.

Step 4: Press and hold points at starting or ending of recording’s timeline and modify the position to change the length of the recording.
Step 5: Click Done.
Steps To Save Location For Screenshots & Screen Recording On Mac
You can also set a default location to save screenshots and recordings after you capture them. To do so, follow these steps:
- Press Shift + Command + 5 Key to get screenshot toolbar.
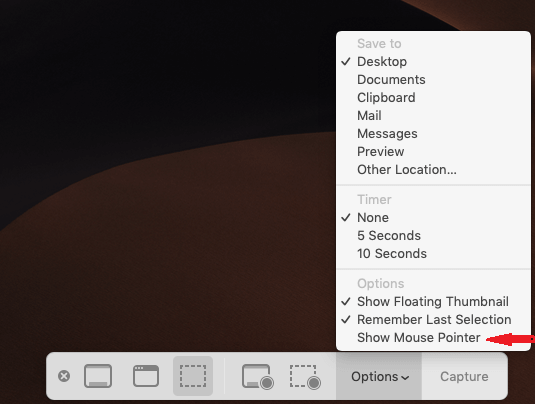
- Click Options.


You can choose from Documents, Desktop, Mail, Clipboard and more under Set a Save Location.

Steps To Set Timer For Screenshots & Screen Recordings On MacOS
Step 1: Press Shift + Command + 5 key to get screenshot toolbar.
Step 2: Click Options.

Step 3: Under Timer-> Set Timer, choose None, 5 or 10 seconds.

Steps To Show Mouse Pointer In Screenshots In MacOS Mojave
Step 1: Press Shift+ Command + 5 to get screenshot toolbar.

Step 2: Click Options->Show Mouse Pointer.
So, in this way you can take screenshots and record your screen in macOS. However, if you have a Windows computer, you can always use TweakShot Capture.
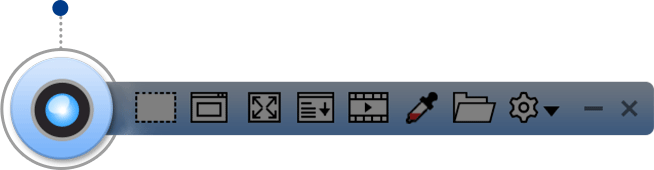

It is the smartest way to capture a screenshot, record a screen, take a scrolling screenshot and edit images. It enables you to take a screenshot of the entire screen, active window or selected region. It also allows you to pick colors from images or screen to use them while editing. You can also perform basic editing features such as cropping, resizing, highlighting and more.
So, these are the ways to take screenshots and record screen on MacOS. Which one did you like? Please share your thoughts in the comments section below.
For more tech updates, follow us on Facebook, Twitter and subscribe our YouTube channel.