
Being a parent is tough, especially in the digitally augmented world that we live in. As internet has become entrenched in our lives, we need to keep strict tabs on what content our kids can access. This definitely calls for online protection against unsuitable content and safety against cyber criminals. Thankfully if you’re a Mac user, this becomes quite an easy task with Parental Control feature to make browsing safe and secure for your children.
In this article, we will talk how to set up parental controls on your Mac.
There are a few things you should have before using Parental Control feature:
- You should have OSx Lion or later.
- You should have an administrative account.
- You must have one or more managed user accounts.
Set Parental Control On Your Mac:
Locate Parental Control
- Locate Apple Icon from top left-hand side corner and click on it
- A drop down menu will appear, select the second option, System Preferences.
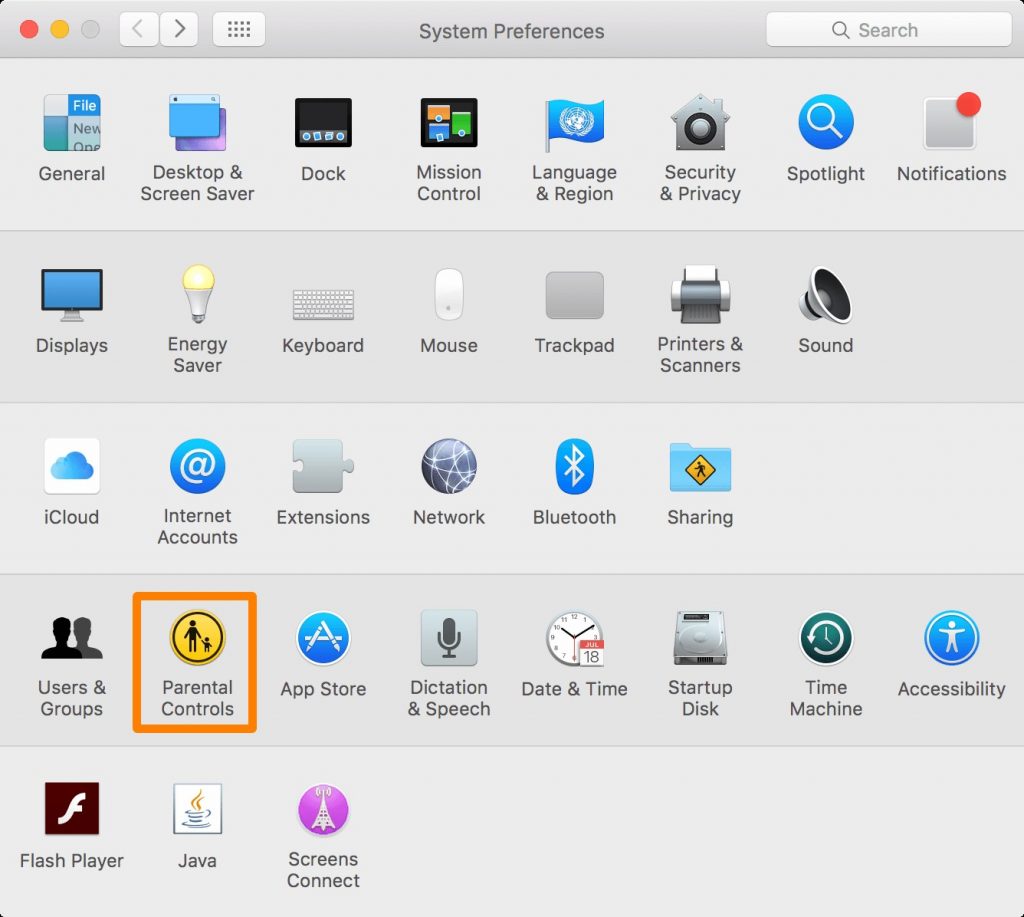
- On the System Preferences pane, under System, click Parental Controls icon.
- On Parental Controls preference windows will open.
- Click the lock icon in the bottom left-hand corner.
- It will prompt you to enter admin credentials.Enter the details and click Ok.
Once you are on Parental Control Window, you need to select an account for which you want to set the parental control. Once you have selected a user, click a button at the top.
You will see certain categories for which you can set restrictions
1. Apps:

By setting restrictions on this parameter, you can stop your child from contacting anyone through email, restrict the usage of inbuilt camera and other apps.
- All you need to do is select the user from the left-hand side of the pane and checkmark on Limit Applications.
- Use the Allow App Store Apps option to select an age range for the apps.
- You can choose which applications (native) should not be used by that user by clicking on reveal arrow next to Other Apps to view apps.
- To prevent the user from running the app, remove the check mark next to the app.
2. Web:

This parameter allows you to limit the access to websites or allows unrestricted access.
On this tab, you will get three options:
- ‘Allow unrestricted access to websites’ – This can be used for older teenagers.
- ‘Try to limit access to adult websites’ – This is the default option selected. Apple has a comprehensive list of websites that are appropriate and inappropriate for kids. You can customize to add or remove websites, to do so, click Customize.
- ‘Allow access to only these websites’. – This option is used for younger children. It blocks the web access apart from the whitelisted websites. Apple has added some of the kid friendly sites, like Discovery Kids, National Geographic Kids. You can add and subtract by clicking on ‘+’ and ‘-’ respectively.
You can click on Logs Button to check the list of websites your kids visited or tried to visit.
3. Stores:

It lets you disable access to the iTunes Store and the iBooks Store. It allows you to limit a child’s access to music, movies, TV shows, apps, and books to only those with age-appropriate ratings.
4. Time:

It lets you set time limits for weekdays, weekends, and bedtime.You can control time for which a user is allowed to access your Mac. You have got three options:
- Limit weekend use to – You set anytime between 30 minutes to 8 hours.
- Limit weekdays use to -You set anytime between 30 minutes to 8 hours.
- Bedtime : It has two options: School nights and Weekends: You can block the access for any time of day and any length of time.
5. Privacy:

This option allows to a child to make changes related to privacy. On this tab, click on Manage Privacy to select apps and games which can access data from the user. You can also choose to disable or enable location services of apps. It also has a list of things (Calendars, Contact, Reminder, etc) for which access can enable or disabled
6. Other:

This option prevents the child from using Siri and Dictation, editing printer and scanner settings, and burning CDs and DVDs. It also lets you hide profanity in the dictionary and other sources.and prevent the Dock from being modified. With Simple Finder option, it allows you to get a simplified view of Mac desktop
So we hope you can now set parental controls for your kids to protect their privacy and to keep a sharp eye on their online activities.