
If you have installed Mojave macOS when it came out as beta, but it is not comfortable with your usual apps, then you need to downgrade it to High Sierra. Yes, you can turn the wheel around however, it is quite a long process, so you need to follow the steps precisely.
In this post, we have listed step by step guide to downgrade macOS from Mojave to High Sierra.
Let’s check whether you want to downgrade the macOS
If you are having performance issues and want to downgrade your macOS to High Sierra, then you could try to improve the performance of your Mac. Run a scan for junk files, unwanted and duplicate files. You can recover a lot of space if you remove unwanted files and improve performance. You can also remove unwanted applications to create more space.
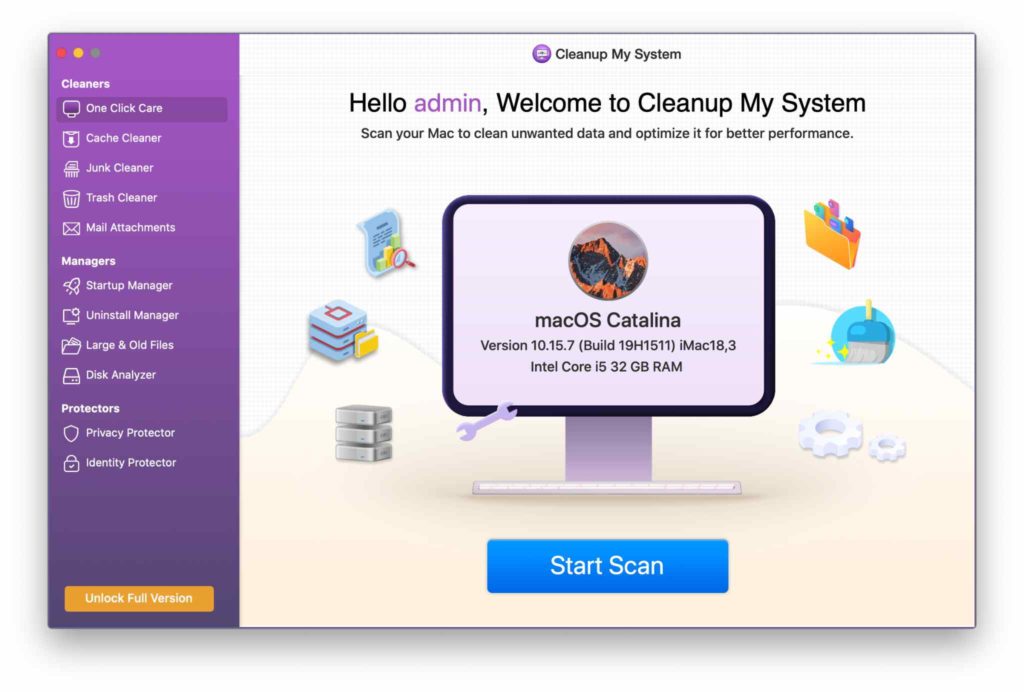
The third party Mac cleaner tools such as Cleanup My System can also helps to enable or disable startup items to enhance the speed of your computer. You can also delete large files such as Music, Video and Pictures and unwanted applications to optimize your Mac. Get Cleanup My System from the download button given below –

How To Roll Back From Mojave To High Sierra?
Step 1: Backup your Mac
Note: It is always recommended to back up your Mac before making any major changes.
You should create a backup of your Mac before uninstalling Mojave. In case you have taken a backup before installing Mojave. You can just copy all the files on cloud storage or external disk.
Step 2: Note Important Things
During the procedure of downgrading, everything including license keys, passwords, and settings are deleted. If you have the old backup file then you must have most of the data on it and rest of the data could be noted either in an app integrated with cloud server or go old fashioned, write it on paper. If you have Password Manager, then you can easily sync it with other devices.
You can also store all these changes to your external hard drive so that you can make the changes to the macOS easily.
Step 3: Uninstall Mojave macOS
To erase Mojave, you need to make sure that your Mac is connected to internet.
- Click Apple menu from top left corner and select Restart.
- Press and hold Command, Shift, Option and R keys to go into recovery mode.
Note, you get into Recovery mode by pressing Command and R keys. Although, when you press Option and Shift along with Command and R, it will reinstall High Sierra, if your Mac has it on when you purchased it.
Follow these steps to proceed further:
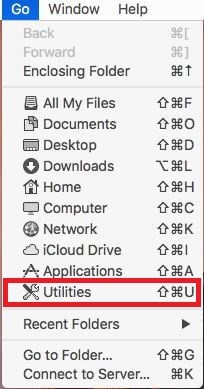
- From Finder’s menu, Click Go to-> Utilities

- From Utilities Window, click Disk Utility.
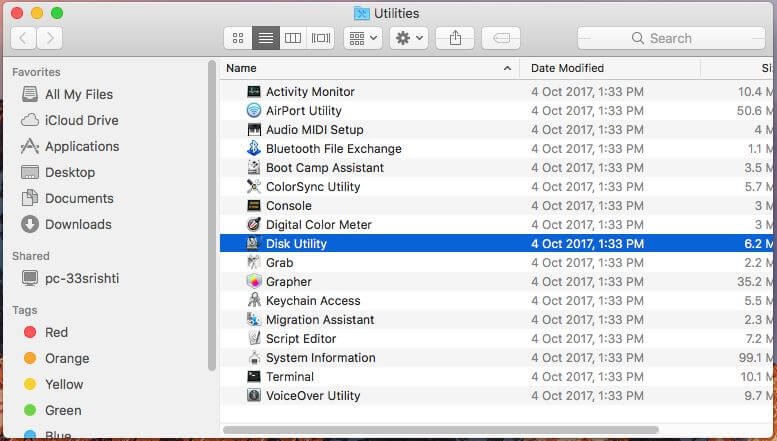
- Choose the disk which has Mojave installed.

- Select Erase.
- Now name the disk and choose file format- MacOS Extended or APFS.
- Again, click Erase and close Disk Utility.
How to revert Mojave to High Sierra if your Mac was shipped with It?
- You need to delete Startup Disk with aforementioned steps. You need to do that first before going to recovery mode as you can’t install older version of macOS over the new one.
- Now go to Utilities again. Select install macOS.
- Click Continue.
How to roll back from Mojave using Time Machine backup
If you have created a backup of your Mac when you installed Mojave, it is your best day. You can use it to install High Sierra. Before going any further, check whether your Time Machine disk is connected to Mac. Now follow these steps:
- First erase startup disk.
- From Finder’s menu, Click Go to-> Utilities
- From Utilities Window, select Restore from Time Machine Backup.
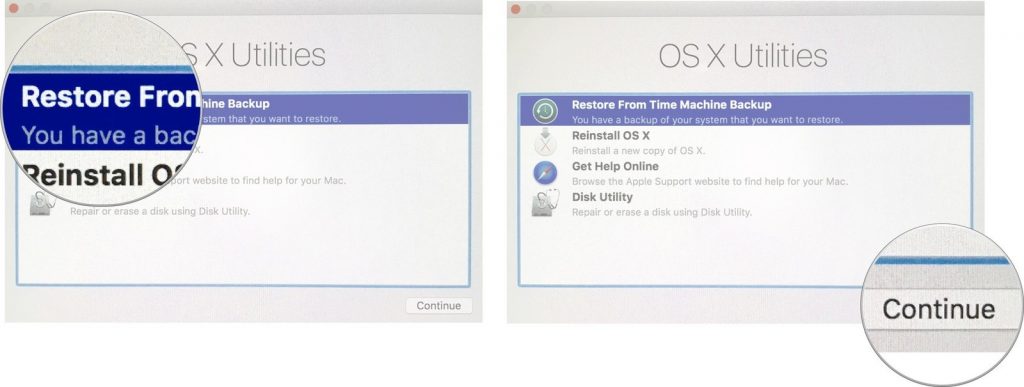
- Now select the backup that you have created, either from the external drive or remote disk.
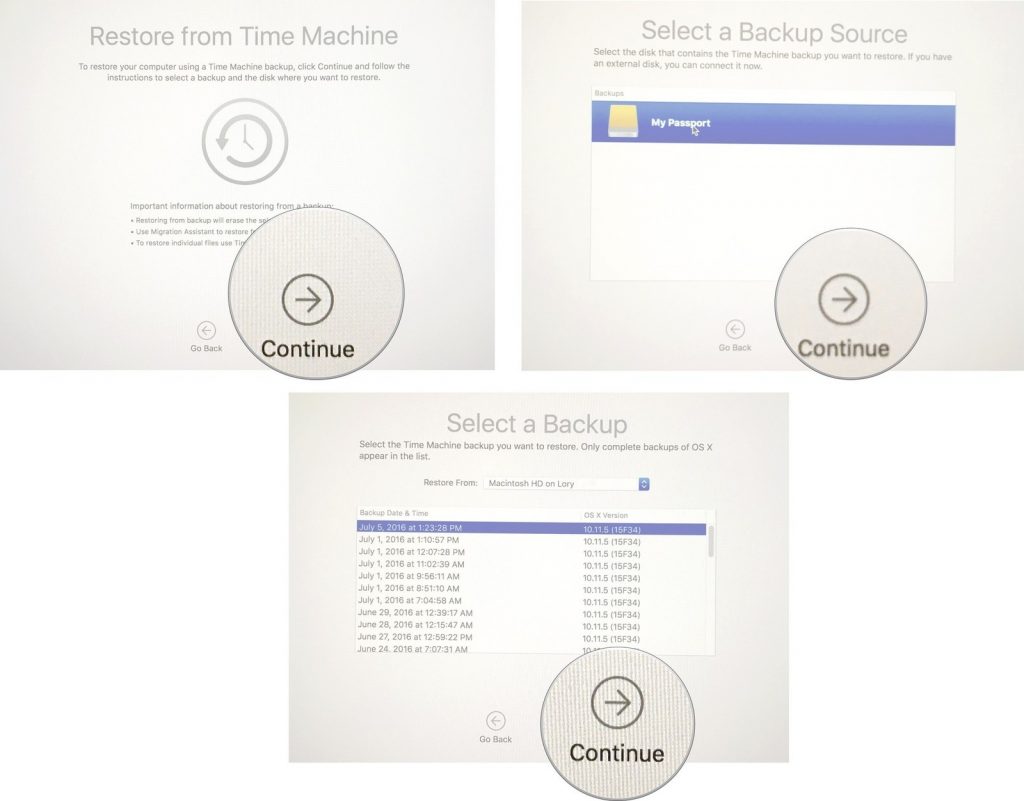
- Input your name and password for the disk, if prompted.
- Now you need to select the time and date of backup which you want to restore.
- After this, just follow the instructions that come on screen.
How To Downgrade From Mojave To High Sierra Via Bootable High Sierra Installer?
If you didn’t have High Sierra when you opened the package, then the above method is not for you. To downgrade from Mojave to High Sierra, you have to create an installer disk. Apple has it on the App Store and the recent version available is El Capitan. You can also get High Sierra. To locate the installer, open the App Store, and look at the left side of the window, or search it from the search box.
Downgrading Mojave after it is released publicly, then it could create issues to get a bootable installer of the High Sierra. You need to get a bootable installer of El Capitan or utilize Recovery Mode to revert macOS recent versions. For recovery mode, press and hold Command, Shift, Option, and R keys. You get into Recovery mode and erase Mojave as well. By pressing Command, Option and R keys. Although, when you press Option and Shift along with Command and R.
Once you have located the bootable installer, click Download button from App Store and wait till OS is downloaded. It could launch when downloaded, close it.
Now follow these steps:
- Get an external hard disk, flash drive or SSD with storage capacity of 128GB or more to create installer.
- Connect external drive or flash drive to your Mac.
- From Finder’s menu, Click Go to-> Utilities
- From Utilities Window, click Disk Utility.
- Tap on external disk from sidebar and choose Erase.
- Name the drive, “My Volume” in Erase window. Choose either APFS or Mac OS as file format.
- Select erase and click Done when the process is completed.
- Close Disk Utility.
- Now go to Utilties folder and start Terminal.
- Now type command, “sudo /Applications/Install\ macOS\ High\ Sierra.app/Contents/Resources/createinstallmedia –volume /Volumes/MyVolume –applicationpath /Applications/Install\ macOS\ High\ Sierra.app”
- Press Return Key.
- Now you need to input your admin account password for your Mac.
- Look for Done on the Terminal window, to make sure the work is done.
Step 4: Install High Sierra
- Locate Apple menu from the top left corner of desktop, select Restart, and press and hold Option key.
- You will get an option to choose a boot disk, select the installer disk that you created.
- High Sierra will start to get installed on your Mac.
- When it is completed, your Mac computer will get restarted and the Startup Assistant will come up.
- Follow the onscreen instructions, to setup your Mac.
Step 5: Restore To Previous Settings
If you have created a backup with some app, you can restore your Mac to the state you had when you created backup. However, you can also reinstall the app manually and also change the settings as per preferences if you don’t have the time constraint.
 10 Best Mac Cleaner Apps & Optimization Software...Checkout the list of best Mac cleaner software for complete mac disk cleanup. Optimization apps like SmartMacCare, CleanMyMac & Ccleaner...
So, in this way you can downgrade from Mojave to High Sierra. However, if you keep your system optimized, and eliminate all the unwanted apps from your computer, you might not need it at all. You can use Cleanup My System to optimize your computer, remove large files and uninstall apps. Try it and keep your Mac clean.