
Categories is a dedicated feature in Gmail that helps users to automatically sort your emails into different tabs, such as Social, Promotions, Updates, and Forums. It is a convenient option to manage your emails, but it can also cause a lot of clutter. Moreover, you may miss important emails that get hidden under the wrong category. You may waste a lot of time in switching between different tabs to find out the exact email you need.
If you are curious to learn the step-by-step method to easily remove unwanted categories on your Gmail account, follow these steps:
A few users have reported that Gmail can add categories to their email accounts even after they are disabled in the settings. This problem may appear due to a bug or sync issue with multiple devices. If you are facing the same issue, we recommend our readers to check out this blog post to discover some potential solutions: Gmail adds Updates, Promotions, and other categories to my emails although disabled
How To Eliminate Categories In Gmail & Streamline Your Emails?
Follow the instructions to quickly remove Categories on PC, Android & iOS.
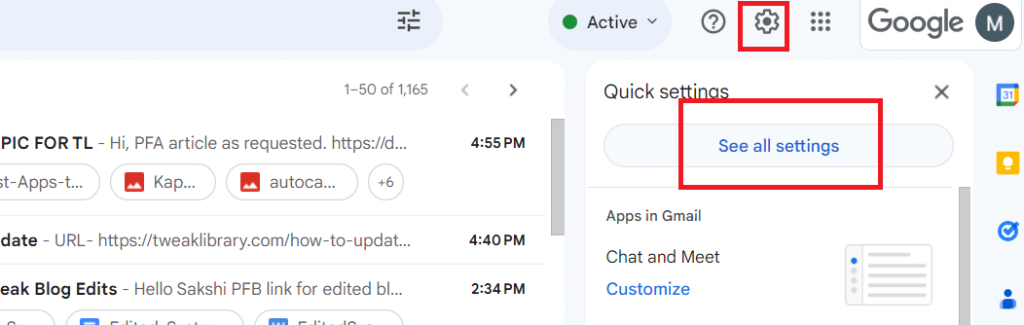
STEP 1 = Launch Gmail on your browser and sign in with your account.
STEP 2 = Hit the “gear icon” to open Settings and select See all settings option from the drop-down menu.
STEP 3 = Head towards the Inbox tab and navigate to the Categories section.
STEP 4 = Now, simply uncheck the categories that you wish to remove from your inbox, such as Social, Promotions, Updates, or Forums.
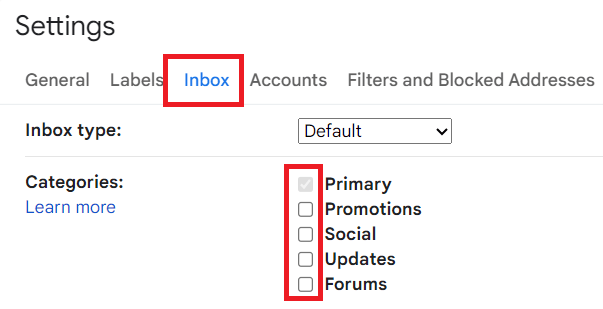
STEP 5 = At this step, you need to scroll down and click on the Save Changes button at the bottom of the page.

Gmail also offers the option to customize which emails should go into which category by creating filters. Alternatively, you can use the Move to option to organize the emails.
Are you facing problems while accessing and using Gmail on the MS Edge browser? If yes, follow the solutions in this article: Gmail Not Opening On Microsoft Edge? Here’s How To Fix It!
How To Remove Categories In Gmail On iOS?
To remove categories in Gmail on iPhone/iPad, follow these steps:
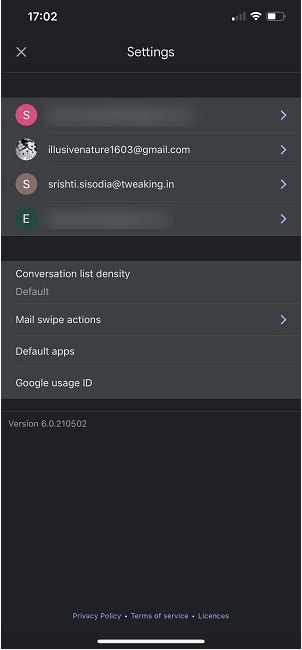
1. Go to the Gmail app on your iPhone/iPad.
2. Locate Menu at the left corner. Tap on Settings.

3. Choose your Gmail account in which you want to make changes.
4. Select Inbox type, and tap on Default Inbox.

5. Tap on the Back arrow and tap on Inbox Categories.
6. Tap on the toggle buttons to disable categories.
Once done, you will see the changes instantly.
How To Remove Categories In Gmail On Android?
Follow these steps to disable categories in Gmail on your Android device:
1. Open Gmail app.
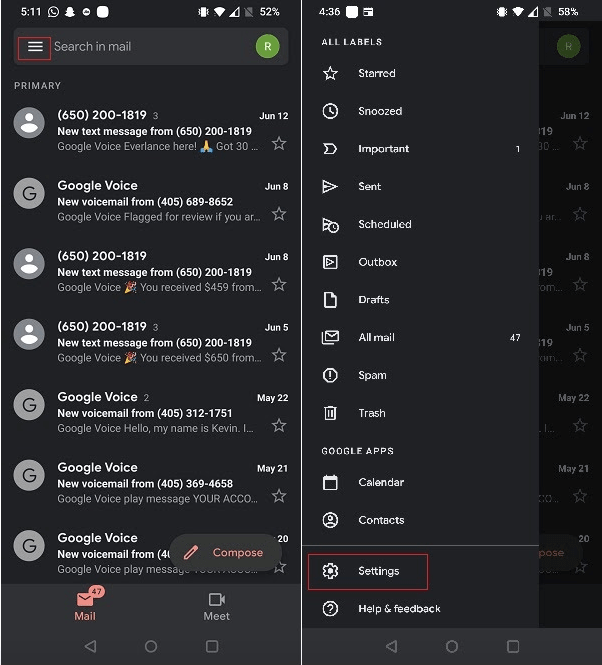
2. Locate Menu (the hamburger icon) from the upper left corner and tap on it.
3. Select Settings. Choose your Gmail account.
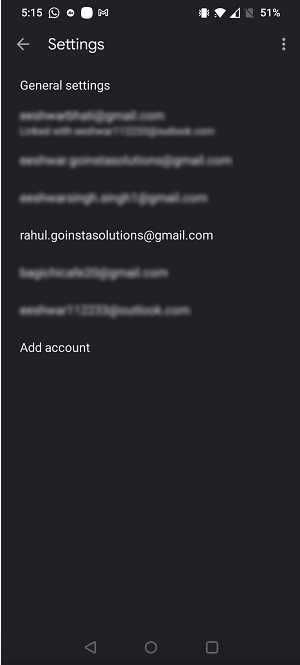
4. Tap on Inbox type->Default Inbox
5. Go to Inbox Categories.
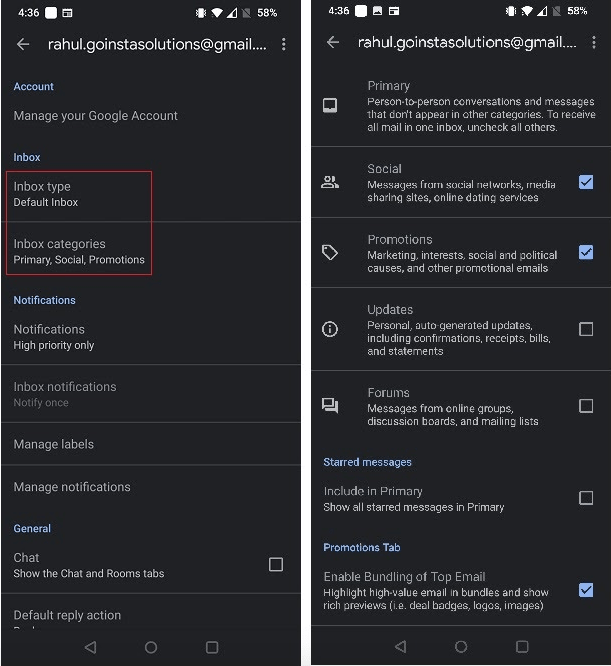
6. Tap on the checkmarks to remove categories.
Once done, you will see the changes instantly.
In this way, you can add/remove categories to your Gmail account. If you have multiple accounts, please follow these steps for each one of your accounts to sort your emails as per your requirements.
Frequently Asked Questions:
How To Move An Email To A New Category?
To add an email in a certain category, drag that email to the category tab. To ensure all your future emails from that sender land in that category, click on the bottom left notification, select Yes.
Can Gmail Be Restored To Default Settings?
There is no easy way of saying this, but sadly if you have messed up your Gmail settings, you can’t restore it to default. To return to its original, you must go to each tab and disable all the settings that you don’t want.
Declutter Your Gmail Inbox By Removing Categories And Enjoy A Cleaner Email Experience
Categories are a convenient functionality in Gmail to sort emails into separate tabs to access important emails easily. By removing unwanted categories from your inbox, you can have better control over your email organization. This way, you can avoid missing important emails. By following the aforementioned steps, you can effortlessly delete categories from your inbox.
If you have any questions or feedback, please leave a comment below
Craig Lewis
This article is fine as far as it goes, but it fails to recognize one fact. When you delete a message from your inbox, but NOT the categories to which it’s been assigned, that email still exists in those categories. Even after you empty trash, it still exists. This means it’s still taking up memory on your phone or tablet or computer. You might think, oh, you’ve been regularly deleting promo emails, your inbox is pretty clean, so why does gmail say you’ve still got gigabtyes worth of mail? THIS IS WHY. You may have *thousands* in those damned categories.Preeti Seth
Hello Craig, Thank you for sharing your input. Please note that deleting an email from Inox automatically removed the email from the category. However, if you don’t clean the Trash where the deleted email stays for 30 days, you will be able to see it. Also, most users get confused with labels and categories. Please note both aren’t the same, and removing a label doesn’t mean it will delete the email. It only means you won’t be able to see the label, but the email will exist. To remove such emails, select them > hit the delete icon > and empty the Trash. This should help.Michael Levy
Unchecking the categories does not prevent emails from being categorized. It just doesn’t show you the category tabs. I have them all unchecked and emails still get assigned to those categories. We should be able to delete them outright and never have emails flagged with the categories.