
Although Facebook is now going through a tough time, it nowhere means that it has completely lost its high ground. Even now, Facebook is far ahead from all its competitors when it comes to the number of active users. No matter the number of campaigns that demand users quit Facebook, there are still millions and millions of users who will stay connected on Facebook. The bottom line is that you still need to prevent your Facebook Timeline from being cluttered by others.
So, if you want to organize your Facebook Timeline, then you need to learn, how to prevent people from posting on it. For this, read on until the end.
Read Also: How To Record Facebook Video Calls Or Video Chats
How to Stop Anyone from Posting on Your Facebook Timeline(Desktop):
This article will guide you step by step on how to stop anyone from posting on your Facebook Timeline.
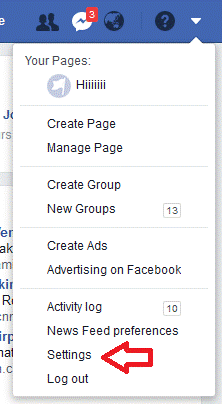
1. To get started login to your Facebook account. Now, click on the small inverted triangle. Its location is at the top right corner of the screen. Then, from the drop-down menu select Settings. (a red arrow has been added for visual reference purpose)
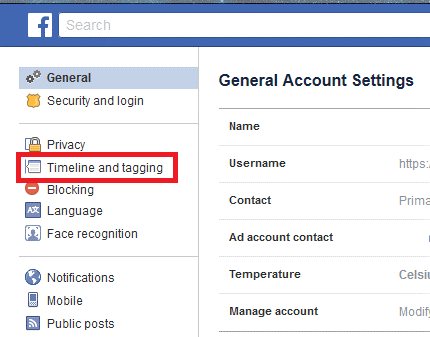
 2. In the new Settings window that opens, click on ‘Timeline and tagging’ in the left panel of the screen.
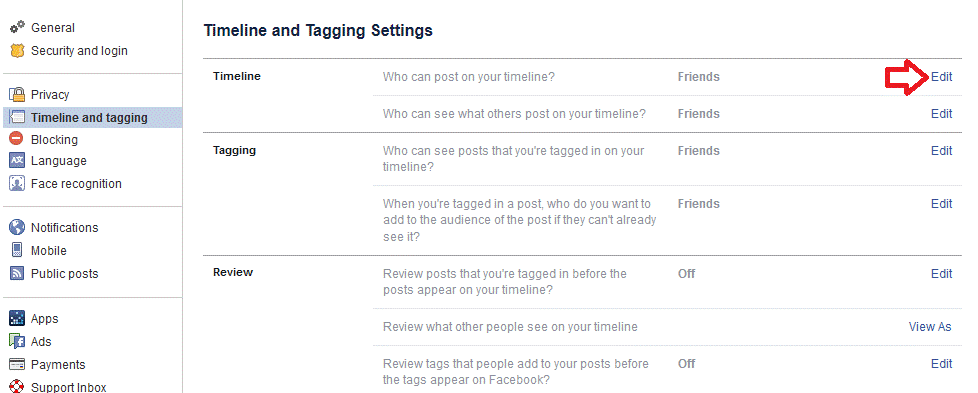
 3. In the ‘Timeline and Tagging’ Settings, locate ‘Timeline’ and click on Edit. It is next to ‘Who can post on your timeline?’.
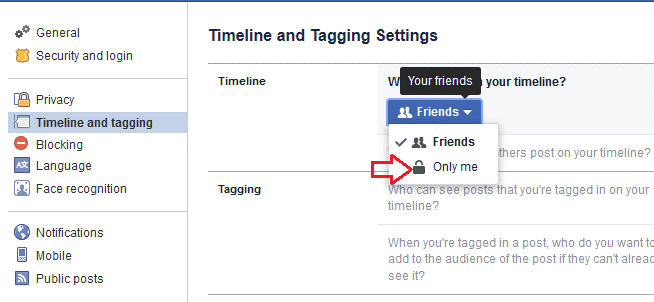
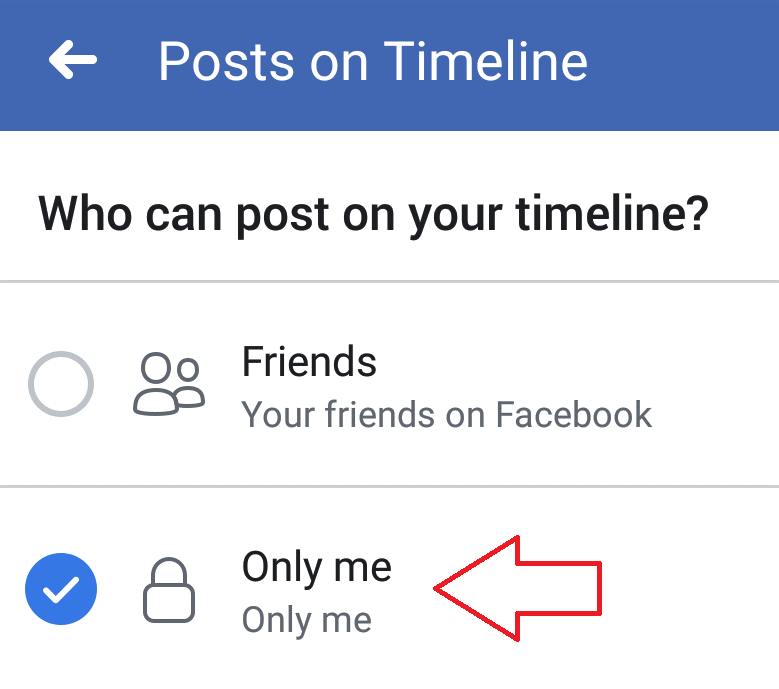
 4. To prevent anyone from posting on your Facebook Timeline select the ‘Only me’ option.
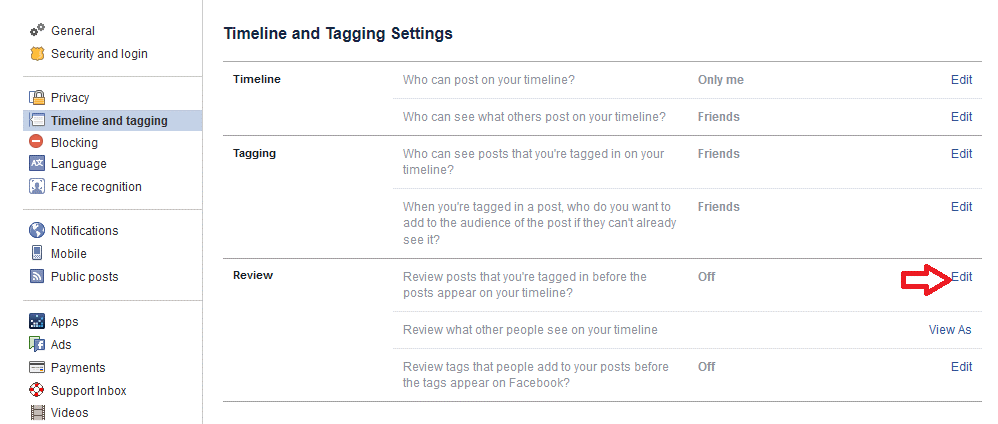
 5. Next, additional changes are required to be made in the Review section. In the ‘review posts that you are tagged in before the post appear on your Timeline’ section, click on Edit.
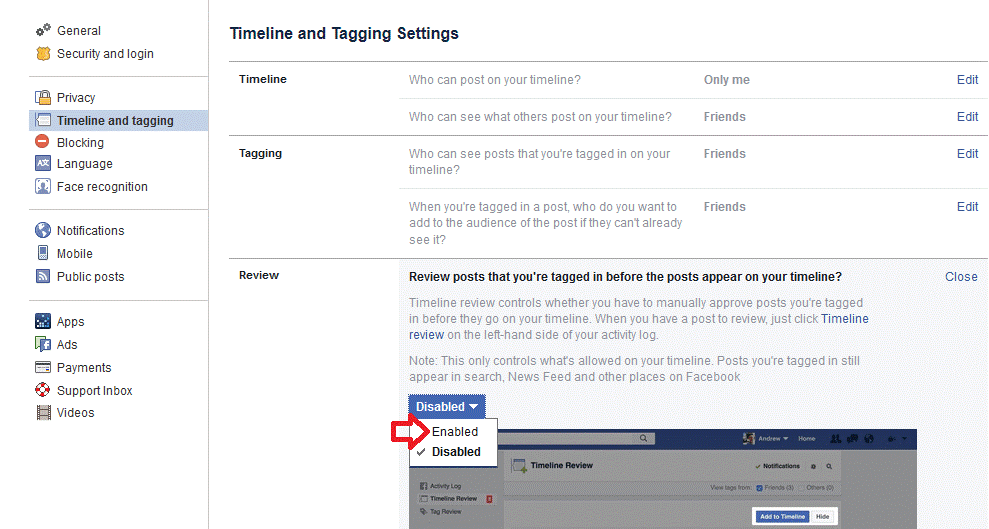
 6. Click on Enabled to set the Timeline review. This turns the setting ‘On’. Now that you have done these steps, you will need to manually approve the posts in which you are tagged in before they are posted on your Timeline.
How to Stop Anyone from Posting on Your Facebook Timeline via Facebook App:
If you currently do not have access to your PC, then you can also enable this feature via Facebook App that is installed on your phone.
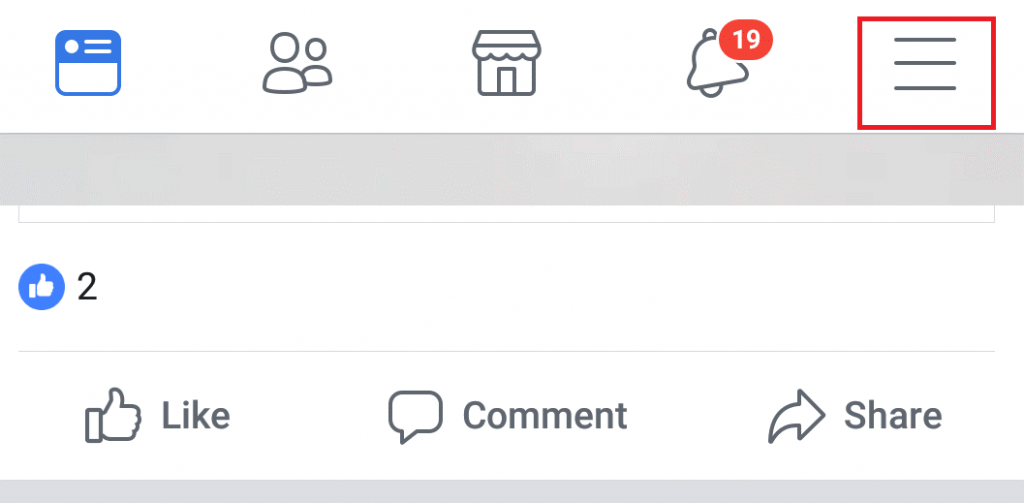
1. Tap on Facebook app icon on your smartphone home screen to launch the app. Next, tap on menu icon located at the top right corner of the app.
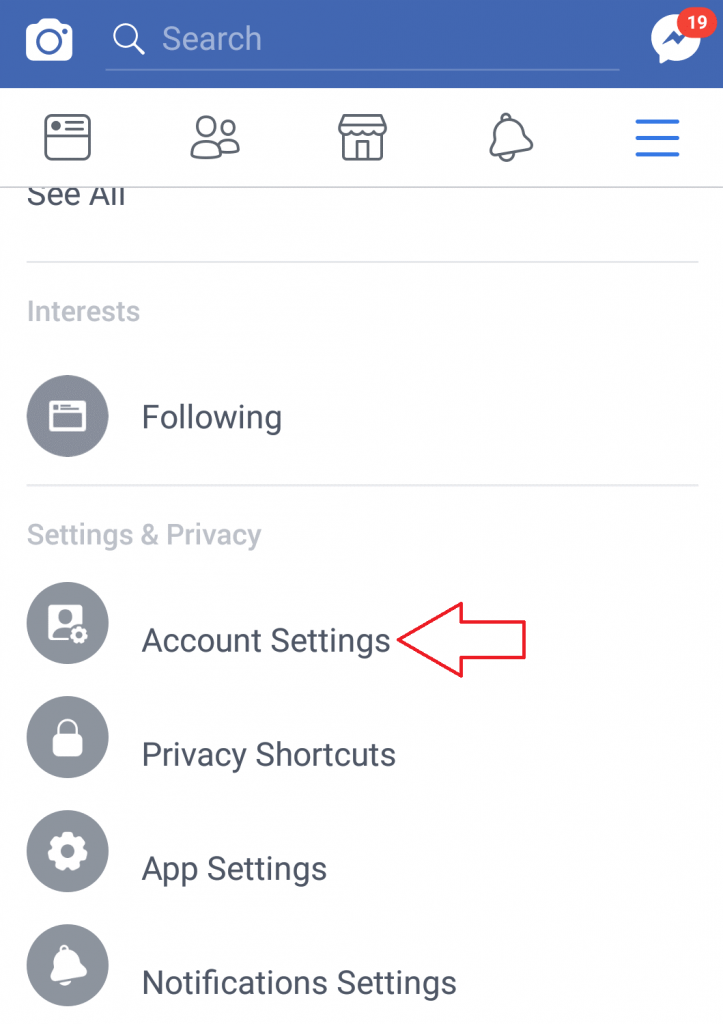
2. In the Settings & Privacy section tap on ‘Account Settings’.
3. In the Account setting section, select ‘Timeline and tagging’ option.
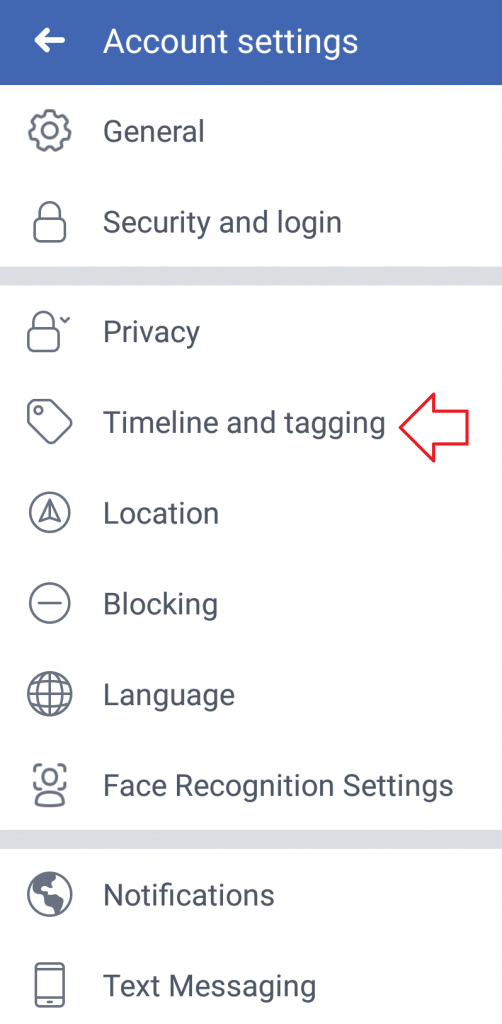
4. In Timeline option tap on, ‘Who can post on your timeline?’
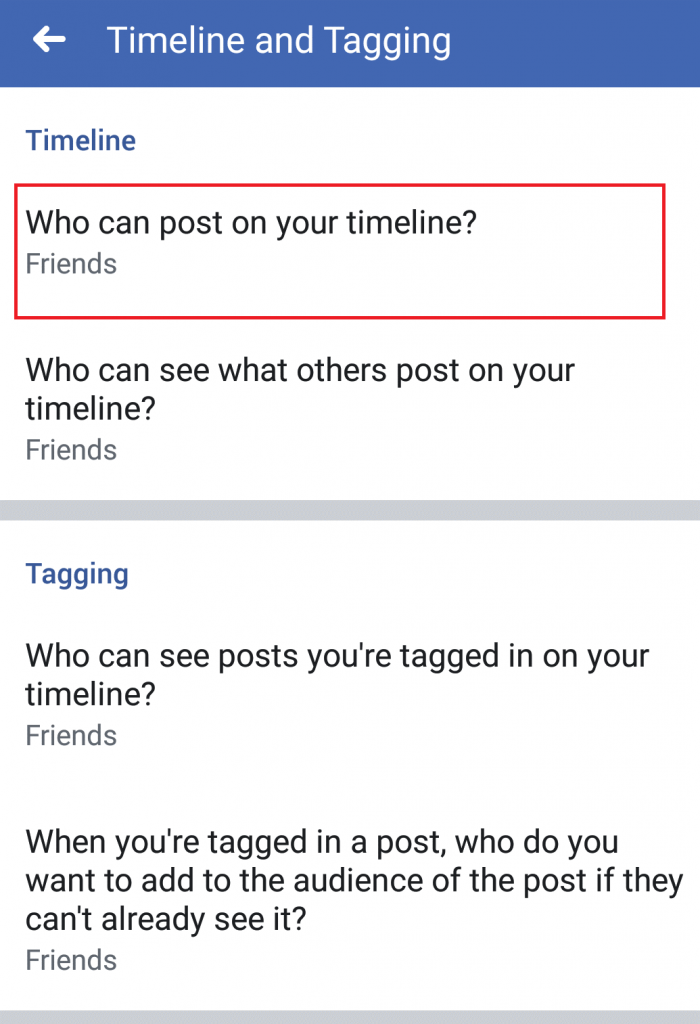
5. Select ‘Only me’. This way no other person can post on your timeline.
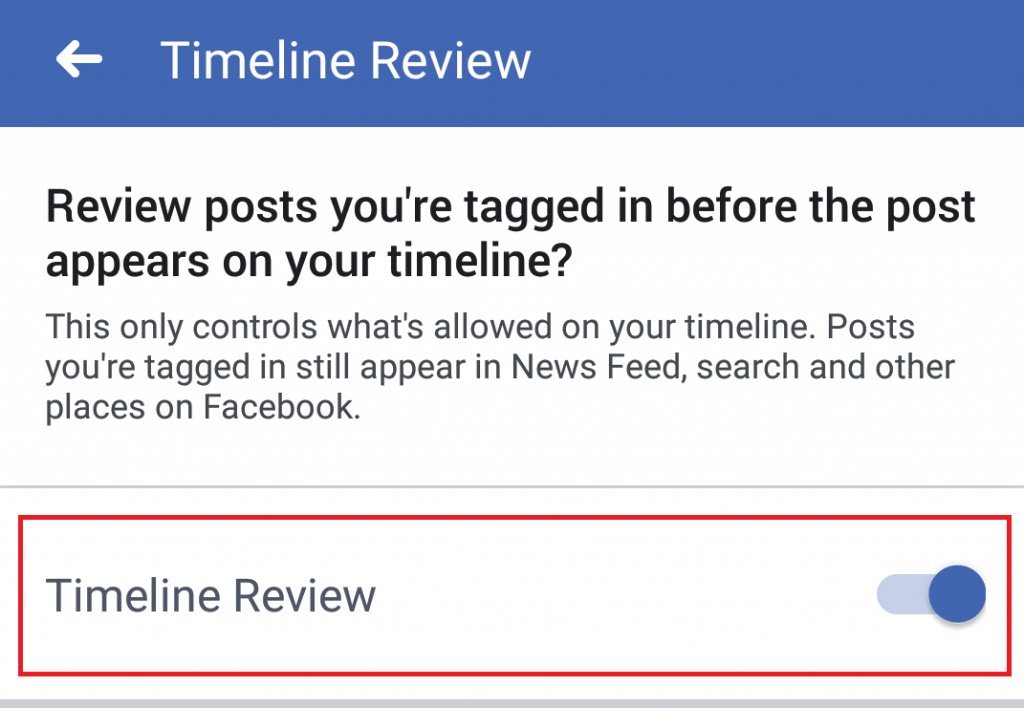
6. Scroll to ‘Review option’ and tap on ‘Review posts you’re tagged in before the post appears on your timeline’.
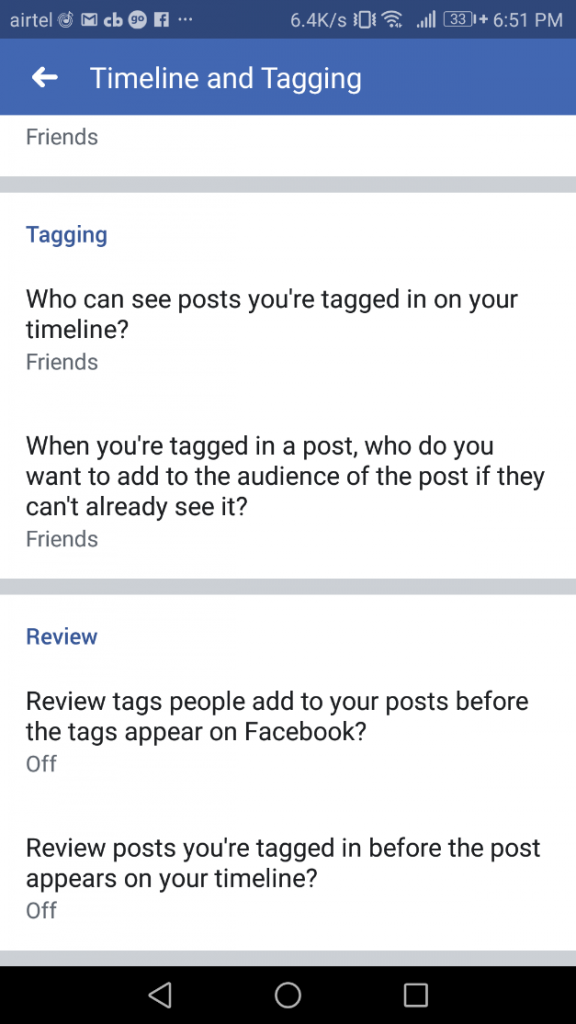
7. Then tap on the toggle button in front of Timeline Review to turn it on. You now have to manually review all the posts in which you are tagged, before they are posted on your Facebook Timeline.
Once you applied this setting you are set. You will now be able to keep your Facebook Timeline organized. These steps give you complete control of what is posted on your timeline. Do not wait any longer. Implement these steps and prevent people from cluttering your Facebook Wall.
Read Also: How To Recover Permanently Deleted Facebook Messages On Messenger