A screencast is a video recording of actions on a computer screen. Text, graphics, audio, and mouse movements can all be included in a screencast. A screencast is a form of video instruction typically used to display a process on a computer screen. Various people can use them for different purposes like:
- Learning professionals can utilize screencasts to show their staff how to use the software they need to do their jobs.
- Screencasting allows teachers to spend less time in the classroom teaching the material and more time practicing and discussing it.
- Video tutorials on using a tool can be quite beneficial to companies that manufacture software or provide a web service.
- Screencasts are used by skilled Photoshoppers, sophisticated users of Microsoft Excel, and other software gurus to share their knowledge with the rest of the world.
- A screencast is a tool for gamers to share their gameplay with the rest of the world and receive feedback on their abilities and teach their peers how to improve.
How to Make a Screencast in 6 Easy Steps
Step 1: Create a plan and a script.

You only have the first few seconds to grab and hold an audience’s attention. From the start of the video, they should recognize that this screencast is what they require right now. Plan your video to attract your audience immediately. This is a blueprint for a future tutorial: where to begin, what to present in the middle, and how to conclude.
Make sure you use words that have meaning when crafting your script. Make every word compete for a spot in the script. Consider removing a term if it isn’t helping the audience understand or progress toward the video’s goal. A succinct script is easier to understand.
Step 2: Select A Microphone

For voice acting, a headset or built-in laptop microphone is ineffective. The recording may contain background noises such as hissing, cracking, or echoing. When making screencasts, use a separate microphone. A microphone isolation shield cuts out the echo and mutes other sounds.
Step 3: Test your Screen Recording Software.
It is always recommended that you test your screen recording software before starting your actual recording. Make a small video and check it to understand when the recording begins and what gets captured.
Step 4: Set up the recording studio

Select a modest space for recording. In a huge room, your voice will be amplified by the walls.
Close all windows and switch off all electronics, including phones, computers, fans, and other appliances. Check to see if your chair squeaks. If the room is empty, the sound will be hollow, as if you are in the bathroom.
Step 5: Get ready to record your voice

You must read the text in a light and believable manner when recording a voiceover. Do some rehearsal before recording by reading the script aloud many times. It is critical to use the microphone correctly while recording. It shouldn’t be too far away from your mouth, as this will pick up more ambient noise, nor should it be too close, as this will pick up undesired mouth sounds and increase the decibels. Your voice will sound stronger and more expressive if you maintain proper posture.
Step 6: Make a screencast.
- Remove any undesired things from the shot before recording.
- Pop-ups and messaging notifications can be turned off.
- Increase the resolution of your screencasts.
- Separately record the voice and the screen.
- Unwanted video segments should be removed.
Bonus Tip. Use Advanced Screen Recorder
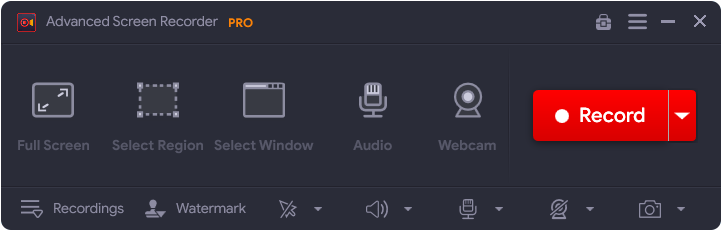

Advanced Screen Recorder is an excellent program that costs $39.95 at the time of testing. The Premium Trial Version is installed when a user initially installs the program. It’s essentially the full edition of the software, with no restrictions and unlimited recording of two tracks without a watermark. This software also includes a 60-day money-back guarantee, which is a great benefit. Here are a few features:
- 4K and HD video can be recorded using MP4 and FLV codecs and other formats.
- Users can record the entire screen, a selected region, or a specific window with or without sound using the application installed on their computer.
- Record footage from a camera or use a webcam overlay to make a video.
- Take a screenshot of a single window, region, selected window, or scrolling window during or after recording.
- Using a microphone, record audio from the system and a voice-over, either simultaneously or independently.
- Users can utilize the Auto-Stop option to stop screen recording when it reaches a certain threshold, such as recording duration or file size.
- You can even draw or input text on the video while filming. This feature is useful when creating tutorials.
The Final Word On How to Make a Screencast in 6 Easy Steps.
Screencasting is an excellent way for globally connected workforces, teachers, students, software developers, and customers to bridge gaps. Making a screencast allows the person on the other end to hear your voice and gives the context of your words. It is, however, not only a powerful but also a straightforward instructive tool that you may start using right away.
Follow us on social media – Facebook, Instagram, and YouTube. Please let us know of any queries or suggestions in the comments section below. We would love to get back to you with a solution. We regularly post tips and tricks and answers to common issues related to technology.