Windows is the most commonly used operating system worldwide. Any individual who has used a computer at some point of their life, must’ve been definitely familiar with Windows environment. Since the evolution of Personal computer, Windows is the only name that stands concrete in our memory.
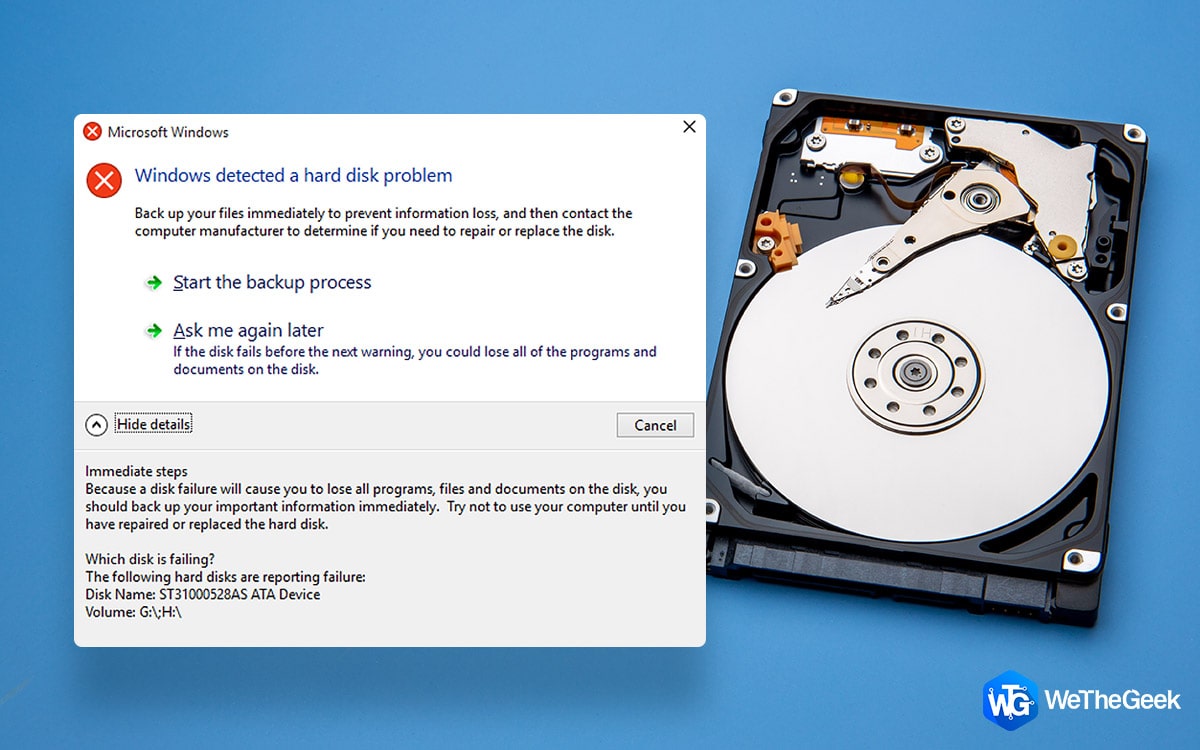
As we’re all aware about common terminologies associated with Windows, let’s dive in deeper. Nobody likes using a slow and sluggish PC, right? The presence of certain errors and bugs results in degrading our Windows performance. One such commonly occurring error is HDD aka Hard Disk Errors, which can get quite worrisome at times. All our precious data including pictures, photos, and documents is saved on Hard Drive of system. So, can you afford to lose your precious data? No, right! Hence, it becomes quite mandatory to instantly fix Hard disk errors on Windows 10, 7 or 8 to keep our private data safe and secure.
The one most effective way to fix hard disk errors on Windows is Check Disk utility—the real lifesaver. So without wasting any further minute let’s see how this tool works on Windows.
How To Use Check Disk Utility On Windows
The Check Disk utility, also known as chkdsk scans the entire hard drive of your system to find and fix any potential problems (if persists). Follow these quick steps to repair hard disk errors on Windows 10, 7 or 8.
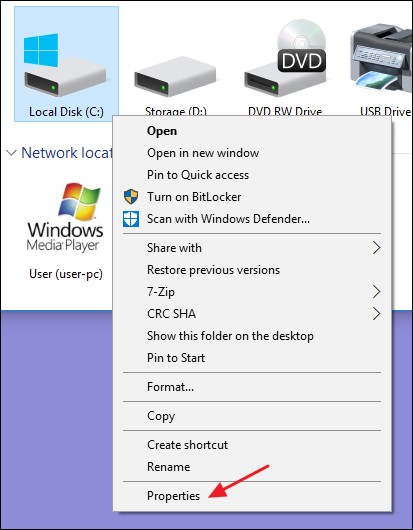
- Open My Computer or Files Explorer and then right click on any hard disk drive that you need to fix.
- Once the pop-up menu appears, tap on “Properties”.

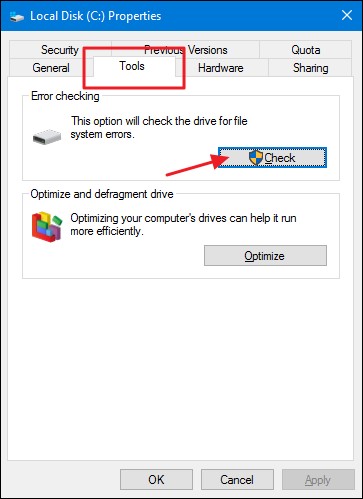
- Now in the Properties window, switch to Tools tab and tap on “Check”.
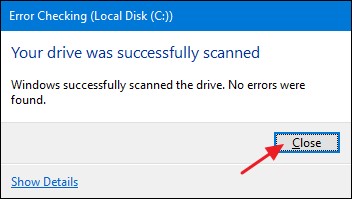
- Once Window is done scanning your hard drive, and if no errors are detected you will see this alert box. Simply tap on “close” to close this Window and you can go back to using your computer normally.
- But if in any case errors are detected by Windows then use one of the following procedures:
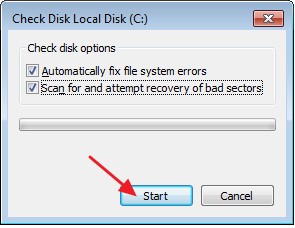
- To run Chkdsk in read-only mode, simply tap on Start.
- To repair errors without scanning the volume for bad sectors, select the “Automatically fix file system errors” check box, then tap on Start.
- To attempt recovery of bad sectors, and recover readable information, select the Scan for and attempt recovery of bad sectors check box, then hit the Start button.
6. If you check on “Scan for and attempt recovery of bad sectors”, Windows won’t be able to scan the drive as the disk is currently being used.
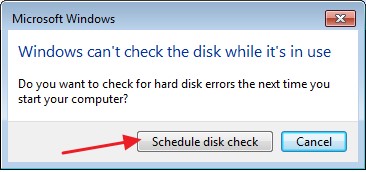
7. In this case you can schedule a disk check for next time when you restart Windows.
How To Check On a Scheduled Disk Scan
At any point of time when you’re unsure when Windows has scheduled the scan, you can check it instantly by hitting up a few geeky commands in Command Prompt. Let’s check it out how!
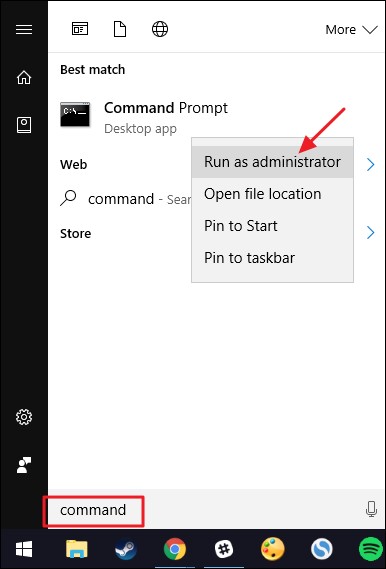
- For starters, launch the start menu and start typing Command Prompt. Once you see the option in the Start menu, right click on it and select “Run as Administrator”.
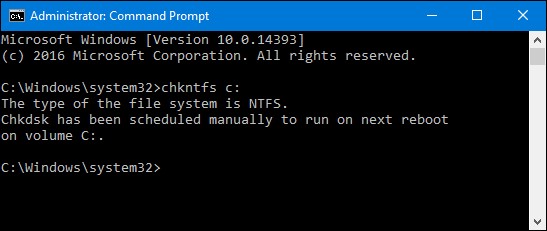
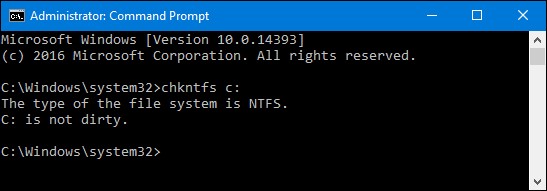
- Now once you arrive at the prompt, type the following command and hit enter.
chkntfs c:
3. If the hard disk is scheduled for a manual check you will see the following message in the command prompt.
4. On the other hand if Windows has scheduled an automatic check on drive then you will get a message saying “<Drive name> is Dirty”. This indicted that drive had potential errors and bugs and Windows will take care of it at the time of next restart.
5. But if you see the message “<Drive name> is not Dirty” this indicates the drive is working fine and no automatic schedule has been planned by Windows.
6. You can now tap on “X” to close the command prompt window.
Hopefully, Chkdsk will fix hard disk errors on Windows 10, 7 and 8 and you can breathe a sigh of relief knowing that your data is safe and secure.
Well, if you don’t want to get indulged in this lengthy procedure you can always a make a smarter choice by trusting on a third party tool. Disk Speedup defragments the hard drives and arranges fragmented files sequentially. As a result, your system’s performance may improve remarkably and it also saves wear and tear of your hard disk. Disk Speedup can take care of your hard drive and keep your data safe and secure from any potential errors or bug!

So folks, here was a quick guide to fix hard disk errors on Windows 10, 7 and 8! Do let us know if you have any other queries.