Have you ever found yourself in a rush, desperately trying to shut down your computer, only to be held back by those pesky, unresponsive applications? We’ve all been there, frustratedly clicking the close button, waiting for the system to respond. Well, fret no more, because today we’re diving into the world of AutoEndTasks on Windows 11 and Windows 10, a feature that can save you precious time and sanity.
In this blog post, we’ll explore the ins and outs of AutoEndTasks, showing you how to enable or disable this nifty function based on your personal preferences. Whether you’re a multitasking pro who needs quick closure or a cautious user who prefers to handle things manually, we’ve got you covered.
Also Read: How to fix the “This app is preventing shutdown” error
What is AutoEndTasks on Windows?
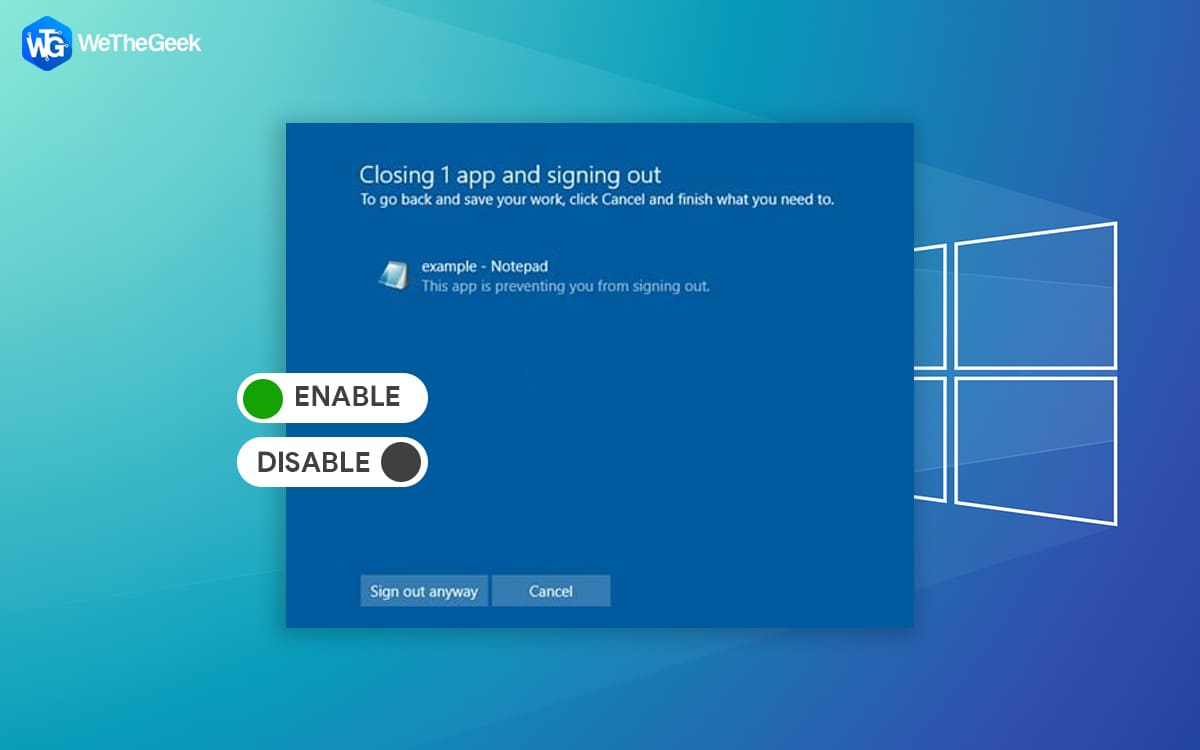
AutoEndTasks on Windows is a feature that determines how your computer handles unresponsive or frozen programs when you try to shut down or restart it. When AutoEndTasks is enabled, Windows will automatically force those troublesome programs to close, allowing your computer to shut down smoothly.

On the other hand, when AutoEndTasks is disabled, Windows will wait for you to manually close those unresponsive programs before it proceeds with the shutdown or restart process. It’s a handy feature that can save you time and frustration when you’re in a hurry to turn off your computer.
Also Read: Best Ways to Fix Computer Not Waking Up from Sleep on Windows 11
How to Enable or Disable AutoEndTasks on Windows 11/10
Here are the simple steps to enable or disable AutoEndTasks on Windows 11/10 using the Registry Editor:
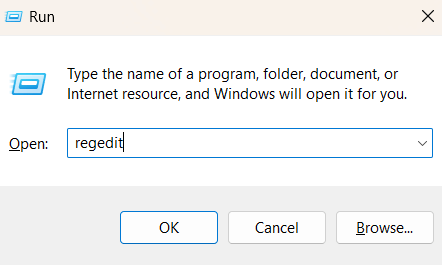
Step 1: Press the Win + R key combination on your keyboard, type “regedit,” and press Enter. This will open the Registry Editor on your device.
Step 2: In the Registry Editor window, navigate to the following path:
HKEY_CURRENT_USER\Control Panel\Desktop
Step 3: In the right-hand pane, look for a value named “AutoEndTasks”. Unable to find it? Don’t worry! If you don’t see the AutoEndTasks value, continue to the next step.
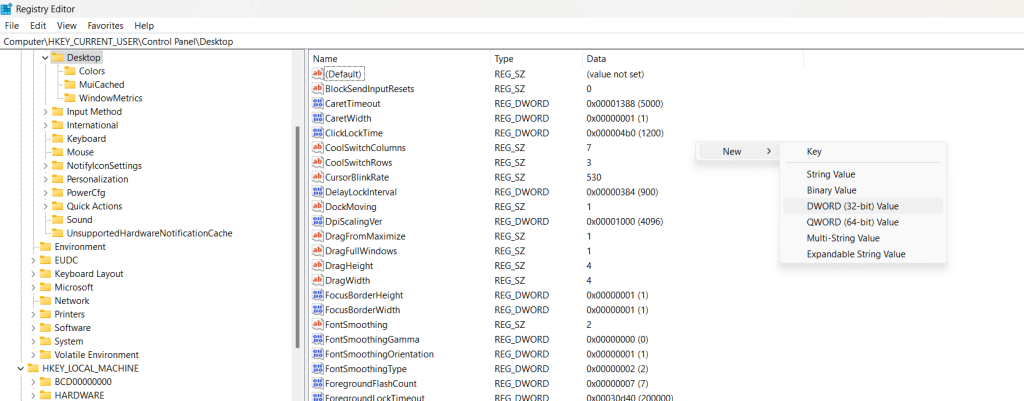
Step 4: Right-click on an empty area in the right-hand pane and select “New” > “DWORD (32-bit) Value.”
Step 5: Rename the newly created value to “AutoEndTasks.”
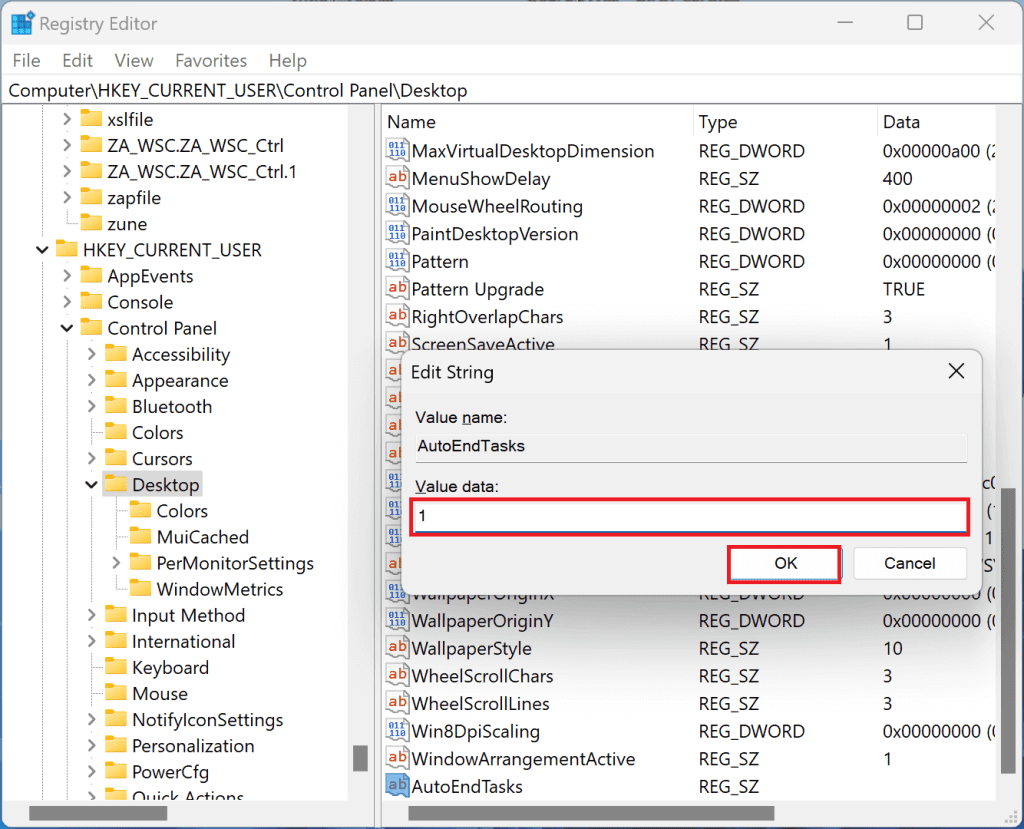
Step 6: Double-click on the “AutoEndTasks” value to modify it. In the “Edit DWORD (32-bit) Value” window, set the value data:
- To enable AutoEndTasks, set the value data to 1.
- To disable AutoEndTasks, set the value data to 0.
Step 7: Click “OK” to save the changes and close the Registry Editor.
Also Read: How to Find Application Process ID (PID) on Windows 11 (5 Ways)
Is it Safe to Disable AutoEndTasks on Windows 11/10?
Disabling AutoEndTasks is generally safe, but it’s important to understand the implications before doing so. When AutoEndTasks is disabled, Windows will wait for you to manually close unresponsive programs before it proceeds with the shutdown or restart process. This can be useful if you want to review any unsaved work or troubleshoot the unresponsive program before closing it.
However, there are a few considerations to keep in mind:
1. Time and convenience: Disabling AutoEndTasks means you’ll need to actively monitor and close unresponsive programs before shutting down or restarting your computer. This can take additional time and may be inconvenient if you’re in a hurry.
2. Unsaved work: If a program becomes unresponsive and you haven’t saved your work, disabling AutoEndTasks may result in data loss if the program crashes or closes unexpectedly.
3. System stability: Sometimes, unresponsive programs can cause system instability or freeze other applications. By allowing them to remain open, you might experience a slowdown or encounter further issues.
In most cases, it’s safe to disable AutoEndTasks if you’re comfortable managing unresponsive programs manually. However, it’s recommended to save your work regularly and consider the potential risks before making any changes to system settings.
Also Read: How To Prevent Background From Changing Automatically in Windows 11
Conclusion
This wraps up our comprehensive guide on how to enable/disable AutoEndTasks on Windows. Understanding how to use AutoEndTasks on Windows 11/10 can provide you with more control over how your computer handles unresponsive programs during shutdown or restart. By enabling AutoEndTasks, you can streamline the shutdown process by allowing Windows to automatically close unresponsive applications.
This can save you time and prevent frustration when you’re in a hurry. On the other hand, disabling AutoEndTasks allows you to manually address unresponsive programs, allowing you to review unsaved work or troubleshoot before closing them.
However, it’s essential to weigh the convenience and potential risks associated with disabling AutoEndTasks, such as the need to save your work regularly and the possibility of system instability. Ultimately, choose the option that aligns with your workflow and preferences.
Was this post helpful? Feel free to share your thoughts in the comments box! Follow us on social media – Facebook, Instagram and YouTube.