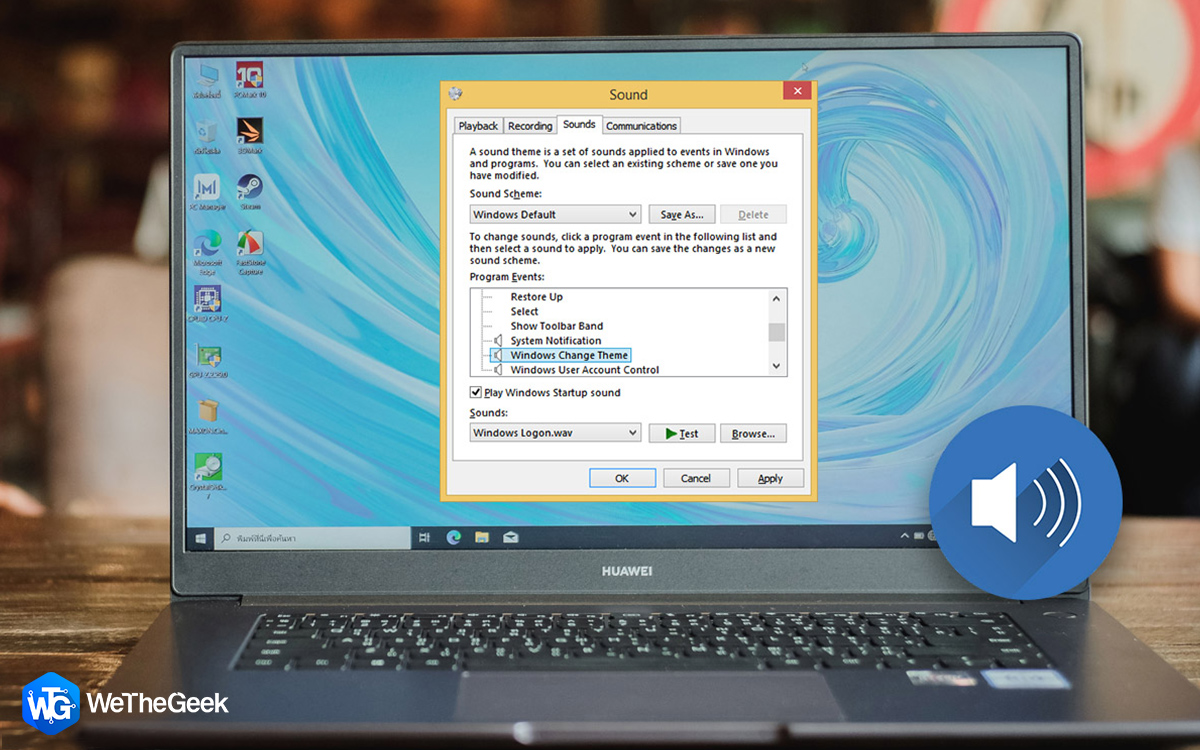
If you are looking to have some fun, then you can try to change your Windows 10 startup sound. You can either set up a beautiful welcome message, an inspirational or motivational message or something scary or funny to play a prank on your friends. This change will not affect the functioning of your computer in any way and is easy to follow. I think that provision has been deliberately left by Microsoft for users to customize the Windows 10 startup sound.
Also Read: How To Solve No Sound Problem In Windows 10
How To Customize Windows 10 Startup Sound?
To customize the Windows 10 startup sound, you would require doing a little bit of programming. But fear not, I have mentioned the codes, and all you need to do is to paste them in a new notepad file. The detailed steps are explained below:
Step 1: Create A VBScript File
The first step is to open the Notepad app on your computer by typing “Notepad” in the search box on the taskbar. Once the Notepad app opens, copy the command codes from below and paste it in the notepad app.
dim speech
text=”Your Message”
set speech=CreateObject(“sapi.spvoice”)
speech.speak text
Also Read: How to Increase Microphone Volume in Windows 10
Step 2: Add Your Message
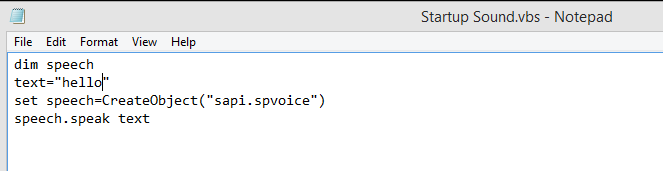
You can add your message in the second line between the quotes. Just erase Your Message and write whatever you want and make sure it is between the quotes.
Step 3: Save The File
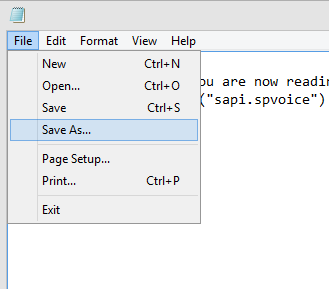
Once you have edited the file, it is essential to save it immediately. For that, click on the File tab on the top left and choose Save As from the dropdown menu.
Type a name as per your discretion and don’t forget to add “.vbs” at the end of the name you typed. This will add as an extension and convert the simple Notepad text file into a VBScript file. For example, I have named the file as “Startup Soud.vbs”.
Also Read: 8 Best Sound Boosters for Windows 10 Laptop and Desktop
Step 4. Test The file
Before we place this file in the appropriate folder for Windows 10 to execute the Startup sound when you turn on the computer, let us test the file and check if we can hear our message loud and clear. The testing can be accomplished by a simple double click on the VBScript file, and you will hear the message typed within the quotes.
If for some reason you cannot hear the message, then make a right-click on that VBScript file and click on Edit from the contextual menu. Now check on the coding and compare it with the codes mentioned above,
The voice you will hear is of the default Windows Narrator, and it can speak out English words with ease. If you use your name or any word in a foreign language, then it may not be able to pronounce it correctly.
Also Read: How to Fix HDMI Sound Not Working on Windows 10?
Step 5. Place The File In Startup Folder
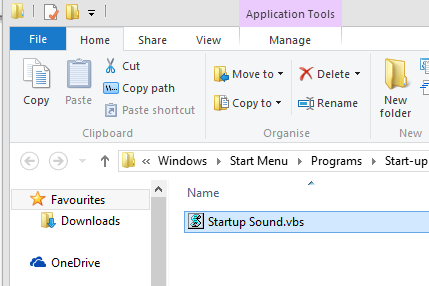
If you have tested the VBScript file and are satisfied with the results, then it is time to place it in the relevant folder so that it can play at the startup. For that, Press the Windows + R keys together on your keyboard to open the Run Box. Once opened, Type “Shell:Startup” to open the start-up folder and copy and paste this newly created VBScript file in that folder.
Step 6. Reboot Your Computer
Once you restart your PC, you will be greeted by the same message you set up in the VBScript file and placed it in the Windows 10 startup folder.
Note: If you are bored of the customized Windows 10 startup sound and want to remove it or change then navigate to the same the folder as in Step 5 and either edit the VBScript or delete it to remove the sound.

Also Read: How To Add Windows 10 Equalizer: Best Way To Improve Sound On PC
Your Thoughts On How To Customize Windows 10 Startup Sound?
That concludes the steps to set a custom Windows 10 Startup sound on your computer. This process is not a troubleshooting step but something to have fun with your computer. Do try it out on your computer and share your experiences in the comments section below.
Follow us on social media – Facebook, Instagram and YouTube. For any queries or suggestions, please let us know in the comments section below. We would love to get back to you with a solution. We post regularly on the tips and tricks along with solutions to common issues related to technology.
Anamika
is these process also works in windows 7 pc