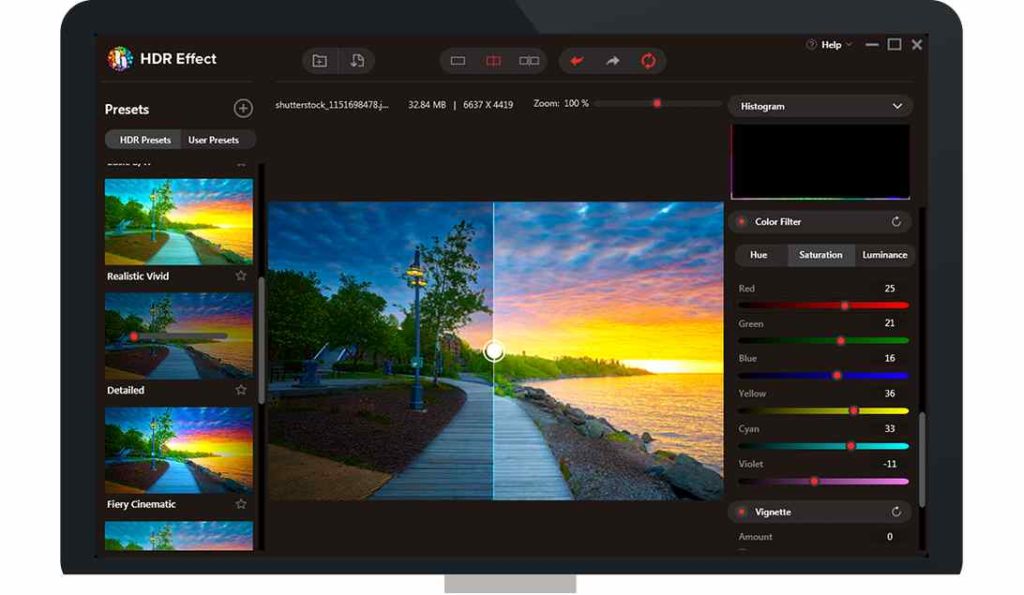
Photography is a passion that is buried deep down into all of us. Some click photos as a profession, others take snaps because they have to or are forced to, while others capture moments as memories. Getting an image right is not always a matter of knowledge, it does involve a bit of luck too. This post describes an HDR Effect app that can help change image colors while photo editing to make your photo perfect. Let us see how to change the color of the image and enhance your photos.
How to change the colors of your image using HDR Effect
Step 1: Go to the Microsoft Store and download HDR Effect on your Windows PC –
Step 2: Finish the installation procedure and grant it the appropriate rights.
Step 3: Start the HDR Effect program on your computer.
Step 4: Open HDR Effect and add the image you wish to alter.
Step 5: Select one of the three viewing modes to see the image.
Single-Mode: Displays only one image on the screen.
Split Mode: Displays a slider that allows you to see the image’s before and after-effects.
Double Mode: Displays the Original and Edited images next to each other.
Step 6:To change the color of the image look to the left side of the tool, it’s time to add the effects to the image. These HDR presets are prepared effects that you can click on to quickly enhance photographs.
Step 7: User Presets will be another option, which can be adjusted to your liking. Use the tools on the right side of the application to accomplish this. You can adjust the Highlights, Saturation, Contrast, Brightness, and Shadows, among other things, here. Save it as a personalized preset for future usage.
Step 8: To save the image after you’ve finished modifying it, click the Save Now option.
Why Choose HDR Effect Over Other Photo Editing Software?
Professional designers and photographers use the HDR Effect to edit, retouch, and create multi-layered compositions. It is beneficial to let go of your inner artist and modify your photos using these options:
HDR Algorithm. To make beautiful, stunning photos, increase the luminance of a regular low-quality digital photograph.
Enhance Colour. With the HDR Effect, you may improve and expand the color saturation range.
Enhance Contrast. Increase HDR contrast to transform photographs and make them stand out.
Denoise HDR. With the powerful HDR denoise tool, you can instantly remove low-light color noise!
Smart Toning. Change the tonal value of your photograph naturally.
Filter by color. By applying a small color filter to an ordinary image or scene, you can transform it into something spectacular.
High-End Presets. With specified high-end settings, you can get correctly exposed photographs.
Vignette. Reduce the brightness or saturation of the image as it approaches the edges.
Radiance of the Image. Control color balance, sharpness, exposure, and brightness, among other things, in your images.
Adjustment of Color. Colors will appear brighter, and temperature, tint, and other parameters can be readily adjusted.
Import of RAW images. Import and edit PSD, JPEG, RAW, PNG, and more image files in seconds for stunning HDR results.
Unique Presets. Make your own presets to obtain the HDR results you want.
The Final Word On How to change colors of your image using HDR Effect
Some of you might think that it would be wrong to change image color while photo editing and would rather stick to the originals. But the thing is, making your image look perfect and better than before is what matters. HDR Effect is an amazing software that requires no formal training like Photoshop. Users can change image colors and other modifications with a few mouse clicks.
Follow us on social media – Facebook, Instagram, and YouTube. For any queries or suggestions, please let us know in the comments section below. We would love to get back to you with a solution. We regularly post tips and tricks, along with answers to common issues related to technology.


 Subscribe Now & Never Miss The Latest Tech Updates!