Facing the “Display driver failed to start” issue on Windows 10? Well, this problem might not be as common as you think, but yes, you may face this issue in a few unfortunate circumstances. In this post, we have listed a step by step guide that will allow you to fix this issue on Windows 10.
Let’s answer a few FAQs for a better understanding of the issue before we move up to the solution.
What does the “Display Driver Fail to Start” mean?
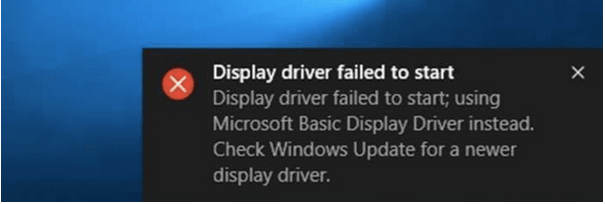
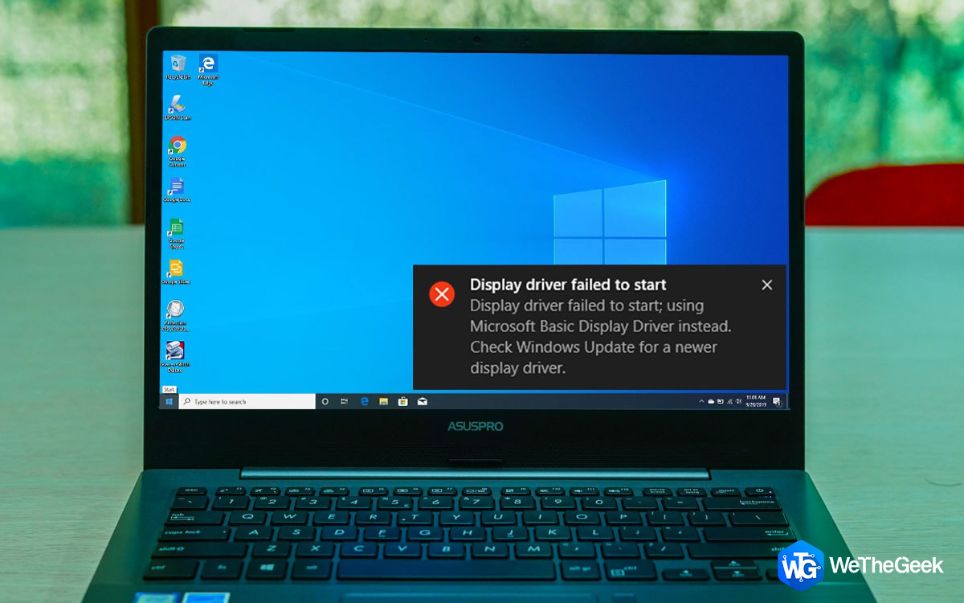
So, how would you know that your machine’s display driver has crashed? Well, Windows 10 will first notify you as a desktop notification (refer above snapshot) letting you know that your existing graphics card is not supported with this OS version. If you encounter this error, Windows strongly recommends you to update the graphics driver installed on your system as this is the most effective solution to fix this issue.
What Do I Do When Display Driver Failed to Start
When you encounter this error on your PC, you will still be able to use your machine, but yes it won’t respond too well. Hence, fixing the “display driver failed to start” error is mandatory to use your Windows 10 system in an optimized condition.

In the latter section of our post, we have listed 4 amazing solutions to fix the driver failure issue on Windows 10. Read on!
Why Does My Display Driver Keep Crashing
The failure of the display driver is generally caused when your system comes across with a faulty driver. This error usually occurs when you upgrade to your device to a newer Windows 10 version, and due to this, a few pre-installed drivers fail to support the update causing this error.
How to Fix Display Driver Failed to Start Issue in Windows 10
Sometimes simply rebooting your system can also fix the error. If not, then there are a couple of other solutions as well which include updating the graphic card drivers, re-installing Windows, and so on.
Here are a few effective ways to fix display driver failure issue on Windows 10:
Solution #1: Update the Graphics Card Driver
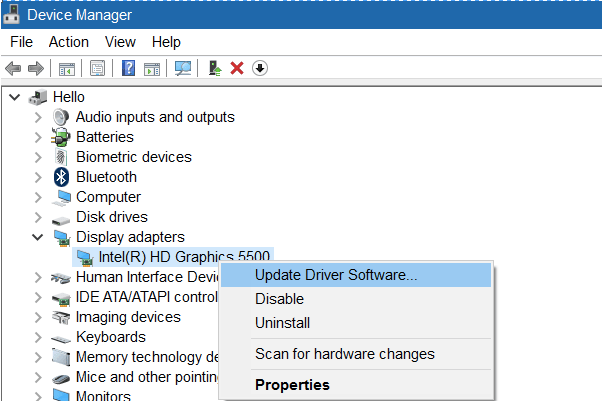
Right-click on the Start menu and select “Device Manager” from the context menu that appears on the screen.
In the Device Manager window, tap on the “Display Adapters” option. As a sub-category to Display Adapters, you will see the name of the installed graphic card drivers of your machine.
Right-click on the Graphics Card driver’s name and select “Update Driver Software”.
Now, Windows will offer you two choices where either your machine can search for available drivers automatically on the web and the other option where you can manually select a driver while browsing to its location.
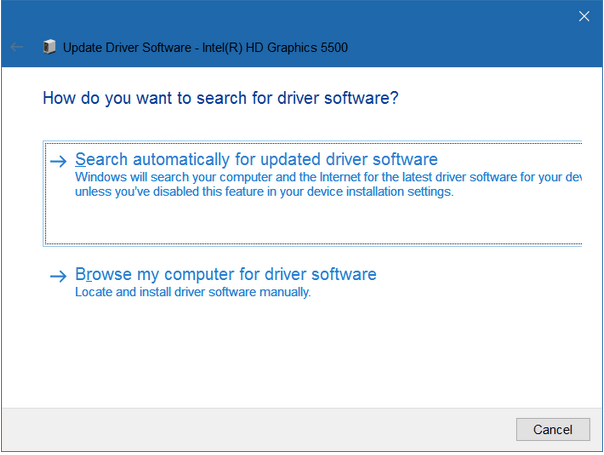
Pick the first option where Windows automatically searches for driver updates online. Wait for a few moments until Windows is done searching. If Windows finds the required update for your graphics card, it will get automatically installed on your system.
Although, there’s also a possibility when Windows is unable to find the update for the graphics card, and it will notify you with a “No updates were found” alert. Hence, moving to our second solution, i.e. to re-install the existing drivers.
Also Read: A complete guide on how to update the graphics driver on Windows 10 PC.
Solution #2: Re-install Existing Graphics Driver
If Windows couldn’t fetch for any updates online, you can also try fixing the issue by re-installing the existing graphics card driver on your system. Here’s what you need to do:
Head on to the Device Manager, by right-clicking on the Start menu.
Tap on the “Display Adapters” option to view your graphic card driver’s name. Right-click on it and select “Uninstall”.
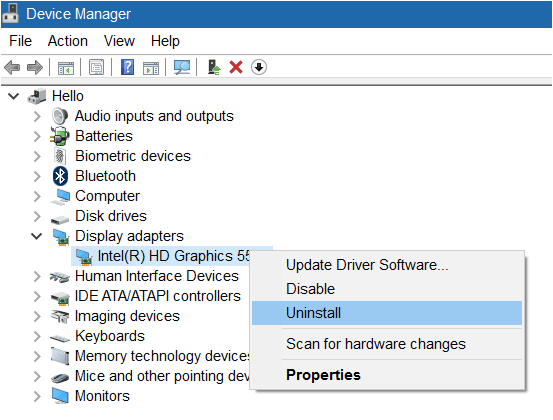
Head on to your respective graphic card driver’s manufacturer’s official website and manually install the latest version available for your device.
Solution #3: Roll Back Driver Settings
Another solution to fix the display driver failure is to roll back your existing driver to its original/ previous settings.
Navigate to Device Manager and right-click on the Graphic card’s name, select “Properties”.
In the Properties window, switch to the second tab, i.e. Driver.

Tap on the “Roll Back Driver” option and hit the OK button to confirm.
Solution #4: Install Smart Driver Care
Last but not least, you can also try downloading a driver updater tool on your machine to free yourself from all the hassle.
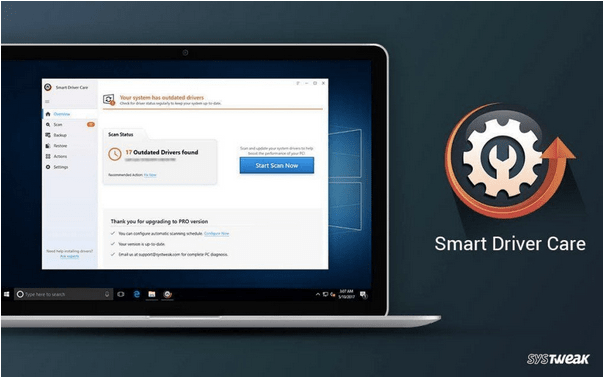

Install the “Smart Driver Care” tool on your Windows as this is the most effortless way to update all sorts of outdated drivers on your system.
Smart Driver Care is an outstanding driver updater tool that automatically looks for outdated/missing drivers installed on your machine and then automatically updates them in just one click. Awesome, isn’t it?
Conclusion
Here were the 4 most useful and effective solutions to fix the “Display Driver Failed to Start” error on Windows 10. You can use any of the above-mentioned methods to fix this error,