Anything you copy shows up in your clipboard once you turn on Windows’ clipboard history feature. Windows may sync your clipboard items between devices if you have the sync capability enabled. Thankfully, you can erase your clipboard history whenever you choose. In actuality, there are several approaches. Here are four quick methods for erasing clipboard history in Windows 11.
Also Read: How to Remove A Clipboard Hijacker That’s Pasting a Garbled String
Methods On How To Clear The Clipboard History In Windows 11
How To Remove History from The Clipboard In The Clipboard Tab
Windows has a simple method for erasing clipboard history under the clipboard tab. To remove all copied objects from your clipboard, press Win + V to bring up the clipboard tab and then click the Clear all button.
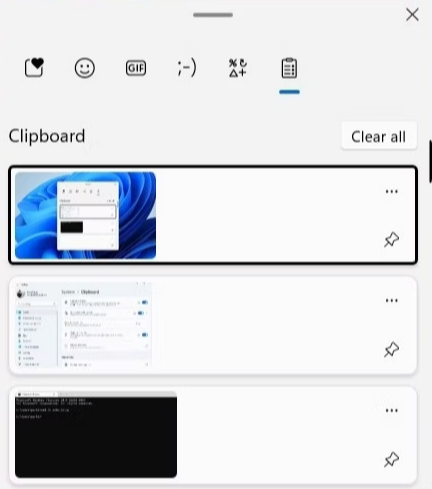
If you like, you can also remove particular entries from the clipboard. To do this, choose the entry you wish to delete by clicking the three-dot menu icon and then selecting the bin icon.
Also Read: How To Fix Windows 11 Clipboard History Not Working
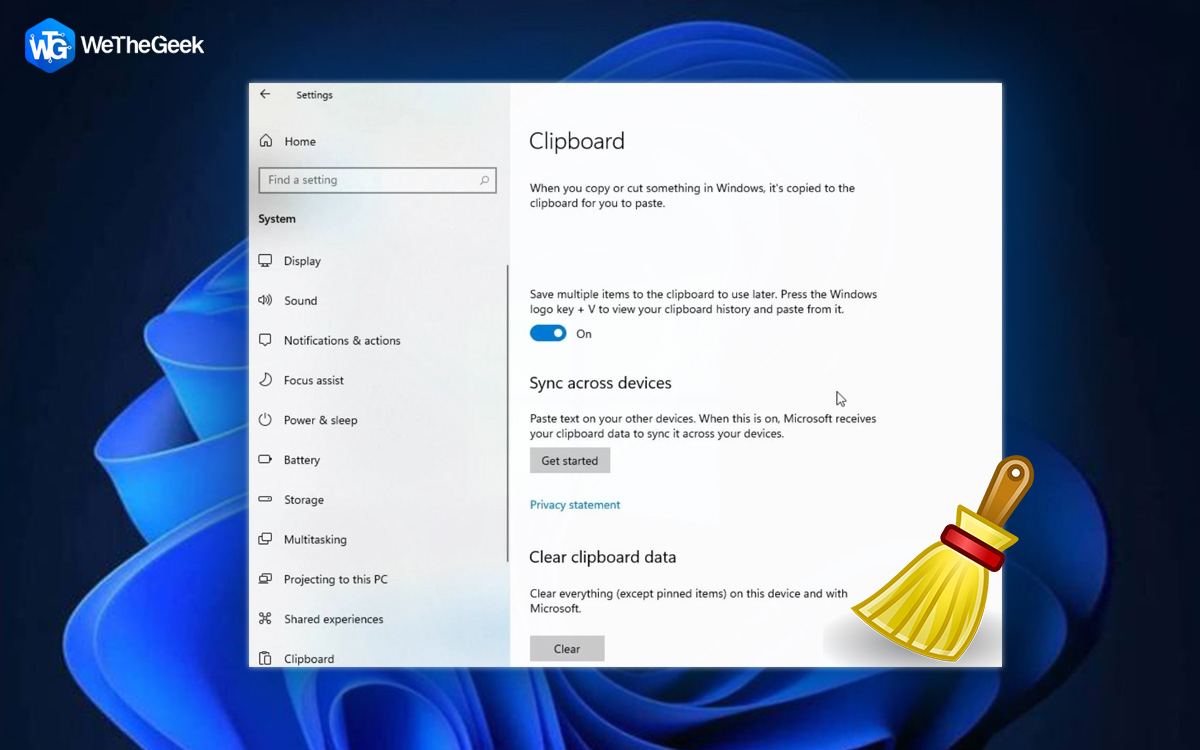
How To Delete Paste History From The Clipboard In The Settings App
Utilizing the Settings app is an additional method for erasing the clipboard history in Windows 11. Here’s how you approach it.
Step 1: Select Settings from the list by right-clicking on the Start symbol.
Step 2: Go to the System tab and select Clipboard.
Step 3: Next to Clear clipboard data, click the Clear button.

Step 4: You may also use this menu to enable or disable the clipboard history feature if you like.
How To Use Command Prompt To Clear The Clipboard History
Command Prompt is a helpful tool if you prefer to use text commands to interact with your computer. You only need to execute one command to clear the clipboard data using Command Prompt.
Step 1: To access the Power User menu, right-click the Start icon or press Win + X on your keyboard.
Step 2: From the list, choose Terminal.
Step 3: Run the following command in the terminal to erase the clipboard’s history.
echo.|clip

Step 4: That’s pretty much it. Once you run the aforementioned command, the clipboard’s history will be cleared.
Also Read: How To Clear Clipboard In Microsoft Excel
Making A Desktop Shortcut To Erase The History Of The Clipboard
Although the aforementioned techniques for erasing clipboard history are simple, doing it repeatedly can get tedious. You may make a desktop shortcut for clearing the clipboard history in Windows 11 if you want an incredibly quick method. The steps that you must take are listed below.
Step 1: Anywhere on your desktop that is vacant, right-click, then choose New > Shortcut.
Step 2: Copy and paste the following command into the text field in the Create Shortcut window:
cmd /c echo.|clip
Step 3: Select Next.
Step 4: Give your desktop shortcut a suitable name, then click Finish.
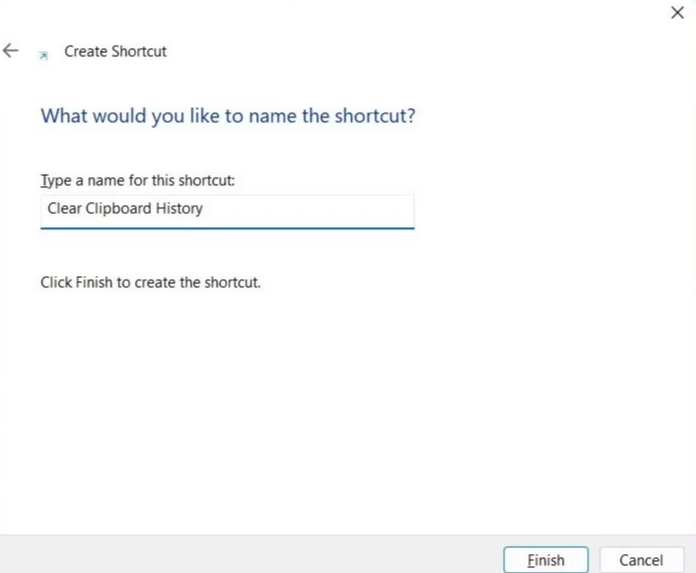
Note: On Windows 11, you may now double-click the desktop shortcut at any time to remove the clipboard history.
Step 1: Select Properties by right-clicking on the desktop shortcut.
Step 2: Click the Shortcut key field on the Shortcut tab.

Step 3: Press the desired key combination to activate the shortcut at this time.
Step 4: Click OK after selecting Apply.
Step 5: Once you’ve finished the aforementioned procedures, you can use the designated keyboard shortcut in Windows 11 to rapidly remove the clipboard history.
Also Read: Best Clipboard Manager Alternatives For Windows
Bonus Tip: Get Rid Of Malicious Cache & Cookies Using Advanced System Protector
Clipboard Hijackers are a new type of infection that affects your PC. Therefore, you require a third-party program called Advanced System Protector to clear the cache and cookies of your PC. This application is made to search your computer’s deepest recesses for infections and spyware that are hiding there. The steps to use it are as follows:
Step 1: To download and install Advanced System Protector, use the download button below:

Step 2: Double-click the shortcut created on the desktop to launch the application.
Step 3: Enter the key from your purchase confirmation email to register the app.

Step 4: Select “Start Scan Now” to launch the scanning procedure. This could take some time, depending on the data quantity and your hard drive size.

Step 5: A list of all the errors in your computer will show after the scan is complete. Hit the Clean all button to solve all of these issues.

Step 6: The process will take some time to finish, but after it is done, your computer will be free of malware, PUPs, and other transient and undesirable files.
Step 7: You succeeded! You’ve finished your task and fixed the Windows PC fault Err Address Unreachable. While the software protects your computer in the background, you can run the scan once a week to confirm and double-check.
The Final Word
When you restart or shut down your computer, Windows automatically clears your clipboard data, but there may be situations when you wish to clean your clipboard history manually. Thankfully, any of the ways mentioned above will work to delete clipboard data on Windows 11.
Please let us know in the comments below if you have any questions or recommendations. We would be delighted to provide you with a resolution. We frequently publish advice, tricks, and solutions to common tech-related problems. You can also find us on Facebook, Twitter, YouTube, Instagram, Flipboard, and Pinterest.