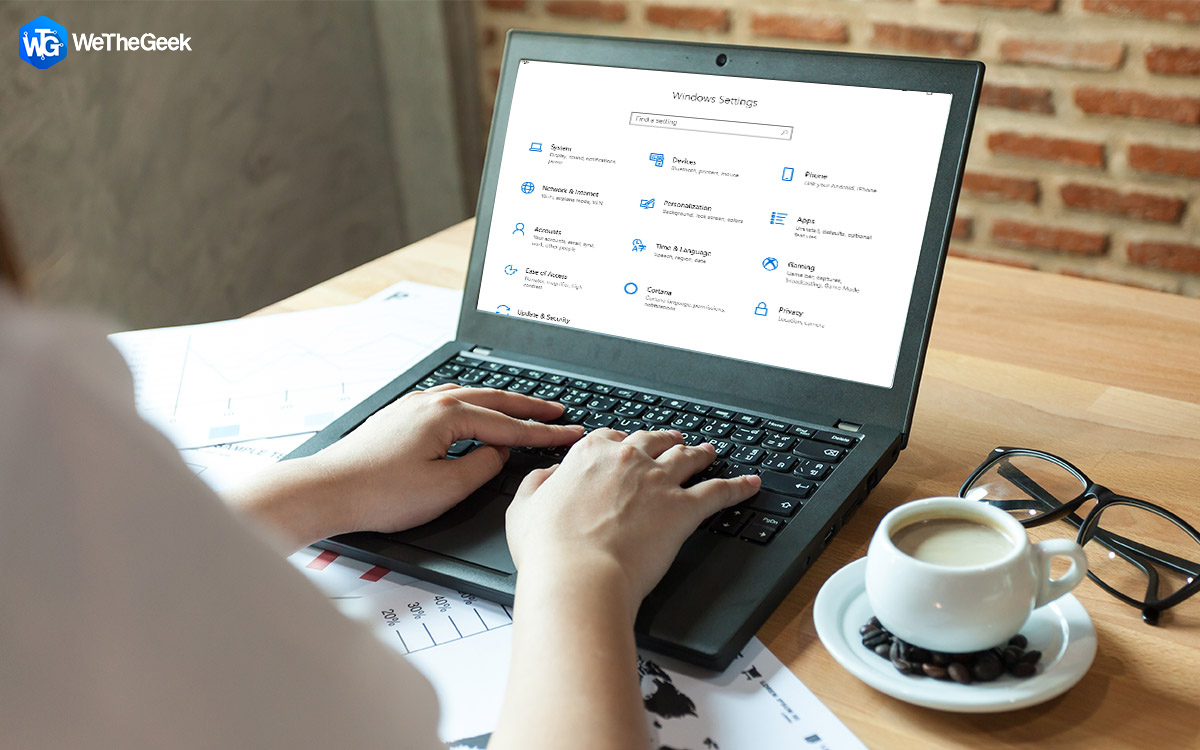
Settings app is an important feature in Windows 10. It contains almost all the system controlling features under the hood. You can change the storage sense; check the network settings, personalization settings and more. What if Settings app doesn’t work?
If you are facing the same issue or App is not working at all, you can try to fix the issue with a few tricks.
In this post, we will discuss a few methods which could help you fix settings app not working.
Alternative Way to Access Settings: Reset Settings App
- Click the Start button and right-click Settings icon and select More. Now click App Settings.

- You will get to a window, Navigate and click the Reset button.
- The Settings app will be reset.

If you can’t open the Settings app the old fashioned way, then you must try to access the Settings app in different ways:
- You can press Windows and I key together to launch the Settings app.
- You can also launch the Settings app, by clicking the Action Center icon on the taskbar. Click All Settings.
If you are not able to launch the Settings app, then you need to try these steps.
 A Guide To Windows 10 Privacy SettingsGetting the power to control Windows 10 Privacy settings, make us powerful enough to control what data Microsoft collects or...
Steps To Fix Settings App Not Working On Windows 10:
Method 1: Reinstall & Register Windows Apps Again:
As Settings app is a native app of Windows, reinstalling the apps would do it the job.
Steps to Reinstall & Register Windows apps:
- Right-click the Start button and from the context menu, choose Windows PowerShell(Admin)
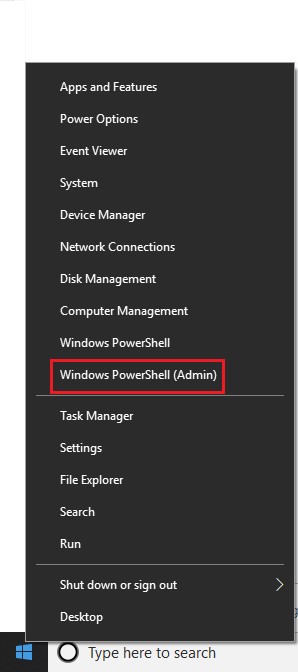
- You can also access PowerShell by typing PowerShell in the search box. Right click on PowerShell and Run as administrator.
- Launch PowerShell and type this command:
Get-AppXPackage | Foreach {Add-AppxPackage -DisableDevelopmentMode -Register “$($_.InstallLocation)\AppXManifest.xml”}

- This command will register and install all native Windows app again
- This might resolve your Settings app not working issue
Method 2: SFC scan
- You can run the SFC scan and fix the issue.
- Type Cmd in the search box and right-click Command Prompt from the results. Click Run as administrator.

- Now in Command Prompt window, type SFC/scannow.

- It will discover and fix all the issues on your PC. If this doesn’t work, run Windows Update Troubleshooter.
Method 3: Last Resort: Create a Windows User
If you are not able to access Settings app, then you need to create another admin account and transfer your files on it. However, you won’t be able to use the Settings app to create an account; you need to use Microsoft Common Console Document provided you have Windows Pro. Also, this
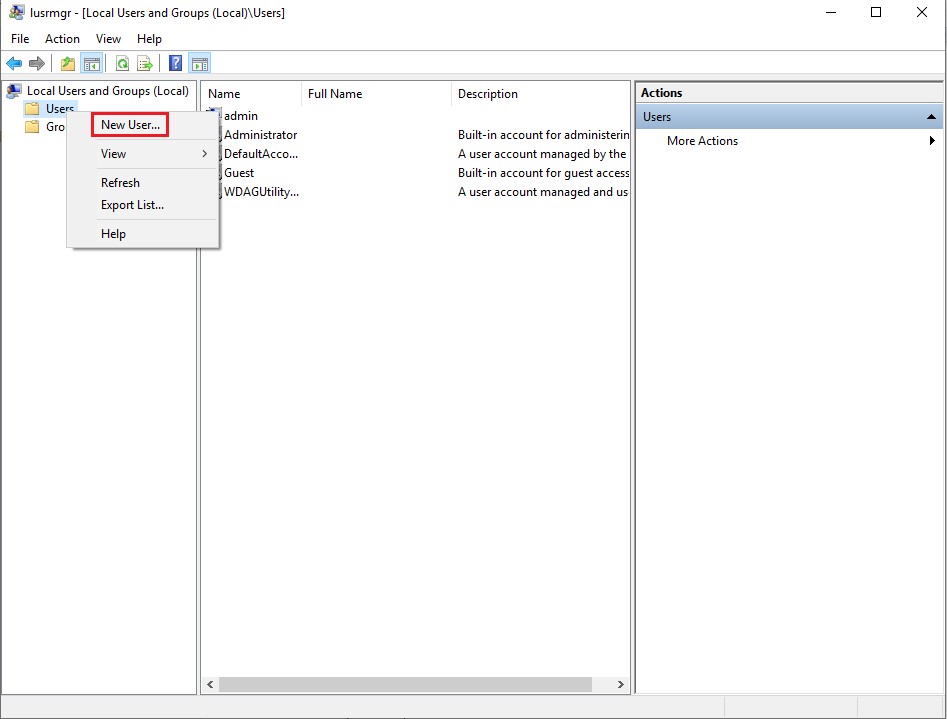
- Typemsc in the search box to launch the Common Console Document.

- Now click Users. Right-click Users and select Add New User.
- Type desired information and sign out. Now sign in to the new account by pressing Ctrl + Alt+

However, if you have Windows 10 Home edition, then you need Command Prompt
- Type CMD in the search box and right-click Command Prompt and select Run as Administrator.
- Once Command Prompt is launched and type net user newusername newpassword /add
Note: Don’t forget to replace username and password with this to create a new administrator account.
- Once done, you will see “The command completed successfully” which means that the new account is created.
- Now, you need to type Control Panel in the search box. On Control Panel, select User Accounts, then Manage Another Account.
- Now choose the new account you created. Click “change the account type” button then select the Administrator from the new window.
- As the new user is admin, you need to sign out the existing user and sign in to the new one
Now, try to launch the Settings app.
Bonus Tips to Move Your Important Files from Old account to New
You need to transfer your files from old Windows user account to the new account.
Transfer the old files to the new one
- To get the old files, you need to go press Windows and E to get File Explorer.
- Click the View tab and put a checkmark beside Hidden items.
- Go to the C Drive, then Users and then old account user name. Double click the username and click Continue when you get a prompt “You don’t currently have permission to access this folder”
- Copy and paste all files from this user account to the new one.
- While you are moving files, you will get a prompt whether you want to merge folders from old account to a new account. Click Yes
 Windows 10 Keyboard Shortcuts That You Could Use!In this blog post, we share a list of Windows 10 keyboard shortcuts with you. Using them will give the...
This is definitely not a simple method. However, a new Windows user account is not exactly an option. But it could be served as a workaround until Microsoft releases a patch to resolve the issue.