
Guest accounts are useful when you need to give your computer to someone. You won’t have to hang over them to make sure they don’t spy around or do things they shouldn’t be doing if you give them their account. It’s not as simple to create a guest account in Windows 11 as it was in prior versions of Windows. That isn’t to say you won’t be able to make some. Below are two approaches for creating a guest account in Windows 11 that can assist you in quickly setting up a temporary account.
What Is The Difference Between A Guest Account And A Regular Account?

A guest account is a user account that has limited access to your computer and is only used for short periods. The guest account users are unable to install new software, access your files, or make system-level changes to your device. All data in the account generated during the session is automatically wiped when the user closes down the PC after utilizing guest mode.
How to Activate a Guest Account on Windows 11
Since Windows 7 and Windows 8, there has been a Guest mode. Creating a guest account with a restricted environment was simple in both of these versions. However, in Windows 10 and 11, you can create a local guest account has become a bit more complicated. Proceed with the one that best meets your needs.
Use the Command Prompt to Create A Guest Account
The Command Prompt, usually known as cmd.exe, is a command-line interface for interacting with the operating system. It is frequently used to conduct advanced functions because the commands are executed with only a few keystrokes. Here’s how to create a guest account on your PC using the Command Prompt:
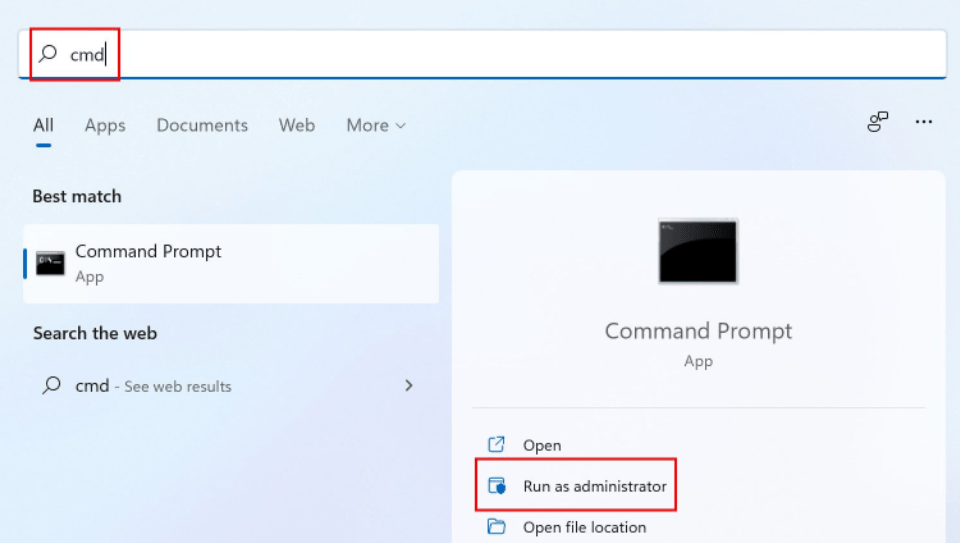
Step 1: Press Windows + S to open the search options and then type Command Prompt.
Step 2: Select the option “ Run as administrator” to open the Command prompt in elevated mode.
Step 3: Type the following command in the command prompt window filled by Enter.
net user Visitor /add /active:yes
Step 4: This should successfully establish a guest account. You can also create a login password for your guest account, but this is optional.
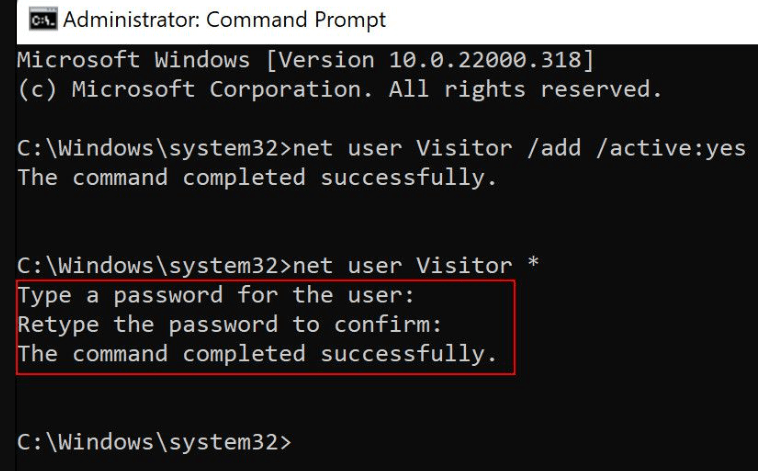
Step 5: Execute the command below in the same window if you want to continue.
net user Visitor *
Step 6: In Command Prompt, type the password and confirm it.
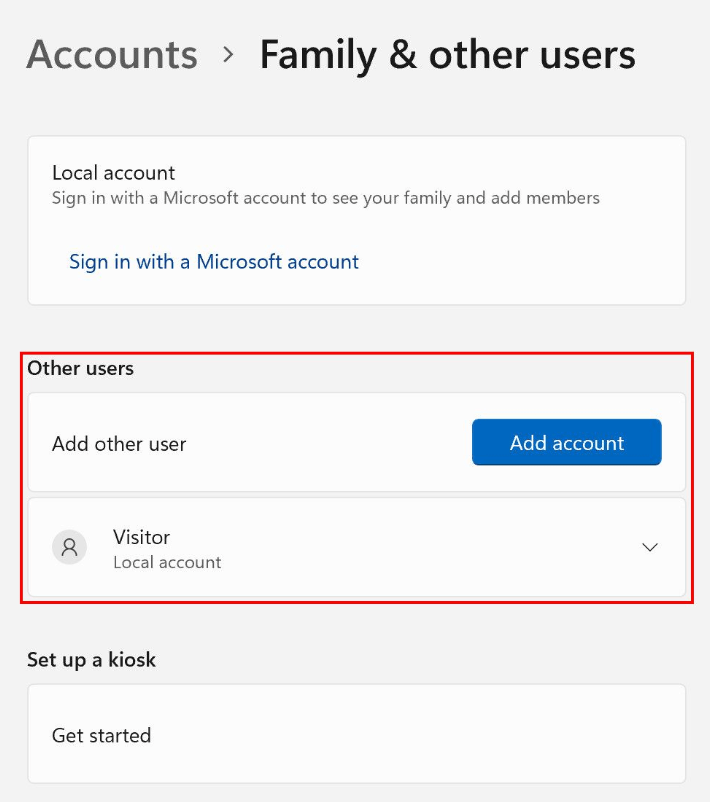
Step 7: Go to Windows Settings and click on Accounts to see the guest account.
Step 8: Select Family and other users.
Step 9: You should be able to find the guest account under Other users. The account will now appear on your sign-in screen as well.
You can remove the account at any moment in the future by using Command Prompt. Here’s what you should do:
Step 1: To begin, open Command Prompt with administrative rights.
Step 2: To run the command listed below, type it and hit Enter in the Command Prompt window. This should successfully remove the account.
net localgroup users Visitor /delete
Using The Windows Settings To Create A Guest Account
Windows Settings is another way to create a local guest account in Windows 11. To use this approach, follow the instructions indicated below.
Step 1: To open Windows Settings, press Win + I at the same time.
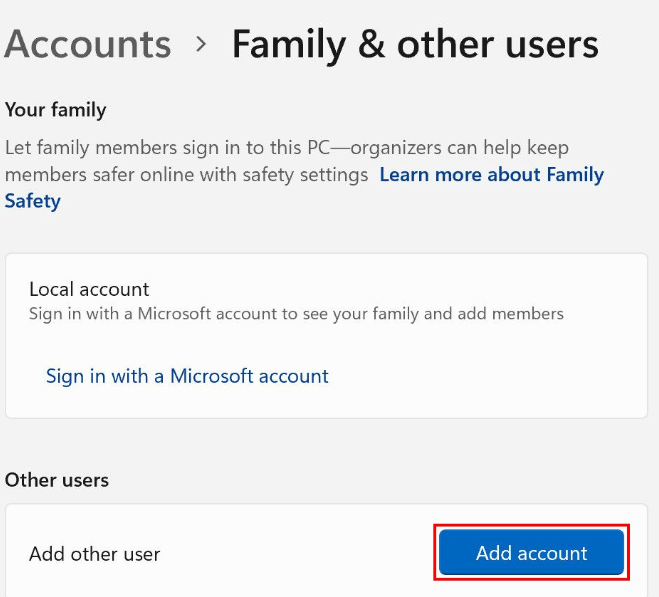
Step 2: Choose Accounts from the left panel and select Family & other users on the right side of the window.
Step 3: Under Other users, click the Add account button.
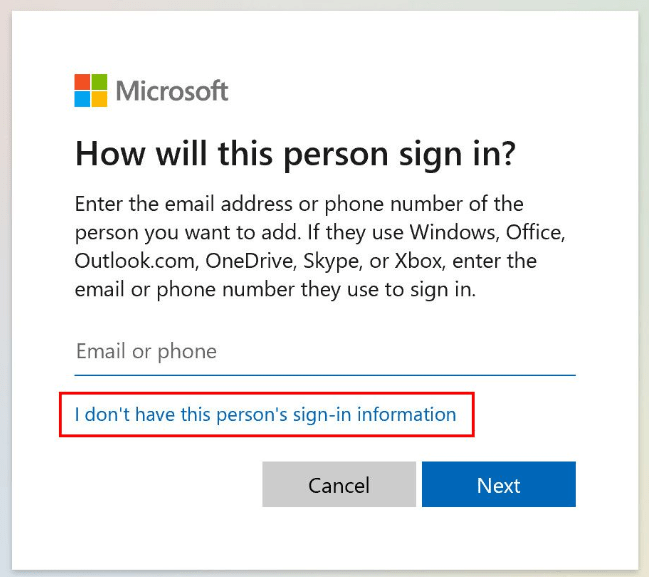
Step 4: Select I don’t have this person’s sign-in information in the dialogue box on your screen.
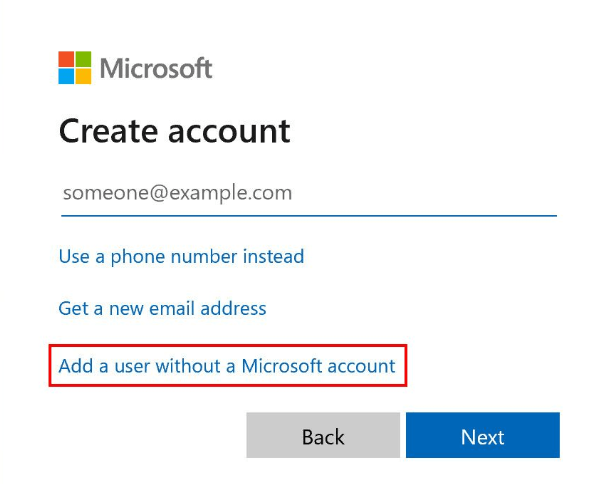
Step 5: Then choose the option Add a user without a Microsoft account.
Step 6: Give the account a name and a password. You can’t call the account Guest, so give it another name.
Step 7: To continue, follow the on-screen instructions.
If you no longer require the guest account, follow these steps to delete it from Windows Settings:
Step 1: Go to the Accounts section of Windows Settings.
Step 2: From the right side of the window, select Family & other users.
Step 3: Now, under Other users, find the guest account and click the Remove button connected with it.
Step 4: Your account, as well as the information contained within it, will now be deleted.
The Final Word On How to Activate a Guest Account on Windows 11
Although sharing a computer saves money, one of the most prevalent issues that prevent users from doing so is privacy. You can let others use your computer without fear now that you know how to create a separate guest account with limited access to the resources. It can be challenging to keep your data safe with Windows. While Windows allows you to conceal files and folders, a guest account is the best way to welcome visitors to your computer.
Follow us on social media – Facebook, Instagram, and YouTube. For any queries or suggestions, please let us know in the comments section below. We would love to get back to you with a solution. We regularly post tips and tricks, along with answers to common issues related to technology.