
Windows Movie Maker has been around since a while but somehow, its presence was always neglected by a majority of users. And whatever may the reason be, Windows Movie Maker is surely a one of a kind video editing tools which are compatible with almost all operating systems. It also comes with a simple user interface and a bunch of useful editing options which is a plus.

So, whether you’re a professional movie maker or not, Windows Movie Maker can act as the perfect video editing tool which can be used for both professional and personal purposes. If you love recording videos and curating new content for movies here are a few Windows Movie Maker tips and tricks that will make your editing sessions more entertaining (And less stressful of course).
Let’s get started and explore these few basic tips of Windows Movie Maker tool.
The Divisions
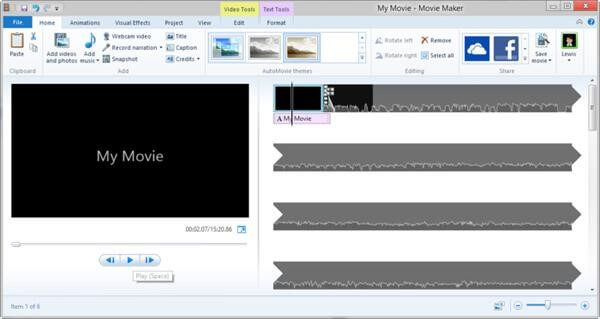
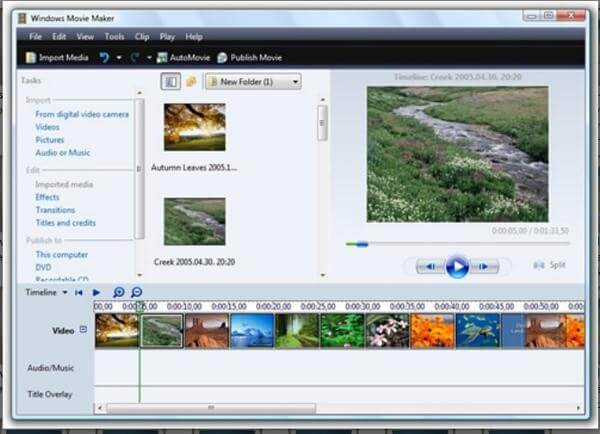
Before you learn to master any app or software, it’s really important that you understand all about its interface and design. Windows Movie Maker’s user interface is roughly divided into three divisions. One is the top menu panes, second is the preview monitor and third is the storyboard which includes a timeline you will majorly use for editing videos. While you make any changes in the storyboard, you will see the reflected updates in the preview monitor window.
Set an Aspect Ratio
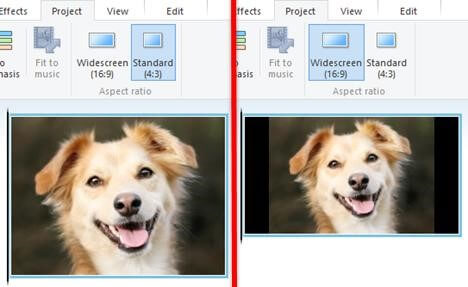
Aspect Ratio may sound like a complicated term to say but if we try and understand it in a simple way then it’s nothing but simply the way and format how your movie is displayed on the screen. Before you start creating any new project on Windows Movie Maker, just make sure you set an ideal aspect ratio for your movie. Head on to options from tools, tap on Advanced tab and select “Preferred Ratio”. If you don’t want to dig in many details, simply set the aspect ratio as 4:3 which is ideal for full-screen movies.
Choose Output Format

This is another important thing to keep in mind while creating or editing any video or film on Windows Movie Maker. By default, all Windows movie maker files are saved in .wmv but most media players don’t support this format. So, to pick your desired output format tap on “Open Project” and select “Save Movie” option from the list. A submenu will appear on the right, and then select for which purpose your movie is intended for. For instance, whether it’s for PC, for high definition display, for email and so on.
Trim Videos
Trimming or cropping videos is one of the most commonly used features on any video editing software. So, if you want to trim the length of your videos or movies on Windows Movie Maker here’s what you need to do. While you’re on the Home screen, tap on “Add videos or photos” option. Browse through the system and locate your file which you need to edit on Windows Movie Maker. Go to the “Edit” tab under video tools. You will see a slider in the bottom, simply pick a starting position where you want to start your video and pick an ending position where you want it to end. Save your changes and you’re then good to go!
 7 Best Video Editor Software For Windows in...Video editing has become a cakewalk ever since the digital revolution took place. Read this article to find the best...
Adjust the Sound

Adjusting the volume in video clips can be a cumbersome task. Well, not on Windows Movie Maker! To adjust the sound of your movies, open video tools and tap on “Music Volume” option. You will now see a tiny slider right below this option which you can use for adjusting the volume of your video or film.
Combine Movies
Like we said earlier, Windows Movie Maker is a simple, yet intuitive tool and you won’t regret using it. If you want to combine two or movies on this tool it’s a piece of cake. Open up a new project on storyboard, load your movies (both) which need to be merged. Now, tap on “Clip” option to initiate the combine process.
Adjust the Speed of Video Playback

This is a really important feature used for editing videos and movies. When you have to adjust the speed of video playback, suppose you want to increase the speed or slow it down here’s what you need to do. Head on to “Edit” tab and look for “Adjust” option. In the “Speed” dialog box choose your preferred speed in which you want your video to play.
There were a few basic Windows Movie Maker tips and tricks that you should surely consider before using this amazing tool. For any other queries or feedback feel free to hit the comment box!