If you want to take playing games to another level, you can always install a PC Driving Wheel on our computer. The PC driving wheel majorly works for racing games, but you can also control other games provided they support the device. Although it looks complicated in reality, it is one of the simplest devices to set up.
Set Up PC Driving Wheel For Games on PC
To set up the PC driving wheel, all you need to do is follow these three steps:
Install the Appropriate Driver
Configure your PC Driving Wheel
Step 1: Install The PC Driving Wheel
The process for different PC Wheel brands would be different and can be checked in the manual or user guide that came along with the device. But the basic plan to setup will always remain the same for different devices.
1) Assign the pedals (and Gear, if available) to the PC Wheel.
2) Connect the power switch to the PC driving wheel.
3) Join your PC Wheel to a any USB port on your Computer.
4) Fix the pedals, gear, and steering wheel and place it in their correct position.
6) Finally, Switch on your computer, and connect your PC driving wheel into a power socket
Step 2: Install The Appropriate Driver
Your PC driving wheel will not work until a link is established between the hardware and the operating system. This can be done with the help of a coded program known as a Driver. All the hardware can only function properly if there is a driver that can communicate between the PC wheel and the racing game. To get the most appropriate and updated driver, you have two options:
- Option 1 – Manual Download and Install.
- Option 2 – Automatic Download and Install.
Option 1 – Manual Download and Install
You can always get your PC wheel working by installing the driver that came along with the device and user manual in the box. Supposedly you have purchased the Logitech Steering Wheel for PC, and then you would get a disk or a website address along with it to help you install the driver. This driver provided would be compatible and get your PC Wheel up and running, but it may not necessarily be the most updated driver.

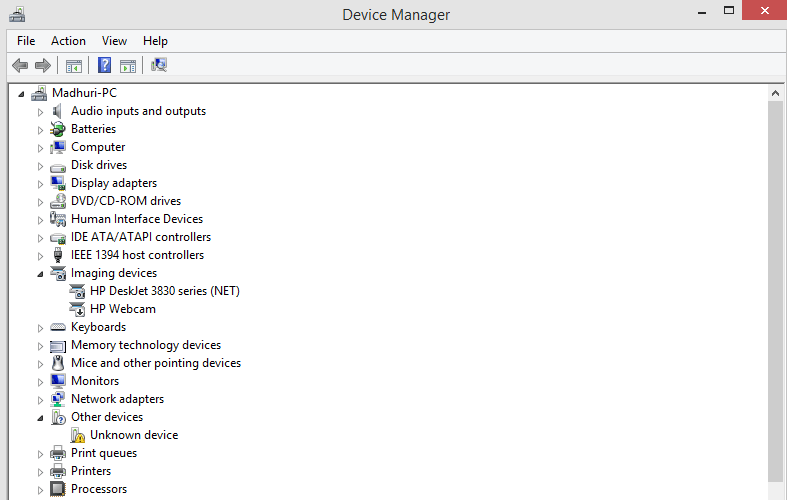
Outdated drivers can help run hardware but do not provide enhanced performance of the device. On the other hand, updated drivers would enable the users to use the hardware to its optimal level. To update the driver manually, you can always use the Windows Device Manager or visit the Logitech Steering Wheel for PC’s official website, choose the correct model and version, download and finally install the driver.
Option 2 – Automatic Download and Install
Automatic method of updating drivers includes using a driver updated software which can scan your computer’s drivers and hardware and perform the following functions:
Update the outdated drivers.
Replace the corrupted drivers.
Install the missing drivers.
Automatic driver updater software does not require the user to enter the brand, model number, or version of the hardware installed in the computer but obtains it automatically while scanning. It also saves the user’s time and effort to manually check different websites for each driver installed in the system and find out if there is an updated version. There are many driver updater software in the software world. Still, there is one that I have been personally using for a couple of years and experienced a smooth and flawless performance of my computer.
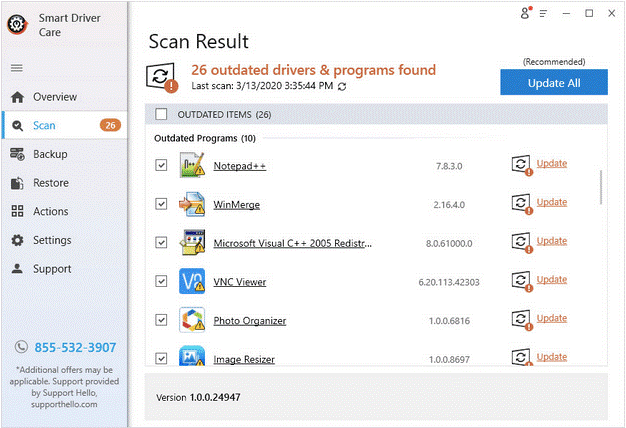
Smart Driver Care: The all-in-one software for all your driver issues and needs. Here are the quick and simple steps to use this application:
Step 1. Download the Smart Driver Care on computer.
Step 2. The file stored on your computer is the executable file which can be used to initiate the installation process and complete it.
Step 3. Registration is important in order to use the product.
Step 4. You need to press the Scan Now button in order to begin the process
Step 5. After the results have been displayed click on the repair button to complete the process.

This will finally install the PC driving wheel updated drivers and, at the same time, take care of the audio and graphic drivers to provide a unique gaming experience as an experience never before.
Step 3: Configure Your PC Driving Wheel
Once the hardware is connected correctly and the driver is installed, it is time for the final step, and that is to configure the PC driving wheel. Again, this process can differ from PC Wheel to PC Wheel. The following steps are for configuring a Logitech Steering Wheel to PC:
1) Execute the driver program first.
2) Next, click on Profile and then click on New.
3) Locate and add the title you want to launch.
4) Now click on Edit and then on Specific Game Settings.
5) Here, you can configure your PC driving wheel and then hit the OK button.
That’s all, folks!. You can now drive your way through all the racing games and other games that support the PC driving wheel, and the best part is you don’t need a license to drive here.
The Final Word On How To Set Up PC Driving Wheel For Games On PC
Although different brands have different methods of setting up PC Wheel, the generic process is the same. I am sure that the above steps would give a fair amount of idea on installing any PC Wheel, including Logitech Steering Wheel on PC.
Follow us on social media – Facebook, Twitter, LinkedIn, and YouTube. For any queries or suggestions, please let us know in the comments section below. We would love to get back to you with a solution. We regularly post tips and tricks, along with solutions to common issues related to technology. Subscribe to our newsletter to get regular updates on the tech world.


 Subscribe Now & Never Miss The Latest Tech Updates!